Configure Global Preferences
The Global tab contains preferences that apply globally across all domains.
- From the home page, click Admin and click Preferences.
The Preferences page automatically opens to the Shared tab.
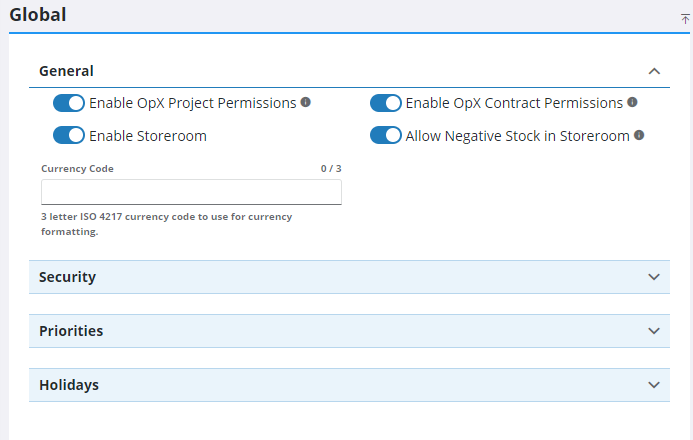
- Expand the General section.
-
Turn on Enable OpX Project Permissions to enable the OpX project permission model. If selected, projects are managed in OpX. Information about projects in Office become read-only. See the OpX 3.1 Guide for more information.
-
Turn on Enable OpX Contract Permissions to enable the OpX contract permission model. If enabled, contracts are managed in OpX. See the OpX 3.1 Guide for more information.
-
Turn on Enable Storeroom to enable Storeroom for your site. This preference does not appear if you are not licensed for Storeroom or if you are not a Cityworks administrator.
-
Turn on Allow Negative Stock in Storeroom to allow negative stock for current and weight average cost types in Storeroom. If enabled, Storeroom shows an error for LIFO and FIFO when more material is issued than what's in stock and does not allow the stock to go below zero, but not for weighted average or current cost types. The default is not enabled. This preference does not appear if you are not licensed for Storeroom.
-
Enter the Currency Code to accurately format and display currency values in all plugins. The standard for currency codes comes from ISO 4217.
 IMPORTANT: The plugin cache must be cleared and the page must be refreshed to see the new Currency Code value. See
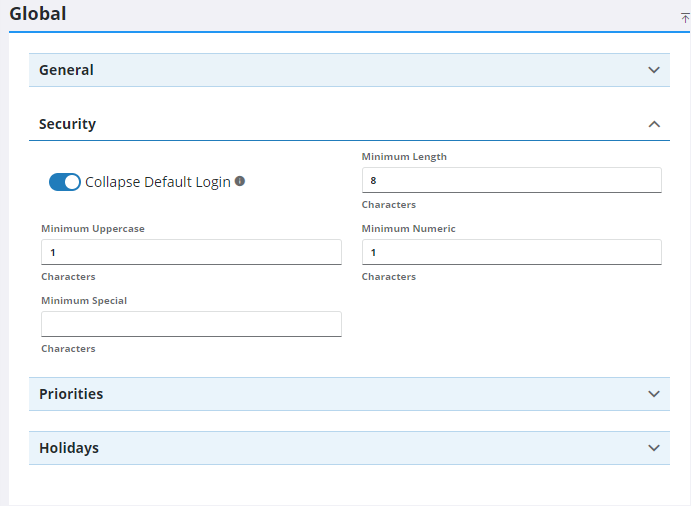
In the Security section, administrators can set up password requirements for users. Once password requirements are set up, they only affect new users, or existing users who update their password.
- Expand the Security section.
- Turn on Collapse Default Login to hide the Username and Password fields on the login page if OAuth2 login options are enabled. See the Single Sign-on 23 Guide for more information.
- In the Minimum Length field, enter the minimum number of characters required for a password by using the arrows, or clicking in the field and manually typing a number. If you don't want to set a minimum length, leave the field blank or enter zero.
- In the Minimum UpperCase field, enter the minimum number of uppercase letters required for a password by using the arrows, or clicking in the field and manually typing a number. If you don't want to set a minimum length, leave the field blank or enter zero.
- In the Minimum Numeric field, enter the minimum number of numeric characters required for a password by using the arrows, or clicking in the field and manually typing a number. If you don't want to set a minimum length, leave the field blank or enter zero.
- In the Minimum Special field, enter the minimum number of special characters required for a password by using the arrows, or clicking in the field and manually typing a number. If you don't want to set a minimum length, leave the field blank or enter zero.
- Add Priority Values that can be assigned to a service request, work order, or custom inspection. See Add Priority Values for more information.
- Add Holidays observed by your organization to avoid having cyclical work orders start on a holiday. See Configure Holidays for more information.