Add or Edit a Text Custom Field
- Select a category from the Categories panel to view the Category Details.
The Custom Fields section displays the custom fields for the selected category.
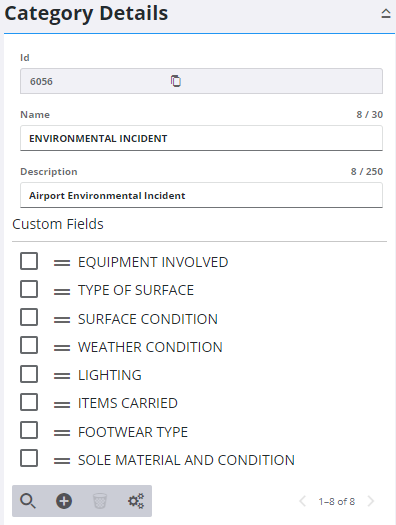
- Click Add record on the Category Details panel to add a new custom field.
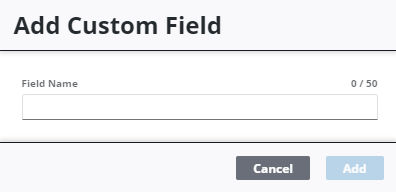
- Enter a Field Name and click Add.
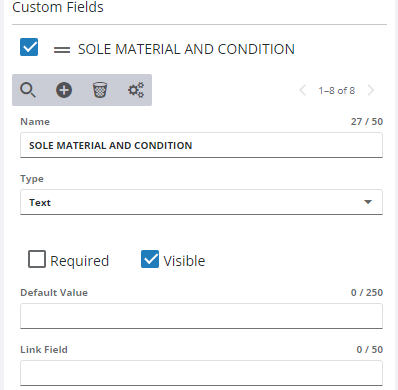
- Select the custom field from the Custom Fields section to enter the details.
 NOTE: The Id field was added in Admin 3.8.
- Select Text from the Type drop-down list.
- Select the Required check box to make the custom field required to be populated before a work activity can be closed.
- Select Visible if you want this field to be visible on the work activity.
- Enter a Default Value, if desired, to appear in this field on the work activity.
- Enter a Link Field name, if desired, to integrate work activities to applications with unusual field names.
NOTE: The Link Field name is not seen or used by end users. Give the field a logical custom name and place the third-party system's name in the Link Field.
 TIP: You can filter the list of records displayed. See Filter Records for more information.
- To edit a Text custom field, select it from the Custom Fields section and make the desired changes.
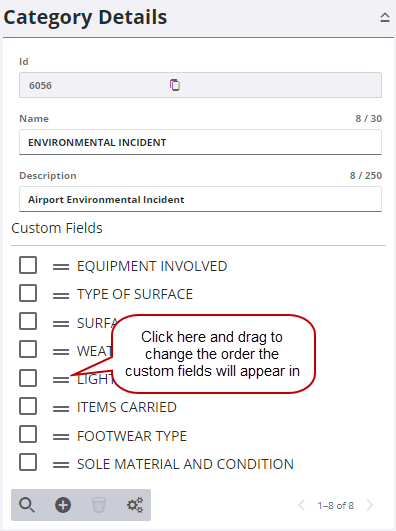
Once custom fields have been added to a category, they can be rearranged.
NOTE: Admin automatically saves the changes you make. A notification pops up at the bottom to verify changes have been saved.