Configure PLL Preferences
|
|
 PREREQUISITES:
- From the home page, click Admin and click Preferences.
- Click the PLL tab.
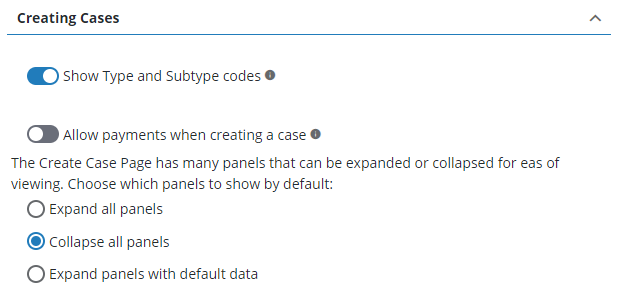
- Expand the Creating Cases section on the PLL panel.
- Turn on Show Type and Subtype Codes to see the case type or subtype codes in the Case Type drop-down list, in addition to the case descriptions when creating a case.
- Turn on Allow Payments when creating a case to let payments be completed while payments are created.
If this switch is turned on, the Fees panel appears after a user saves an application for a new case, allowing the user to make a payment towards the fees associated to the new case, or to skip the payment and click Go To Summary. If the switch is not turned on, the user is taken automatically to the summary page upon saving a new application. Payments toward fees can then be made using the choose action drop-down list to select Pay Fees, either on the summary page or the home page.
PLL administrators can decide whether the controls on the Case Create page are expanded or collapsed by default.
- Select either Expand all panels, Collapse all panels, or Expand panels with default data.
- Turn on Yes/No Checkbox Flag Value if you would like the case data detail entries to be populated with No by default, regardless of whether or not Skip Intake is selected. This requires Cityworks 23.4 and newer.
If the switch is not turned on and Skip Intake is not selected, the case data detail entries are populated with No. If the switch is not turned on and Skip Intake is selected, the data detail values remain null (no selection or Yes or No).

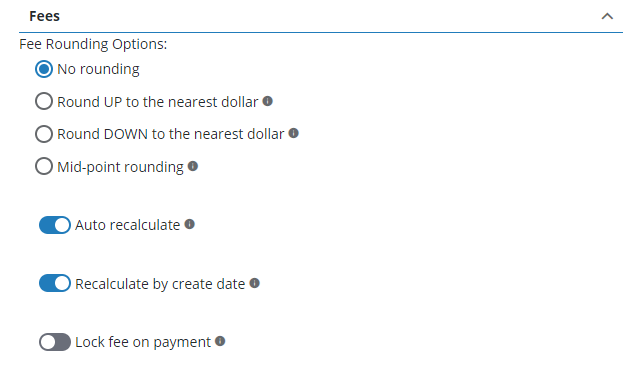
- Expand the Fees section.
PLL administrators can control if and how fees are rounded in PLL.
- Under Fee Rounding Options, select the rounding option you prefer.
Administrators can control whether the Auto Recalculate, Recalculate by Create Date, and the Lock Fee on Payment switches on the Fee Setup panel are turned on or off by default.
- Turn on Auto recalculate.
- Turn on Recalculate by create date.
- Turn on Lock fee on payment.
Administrators can configure PLL so that the View Receipt check box on the Add Payment panel is selected by default.
- Expand the Payment section.
- Select the View Receipt checked by default when adding payments check box.
- Enter a web or server address for the PDF Receipt Path.
The path should match what was previously defined in the config file in earlier versions of Admin, such as PLL-Receipts\. If no default path is set, the receipts are saved to the cw-site\bin\core-app\ContentRoot folder.
PLL administrators can decide where documents and other files are stored when they are attached to a case: in a database, file system, or network.
 NOTE: Wherever attached files are stored, they are organized in folders using the case ID. Each case ID folder contains sub-folders for tasks and payments.
|
|

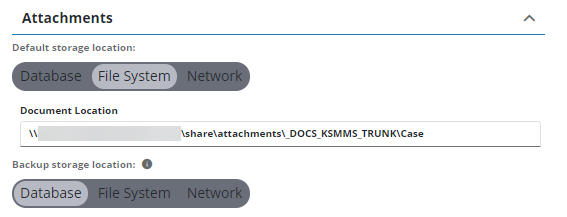
- Expand the Attachments section.
Select the storage option you want to use for the Default storage location and the Backup storage location:
- Database: Attachments will be stored in the Cityworks database.
-
File System: Attachments will be stored in a local file. Enter the file path to set this value.
-
Network: Attachments will be stored in a file on the network. Enter the network file path to set this value.
- Enter the Document Location.
PLL administrators can enable notifications for Respond that will alert users of certain activities, such as when they are mentioned in a comment on a case.
- Expand the Notifications section.
- Turn on the Turn on in-app notifications switch to receive notifications in Respond.
- Enter a number in the Expire after days field to indicate how many days notifications will be stored before being automatically removed from the system.

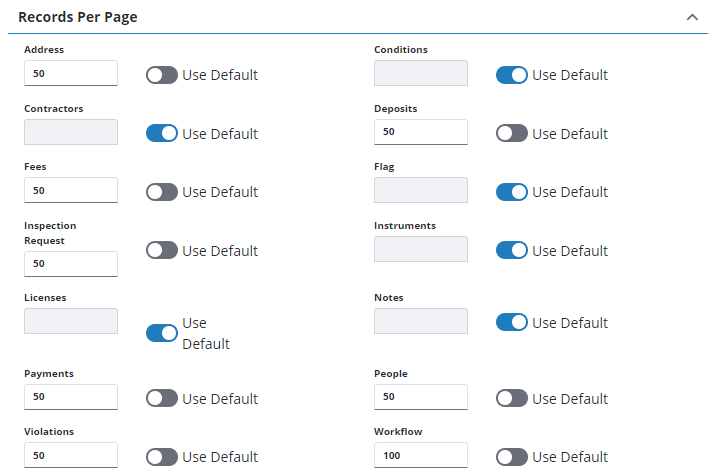
PLL administrators can control how many records appear on each panel in PLL. The default setting is ten records per list page.
- Expand the Records Per Page section.
- Turn off Use Default and enter the custom number of records to display per list page.
- Optionally, turn on Use Default to display ten records per list page.
- Expand the Audit Trace Table Names section.

PLL administrators have the option to enable parallel processing, which can improve creation time for cases with large amounts of case data to process.
 IMPORTANT: Consult your system admin before selecting this option. Parallel processing is NOT supported and should NOT be selected if the database contains triggers.
- Expand the Performance section.
- Turn on the Turn On Parallel Processing switch.

NOTE: Admin automatically saves the changes you make. A notification pops up at the bottom to verify changes have been saved.