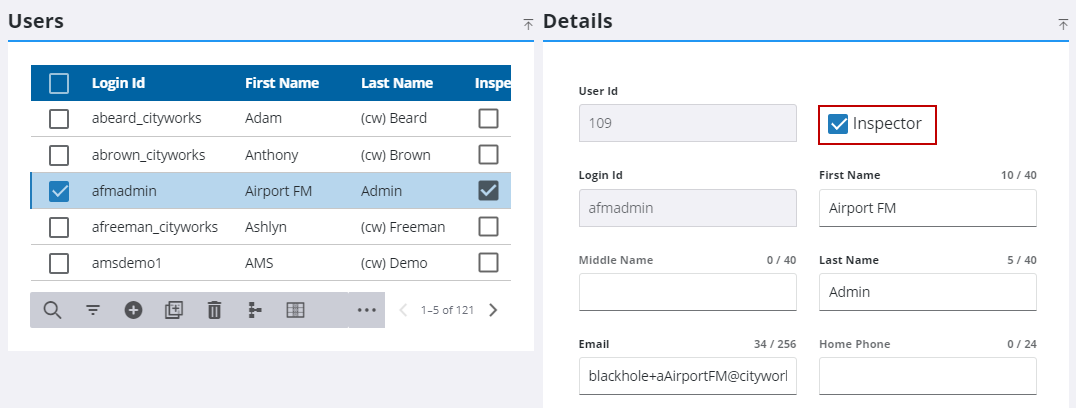
Make a User an Inspector
Many permitting workflows in PLL require at least one inspection, so it is important to have enough qualified inspectors to keep up with demand.
|
|
 IMPORTANT: Unless there is a default inspector listed for a particular discipline, when an inspection is scheduled it is assigned to the inspector with the highest priority who is available at the requested time. If multiple inspections are requested at the same time, the inspections are assigned to the available inspectors in descending order of their priority for the given discipline.
If two inspectors have the same priority for a given discipline, the inspection will be assigned based on the inspectors' user IDs. For example, if one inspector had the user ID of 37 and the other had the user ID of 52, the task would be assigned to the inspector with the user ID of 37.
- From the home page, click PLL and click Users.
 TIP: You can filter the list of records displayed. See Filter Records for more information.
- Select the user you want to assign as an inspector.

- Select the Inspector check box.
 NOTE: Admin automatically saves the changes you make. A notification pops up at the bottom to verify changes have been saved.

