View Related Assets and Create a Work Order
Related assets can be viewed from a selection. Additionally, a work order can be created for the selected related assets.
|
|
 PREREQUISITES:
- From the map, make sure the desired layer is set as selectable.
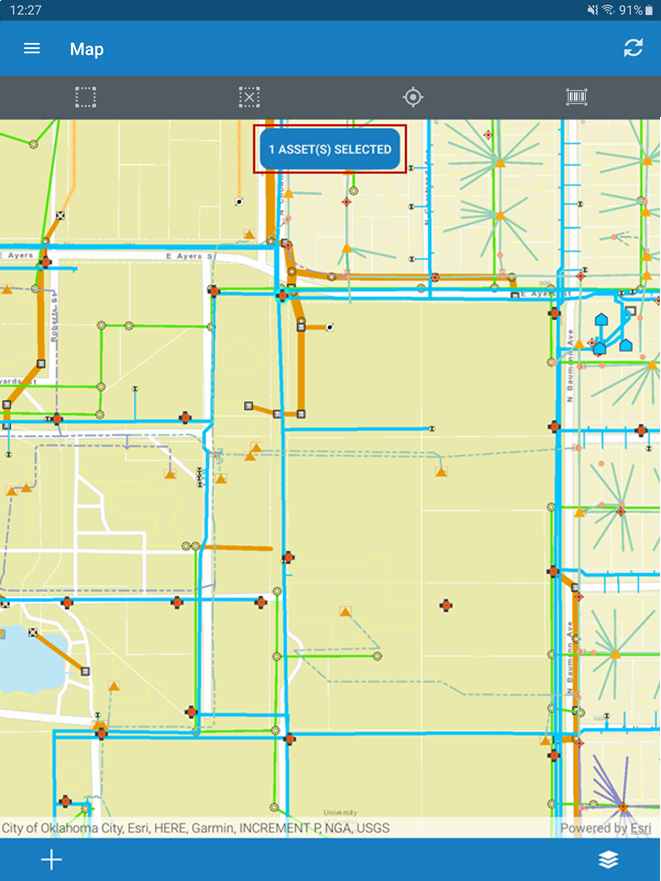
- Tap the selection icon, then tap and drag to make a selection on the map.
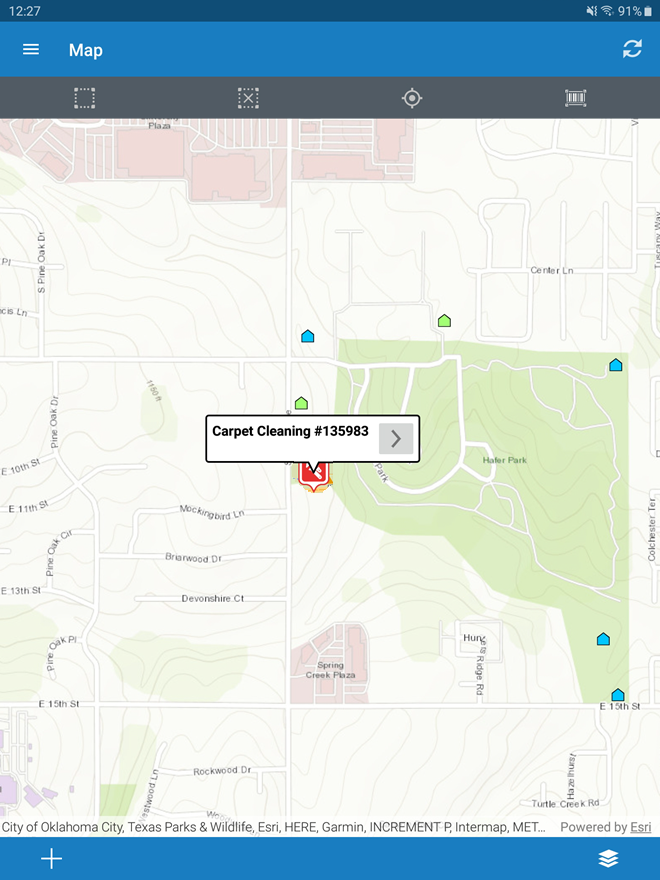
- Tap the blue box to view the selected assets.
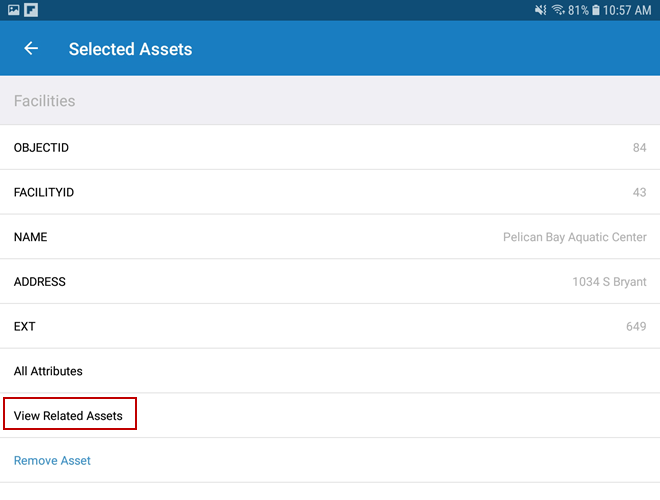
- From the Selected Assets page, tap View Related Assets to see a list of related assets associated to the asset.
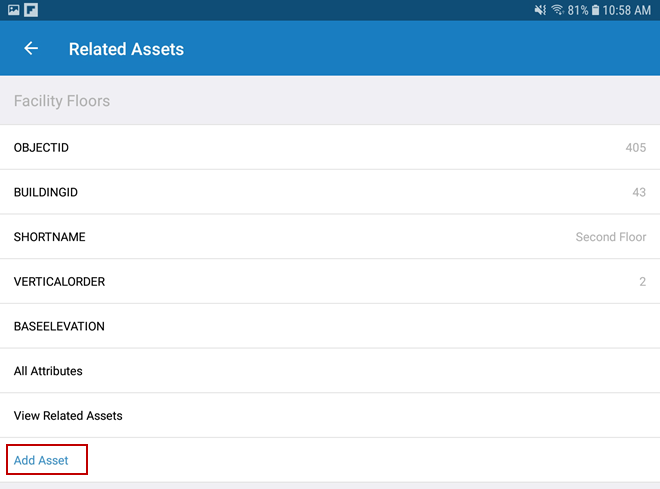
The Related Assets page shows the possible asset types that can be related to the one selected on the map.
- From the Related Assets page, tap a related asset type to see the list of related assets attached to the asset.
If the page is blank, that means there are no assets of this type related to the one selected on the map.

- Tap Add Asset to add the related asset to your current selection. You can add multiple related assets to the selection.
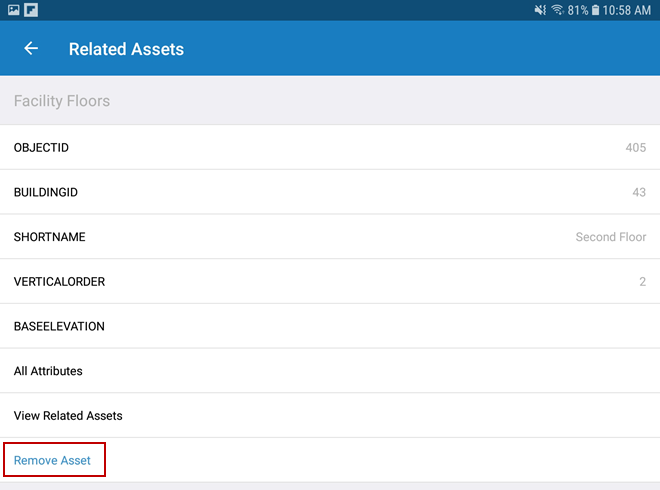
- Tap Remove Asset to remove a related asset from the current selection.
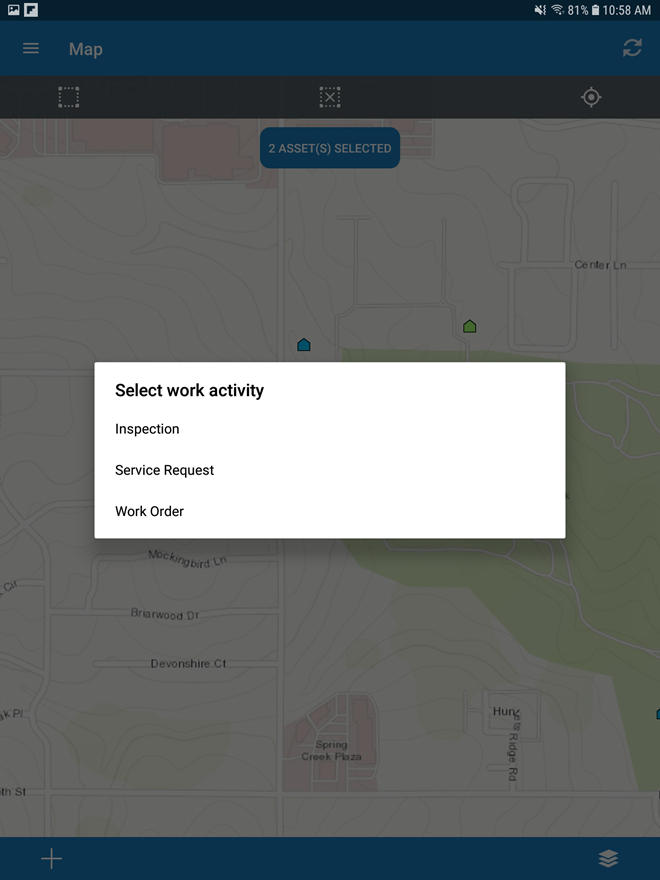
- Navigate back to the map. With the assets still selected, tap the plus icon.
- Tap Work Order from the Select work activity panel.
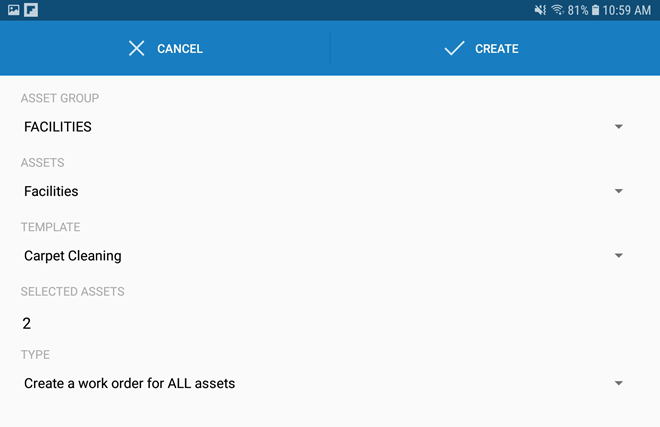
- Select the Asset Group, Asset Type, and Template for the work order(s). You can choose to create one work order with all the assets or one work order for each asset.
 NOTE: Whether you create one work order for all assets or one work order for each asset, the feature is attached. However, if you create one work order for each asset, you will have individual work orders for each selected feature and each related object.
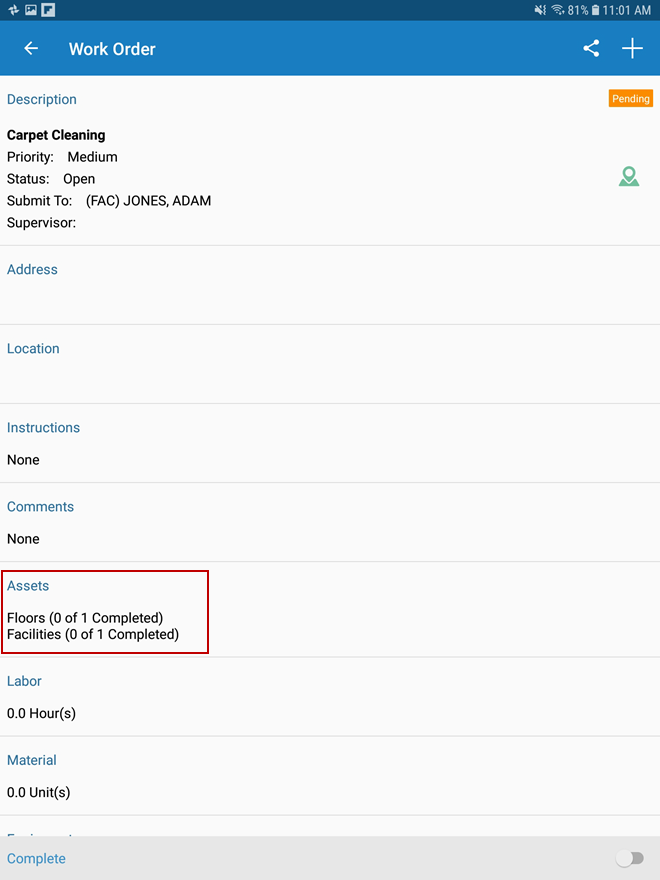
- Tap Create.
- The feature asset(s) and the related asset(s) show under Assets.
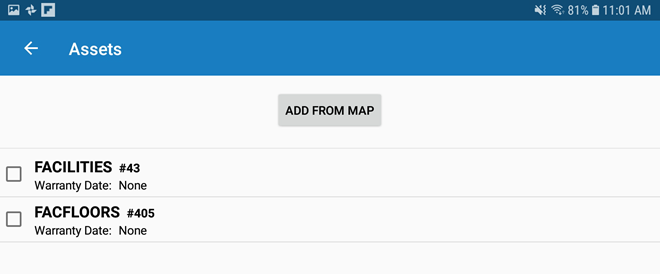
- Tap to open the Assets panel.
The new work order icon is now visible on the map.
For more information on how to create a work order from the map or other work activity, see Create an Attached Work Order.