Add a Resource Proxy
 IMPORTANT: Esri is no longer maintaining or developing the resource proxy. Starting at Respond 3.3, Cityworks support of the resource proxy has been discontinued. For more information on this see Resource Proxy in Esri's documentation and the Esri Support page for more information.
If an administrator does not want users to manually authenticate when accessing secured resources in the map, they can create a proxy to handle secure content. Once the proxy is configured, the administrator needs to define a Service Resource with the Service Type set to Resource Proxy and associate it to a Service Definition. Each assigned resource proxy service resource is injected into the Esri map and Esri logic redirects requests to configured URLs to their appropriate proxy URL if you are using ArcGIS Online or Portal for ArcGIS secured content.
Note that there is a known Esri limitation that prevents printing a secured map service when using a resource proxy. Because the resource proxy hides security credentials, the print task server cannot gain access to the credentials and connect to the secure server.
 NOTE: Depending on your server configurations, using only the server name or Fully Qualified Domain Name (FQDN) for the Resource Proxy Prefix might be too generic and not allow the calls to be properly routed. In these cases, a more specific prefix may be needed, for example, http://<your_machine_name>/arcgis/rest/services.
- Navigate to https://github.com/Esri/resource-proxy and follow the instructions to download the Esri Resource Proxy from GitHub. It is recommended that you download it to the application server where your Cityworks site is located, but it is not required. Any machine running IIS 7.x or greater from which a .NET 4.0 application pool can be created is sufficient.
- Unzip the folder to see its content. The README.md file, which can be opened with a simple text editor, contains additional information regarding the contents of the Esri Resource Proxy. There is another README.md file inside the DotNet folder that contains additional information as well.
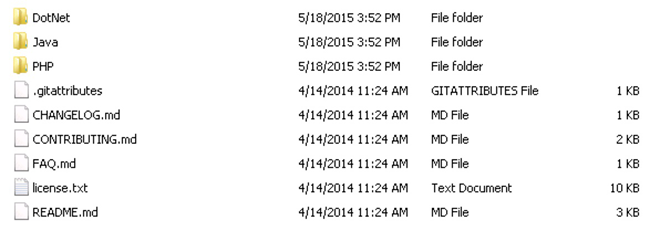
- Copy the DotNet folder to ...\inetpub\wwwroot so that is resides in the same folder structure as other sites. While not required, this is recommended to make it easier to locate. If desired, you can also rename the folder to something that is easier for you to recognize.
- Open IIS Manager on the machine.
- If there is not already an existing application pool that meets the following criteria, you need to create one.
- Navigate to Application Pools. Right-click on Application Pools and select Add Application Pool, or click Add Application Pool under Actions on the right side of the screen.
- Enter a Name and set the .NET Framework version to v4.0.30319. Leave the Managed pipeline mode field set to Integrated, and also leave the Start application pool immediately check box selected. Click OK.
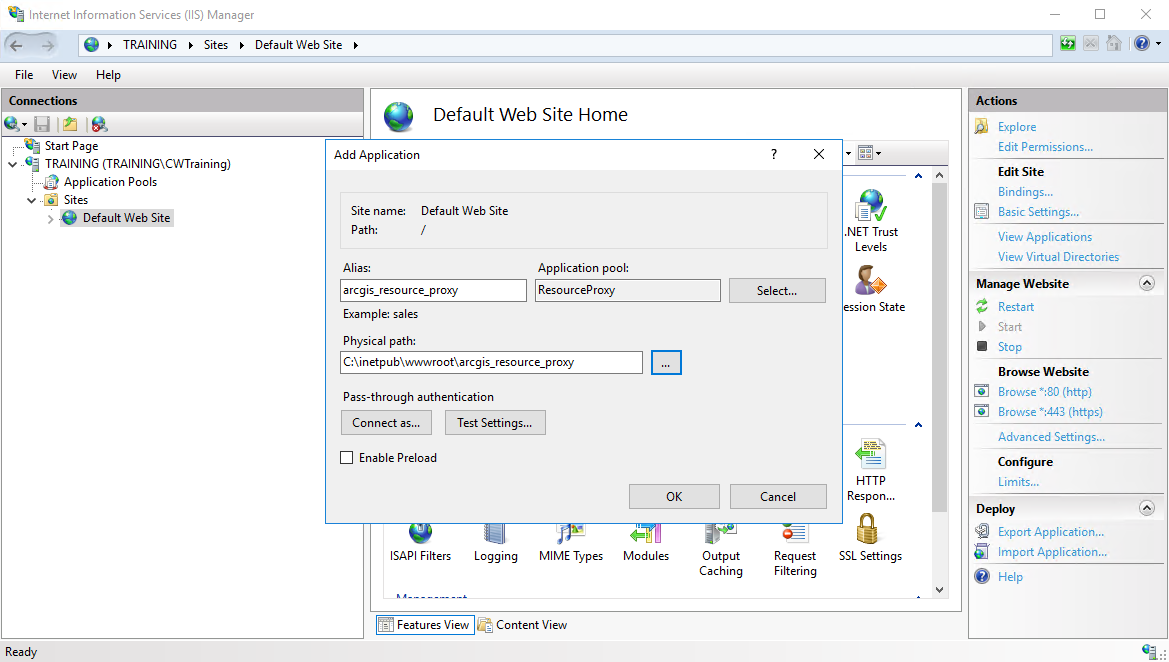
- Next, navigate to Default Web Site under Sites. Right-click Default Web Site and select Add Application. Enter an Alias and select the desired application pool (either the one created in the steps above or the one that matches the same criteria). Browse to the Physical path, which is something like ...inetpub\wwwroot\<your_resource_proxy>. Click OK.
- To test that the proxy is able to forward requests directly in the browser, navigate to http(s)://<your_machine>/<your_resource_proxy>/proxy.ashx?http://services.arcgisonline.com/ArcGIS/rest/services/?f=pjson. You can also get the proxy version along with the configuration and log file status by navigating in the browser to http(s)://<your_machine>/<your_resource_proxy>/proxy.ashx?ping.
- To set up your proxy configuration settings, open the proxy.config file under the Esri Resource Proxy site folder in a text editor. The README.md file in that same folder contains examples and insight from Esri.
Here is an example from Cityworks.
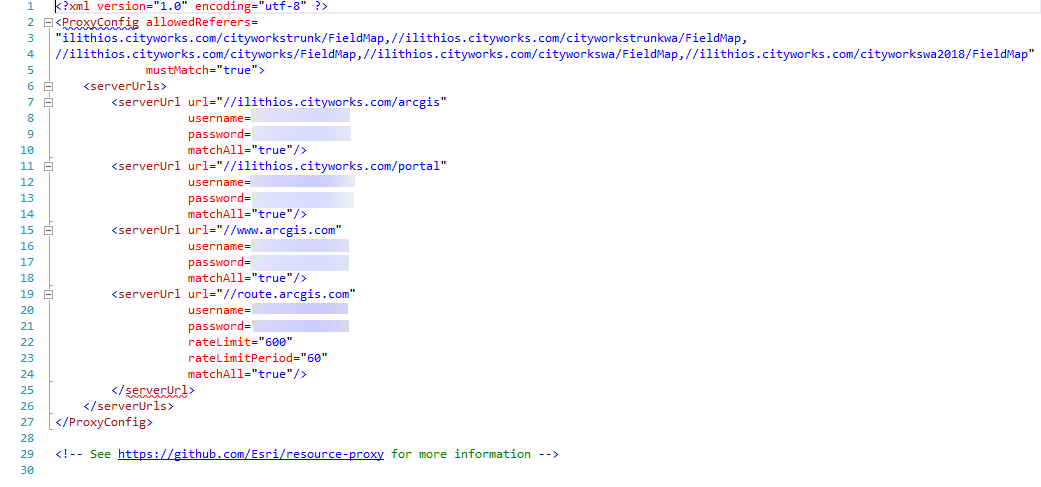
Please note that by default the proxy.config file allows any referrer.
- To lock this down, replace the '''*''' in the '''allowedReferers''' property with your own application URLs. Make sure that the URL ends in .../FieldMap, as this level of specificity is require in version 1.1 of the Esri Resource Proxy and moving forward.
- Make sure to refresh the proxy application after any updates are made to the proxy.config file.
Next add the proxy as a Service Resource.
- From the GIS tab, click Services, or click GIS Services from the home page.
- Click the Service Resources tab.
- Click Add in the GIS Service Resources panel to add a new resource that resolves against the ArcGIS Online Routing Service, if being used by the Routing tool in the map.
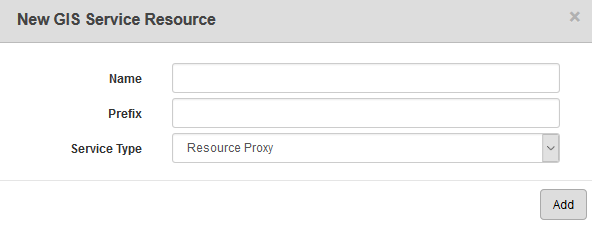
- Enter a Name for the service.
- Select Resource Proxy from the Service Type drop-down list.
The Prefix pulls the correct set of credentials from the proxy config file, since multiple entries can exist in that file. The Prefix needs to exactly match the <server URL> entry from the file that you plan to use. For example, if the proxy config file has an entry of <server URL url="//gishub.cityworks.com"> and you need to use the credentials defined against services from that resource, then enter //gishub.cityworks.com in the Prefix field. If it doesn't match, it won't be able to find the credentials.
- Enter the Prefix and click Add.
- Select the new resource from the GIS Service Resources panel to finish entering the Resource Details.
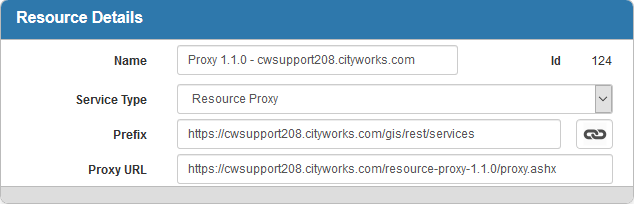
The Id, a unique number assigned to the service resource, appears to the right of the resource Name.
-
Enter a Proxy URL that matches this format: //<server_name>/<your_resource_proxy>/proxy.ashx. The <server_name> should be the name of the server on which the Esri Resource Proxy is configured. Note that you could also use an IP address or internal/external DNS resolved entry. This fully qualified domain name (FQDN) may be required in this case as well, based on individual site network security.
- Click Add in the GIS Service Resources panel to add a new resource that resolves against ArcGIS Online to be used by various logic calls in the map.
- Enter a Name, select Resource Proxy from the Service Type drop-down list, and enter a Prefix (in this case, www.argis.com). Click Add.
- In the Resource Details panel, enter a Proxy URL that matches this format: //<server_name>/<your_resource_proxy>/proxy.ashx. The <server_name> should be the name of the server on which the Esri Resource Proxy is configured. Note that you could also use an IP address or internal/external DNS resolved entry. This fully qualified domain name (FQDN) may be required in this case as well, based on individual site network security.
- Follow these same steps to add a new resource that resolves against a local secured REST endpoint to be used by GIS services in the map. For this entry, the Prefix should be tied to whatever the local address resolves against. For example, //gishub.cityworks.com is the internal/external DNS resolved entry in the last image referenced above. Please note that if your Cityworks Server site and Web Adaptor reside on the same server, further resolution of the address may be necessary to ensure the Esri Resource Proxy is working solely with GIS calls to the map. In this scenario, the example with //gishub.cityworks.com might be modified to something like //gishub.cityworks.com/arcgis, since the Web Adaptor in this case is named the default of arcgis.
Once a Resource Proxy is added as a resource, add it to a Service Definition with at least one map service. When the proxy is added to a service definition, it will proxy all other map services within the definition.
NOTE: When you add a resource proxy to a service definition, the definition must have a GIS service added to it as well. Once a resource proxy is added to a service definition, it will proxy all other GIS services within the definition. More than one proxy may be needed, as a given proxy may not work for all services.
- Click the Service Definitions tab.
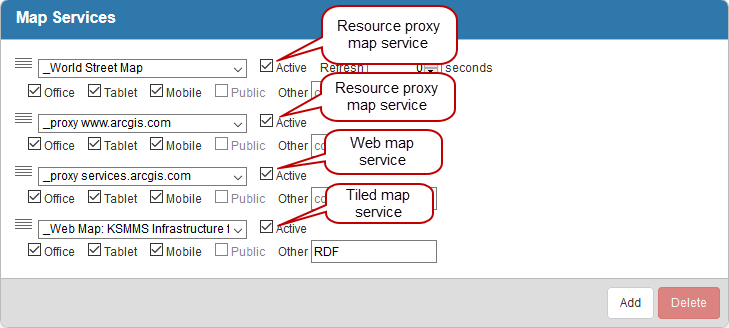
- Select the desired definition in the Service Definitions panel, and click Add in the Map Services panel to add the following services.
- Select the first resource that you added for the Routing tool from the Service drop-down list and click Add. For that service, select the Office, Tablet, or Public check boxes, depending on whether you want the secured service to apply to the map in Office, Tablet, or Public Access.
- Select the second resource that you added for the various logic calls to ArcGIS Online in the map from the Service drop-down list and click Add. For that service, select the Office, Tablet, or Public check boxes, depending on whether you want the secured service to apply to the map in Office, Tablet, or Public Access.
- If you added a resource for a local secured REST endpoint, select it from the Service drop-down list and click Add. For that service, select the Office, Tablet, or Public check boxes, depending on whether you want the secured services to apply to the map in Office, Tablet, or Public Access.
- Open the map. If you are using secured services, you'll notice that the map services are displayed without the user being prompted for the credentials for a user who has access to the secured services. If using the Routing tool, you'll notice that there isn't a prompt asking for ArcGIS.com credentials to access Esri's routing URL.
NOTE: