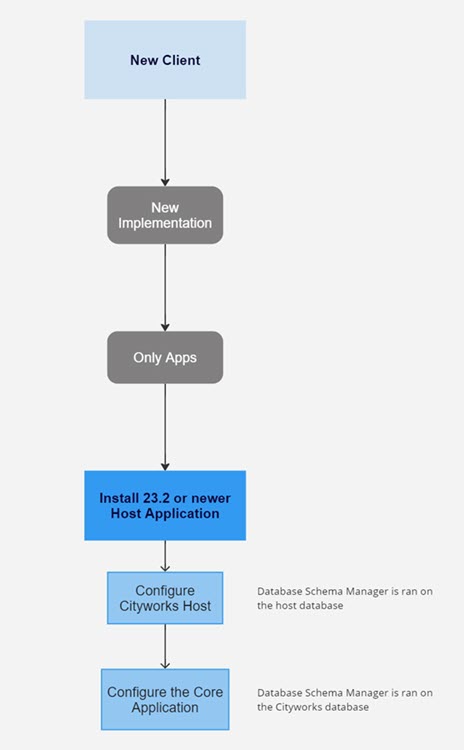
Install the Host Application
This section includes the steps necessary to install a new Cityworks site. This install guide should only be used for new databases. If you are installing a 23.x site using an existing database, use the update guide.
|
|
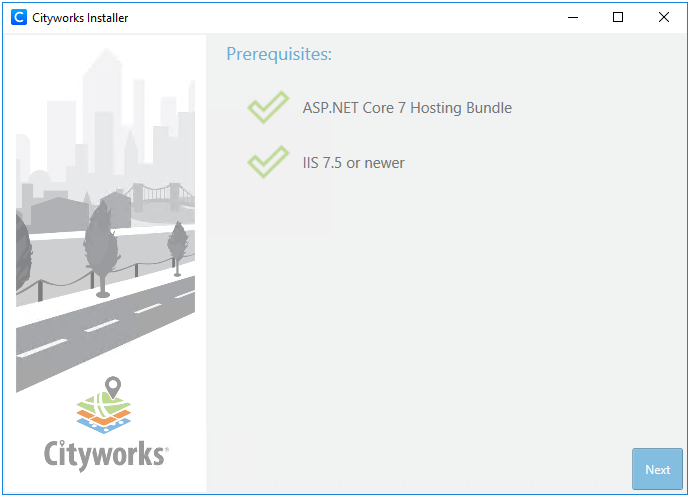
 PREREQUISITES:
- Navigate to where the Cityworks installer is located.
- Right-click the installer and select Run as Administrator to launch the installer.
The installer automatically checks to make sure all the prerequisites are installed. If an application is missing, the installer displays a message instructing you to install the needed prerequisites.
If all prerequisites are properly installed, two green check marks appear.
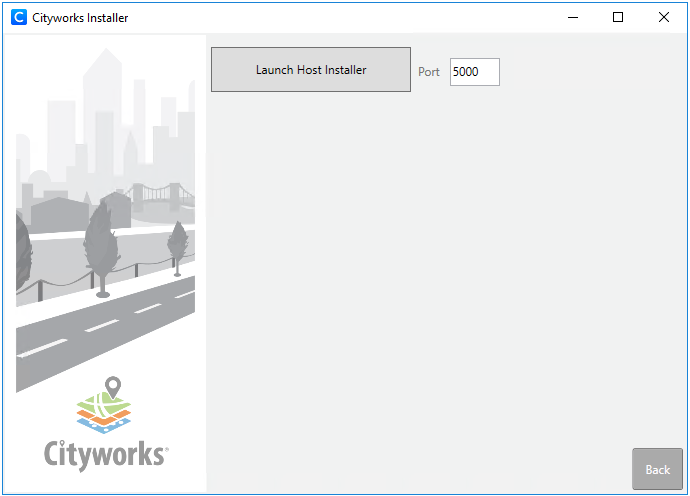
- Click Next.
- Click Launch Host Installer.
 NOTE: The Port field is the port the installer runs on the local computer during the installation process. Once the installation is done, the port is no longer in use. The default is 5000, however a different port can be entered. The port cannot conflict with any other process on the machine that may be using the same port as the installer.
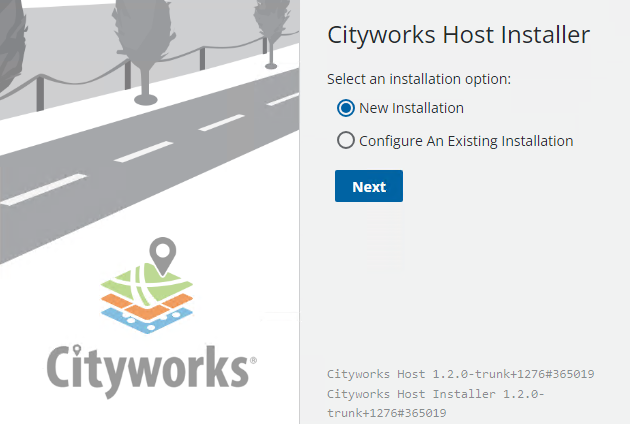
The host installer opens in a web browser.
 IMPORTANT: A command line prompt window runs in the background and must finish running before the web app can open. Trying to launch the host installer before the command line finishes causes an error in the browser. Refreshing the browser or closing and reopening the web app should resolve the error.
The installer includes the following functions:
- New Installation: This option is used when first creating a Cityworks site or to update an existing database.
- Configure An Existing Installation: This option is used to edit any settings previously configured for an existing database.
- Select New Installation and click Next.
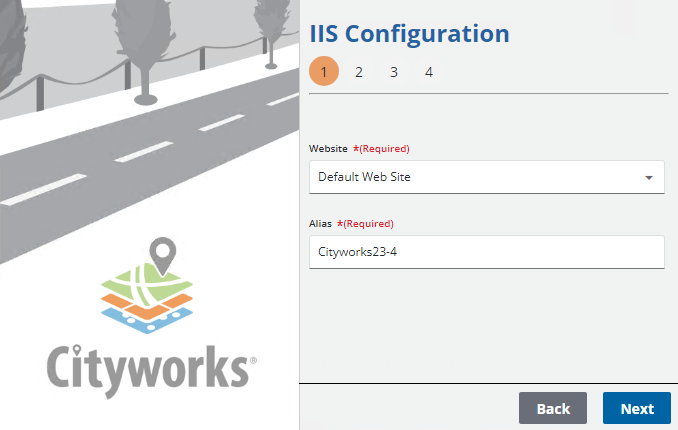
- Select a Website under which the site is installed.
- Give the site an Alias.
- Click Next.
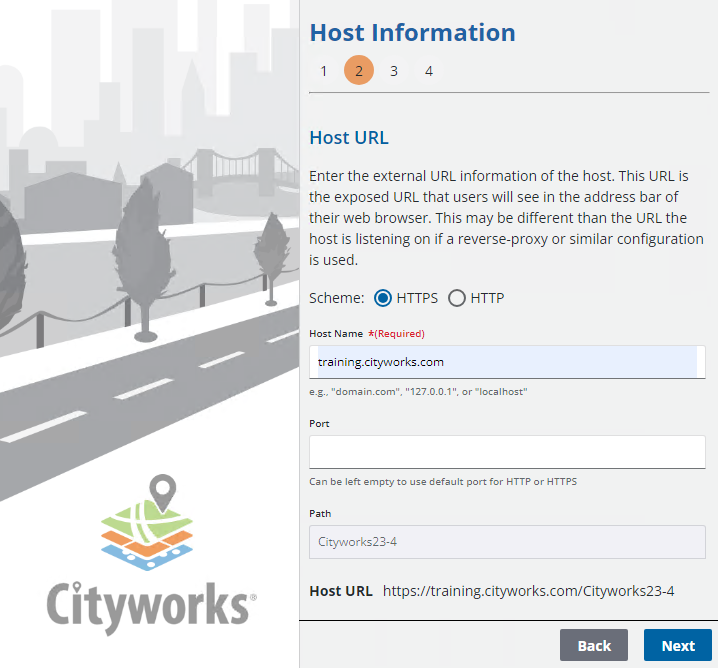
- Select HTTPS or HTTP for the Scheme.
- Enter the Host Name.
- Enter the Port if desired.
- The Path is automatically populated with the Alias.
- Click Next.
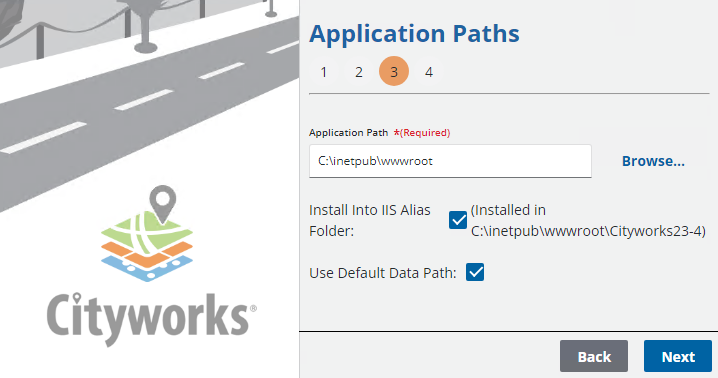
- The Application Path is automatically populated, but can be changed by clicking Browse.
- Select Install Into IIS Alias Folder if desired.
- Select Use Default Data Path or clear the check box and browse to a new location.
- Click Next.
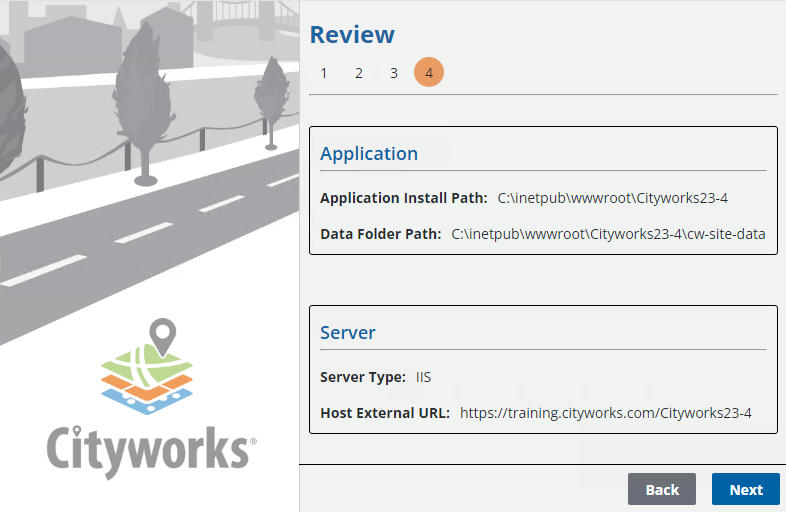
- Verify that the site information is correct in the Review section and click Next.
NOTE: If the Alias includes any underscores, the first underscore displays as removed in the Install Directory filepath. This is merely a display issue with the underlying Microsoft label control and does not affect the installation process. The installer runs correctly and the site is named as stated in the Alias and is installed in the correct filepath.
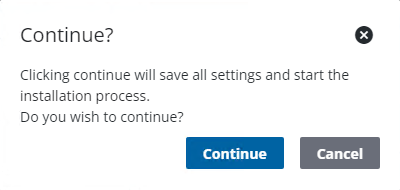
You are asked if you want to proceed.
- Click Continue.
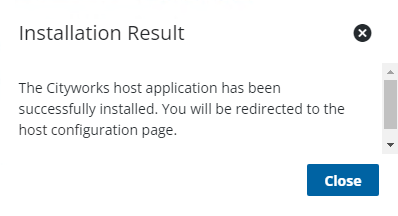
After a few minutes, a message confirms if it was installed successfully or not.
NOTE: At this point, the site folders have been created under the alias and site location specified in the installer. These include the WebSite, cw-site, cw-site-data, DataMigrationManager, PluginManagerCli, and DatabaseManager folders.
- Click Close.
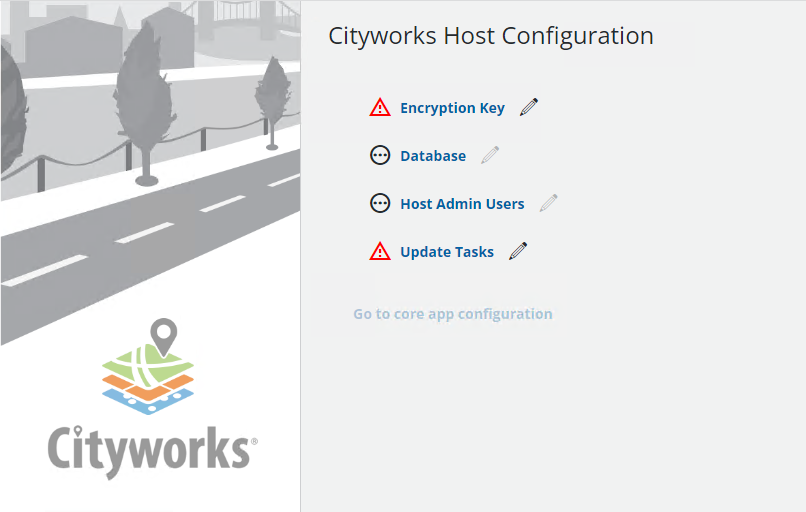
- On the Cityworks Host Configuration page, click the edit icon next to Encryption Key to configure the key file.
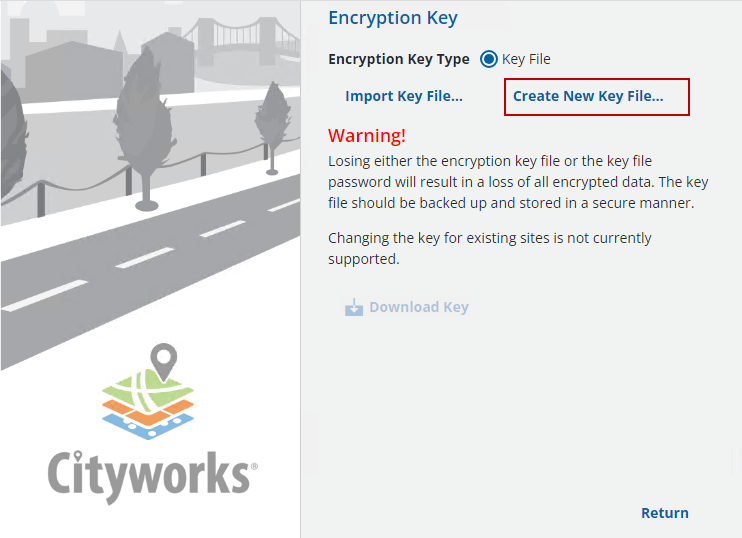
Key files encrypt data to provide greater security. If you are installing Cityworks 23.x for the first time, a key file needs to be generated.
- Click Create New Key File.
- On the Create Encryption Key File panel, enter the password in the Password and Confirm Password fields. The password must be at least eight characters long.
 TIP: If you are creating a new key file, you can enter whatever password you want as long as it's eight characters or longer.
- Click Save Key.
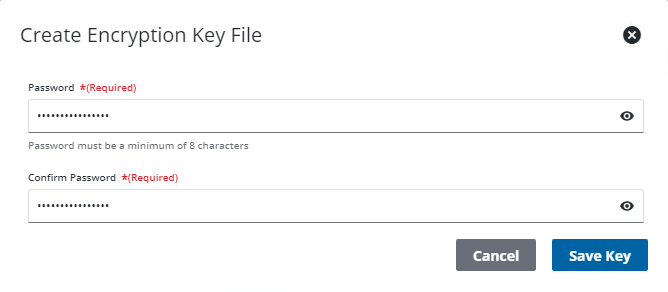
IMPORTANT: Once the key file is created, copy the key file and back it up in a secure location. If a server is destroyed and only one copy of the key file exists on that server, the encrypted data is lost. The password must also be retained. If the password is lost, the encrypted data cannot be accessed.
- Download the newly created key by clicking Download Key.
- Click Return to return to the Cityworks Host Configuration page to continue setting up the site.
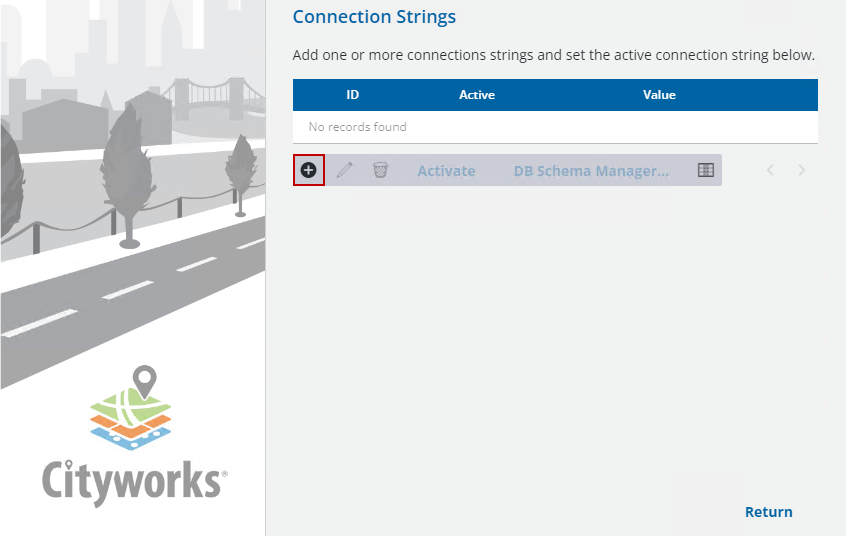
- Click the edit icon next to Database.
- Click the add icon to add a connection string.
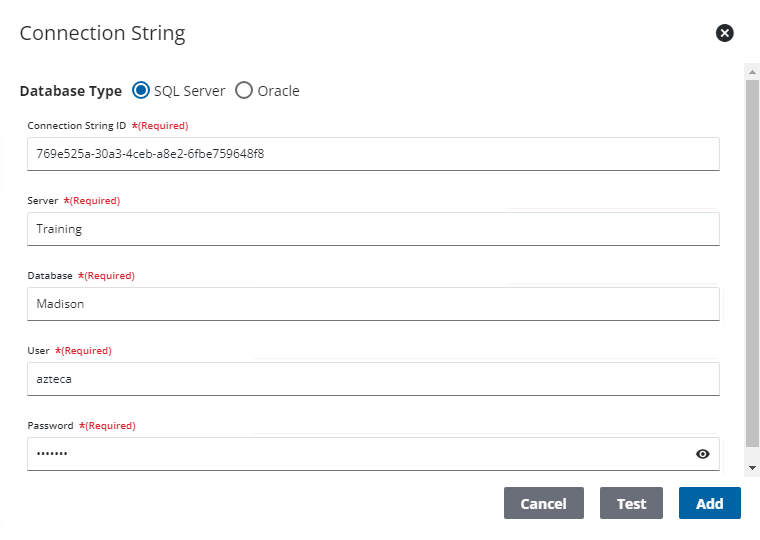
The Connection String ID is automatically populated.
- Enter the Server instance that the database resides on.
- Enter the Database name.
- Enter the user you want Cityworks to utilize in the User field.
IMPORTANT: If you are an Oracle user, a CWHOST user must be manually added and assigned permissions. This user should be used for the host User and Password fields.
NOTE: If desired, the CWDB_USER, or your own user mapped to the CWDB_USER_ROLE, can be used instead of the azteca user. The CWDB_USER runs the application and all the plugins, but has less permissions than the azteca user. After entering the user and password here, map the CWDB_USER_ROLE to the user and enter azteca as the Default Schema.
- Enter the Password.
- Click Test to see if the connection string is valid.
- Click Add.
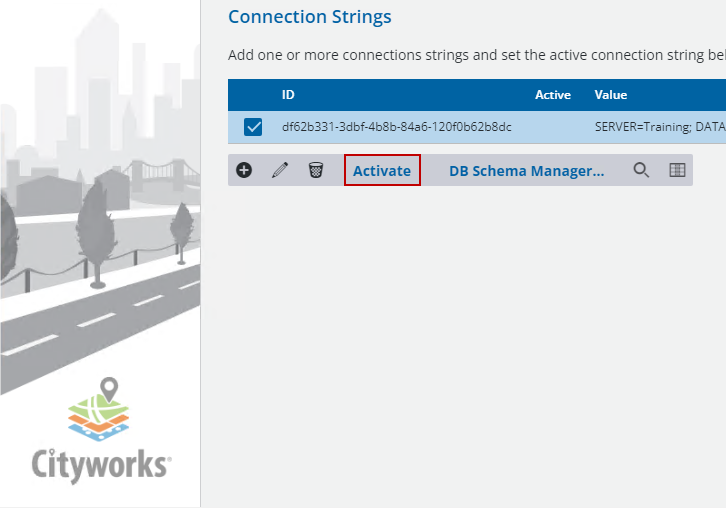
- Select the connection string and click Activate.
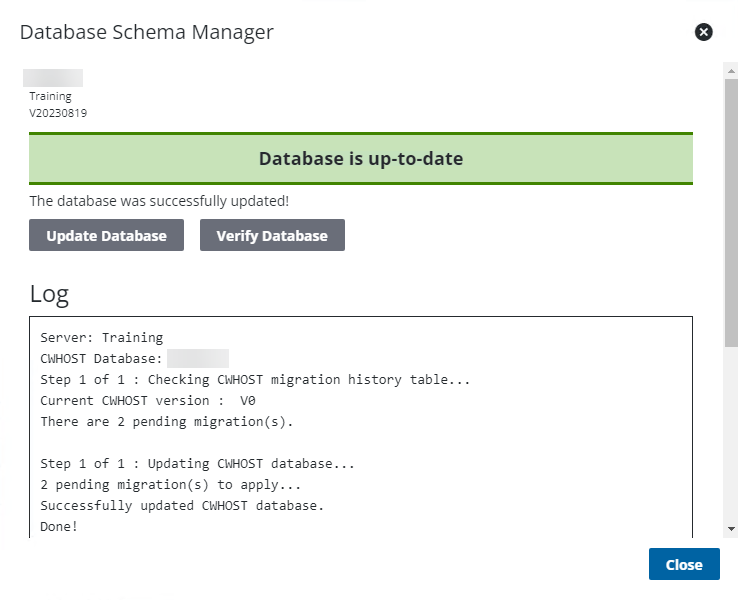
Starting in 23.2 and newer, Database Schema Manager replaces Database Manager.
This creates and updates the host database.
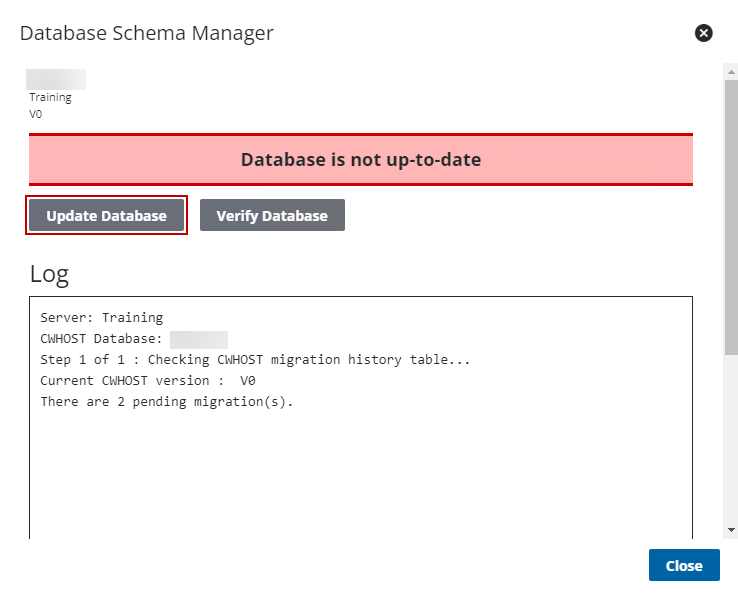
IMPORTANT: The red Database is not up-to-date message might not appear under certain circumstances. Even if it does not appear, you still need to complete the steps to update the database.
Once it's successfully completed, users receive a message indicating that the database was successfully updated. If not, the log shows where any issues were encountered.
- Click Verify Database to identify any additional schema changes that need to be made. If there are any errors in the log after verifying the database, you can fix them by running the SQL scripts provided at the bottom of the log.
- Click Close.
- Click Return to return to the Cityworks Host Configuration page to continue setting up the site.
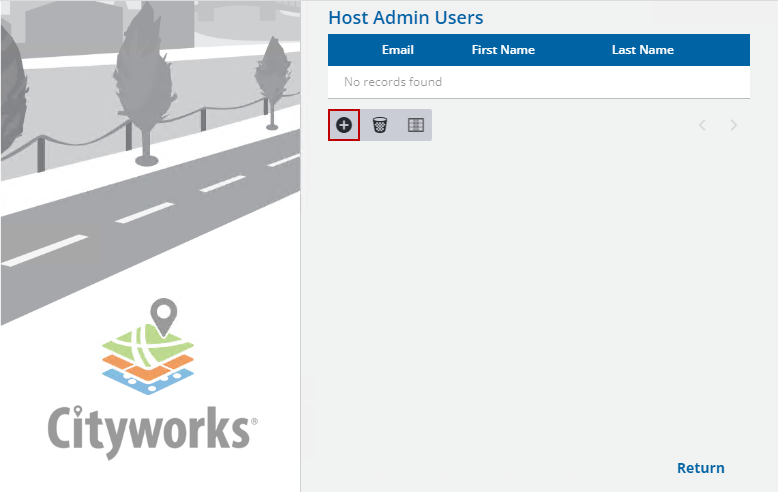
A Host Admin User needs to be created to manage the host.
- Click the edit icon next to Host Admin Users.
- Click the add icon.
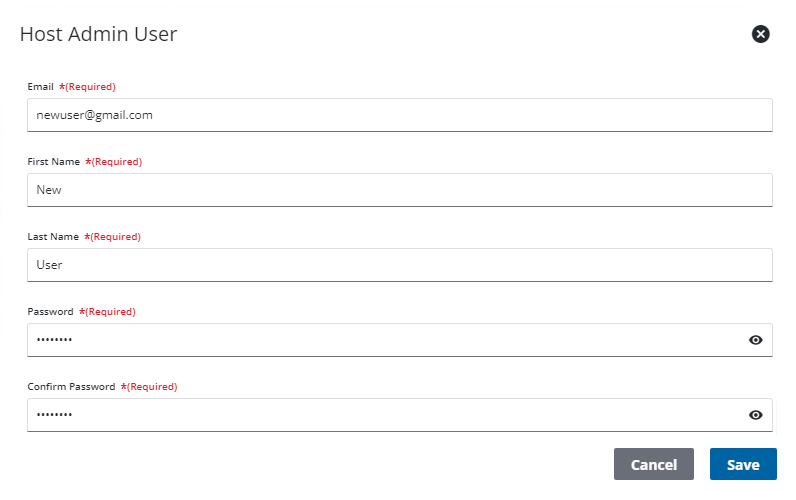
- Enter an Email, First Name, Last Name, and Password.
- Click Save.
- Click Return.
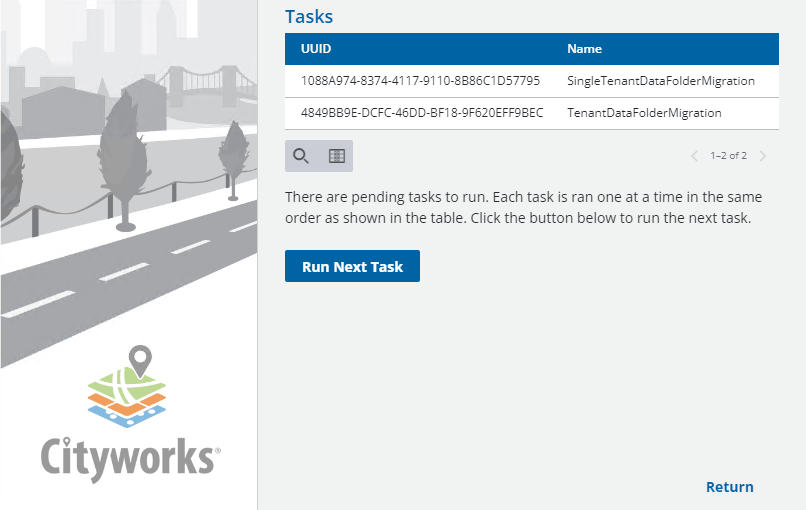
Update tasks can be run from the host installer. Any that need to be run appear in the Tasks section.
- Click the edit icon next to Update Tasks.
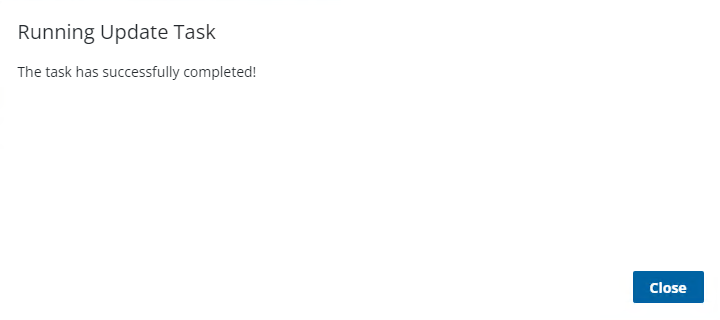
- Click Run Next Task.
A confirmation message appears.
- Click Close.
- Click Run Next Task until all of the tasks have been run.
- Click Return.
The host is now configured. Next the core app needs to be configured. See Configure the Core Application for more information.

