Configure Public Access
- Right-click the installer and select Run as administrator.
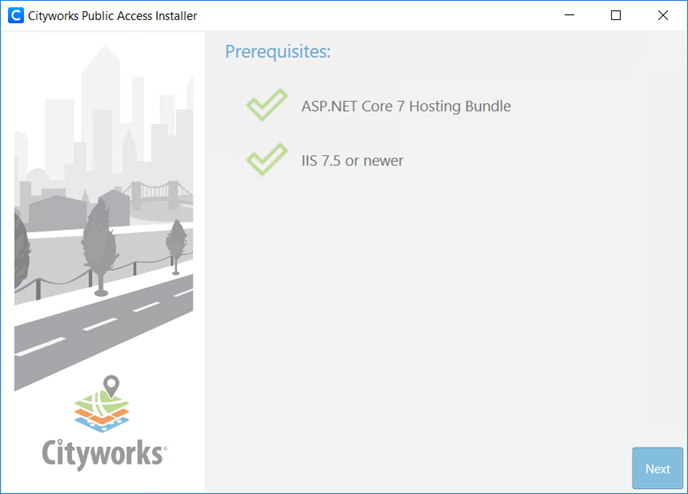
The installer automatically checks to make sure all the prerequisites are installed. If an application is missing, the installer will display a message instructing you to install the needed prerequisite.
If all prerequisites are properly installed, two green check marks display.
- Click Next.
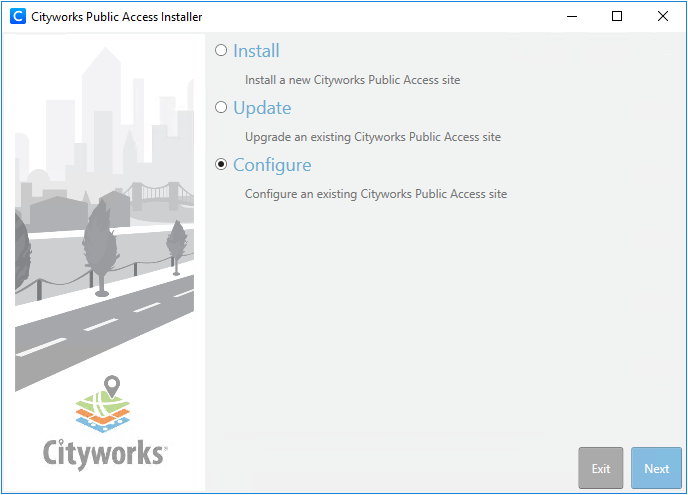
- Select Configure and click Next.
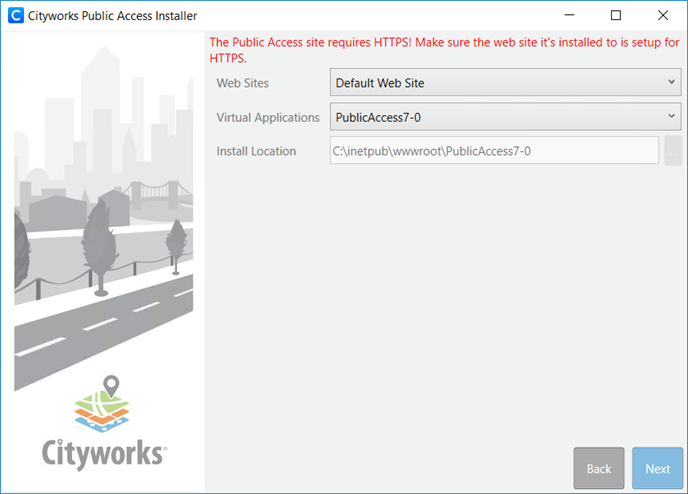
- Select the site to update from the Virtual Applications drop-down list and click Next.
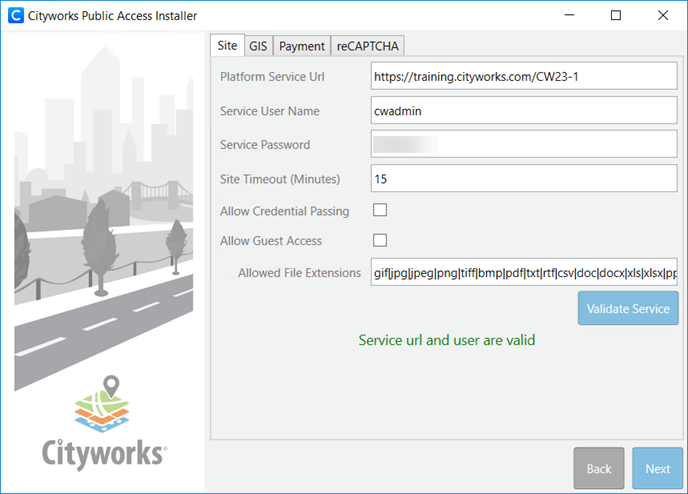
- Click the Site tab to configure overall Public Access site settings.
 NOTE: The initial map extent shown in Public Access is the initial map extent defined for the user entered here. This user must be added to the service definition and the service definition must also have services marked Public for these to display within Public Access. See Public Access Map Best Practices on MyCityworks for more information.
- Enter the number of minutes that the site will time out in the Site Timeout (Minutes) field. The default is 15 minutes.
- Select Allow Credential Passing to allow Public Access users to be authenticated by another site. See Enable Third-Party Authentication in Public Access on MyCityworks for more information.
- Select Allow Guest Access to enable guest access. See Information: Creating Guest Access to PLL Public Access Site on MyCityworks for more information.
- In the Allowed File Extensions field, you can specify the types that can be added in Public Access. The file extensions must be separated by a vertical bar.
- Click Validate Service. This step is required.
A message will indicate whether the service URL and user are valid. It also checks to make sure your version of Cityworks is compatible with the version of Public Access being installed.
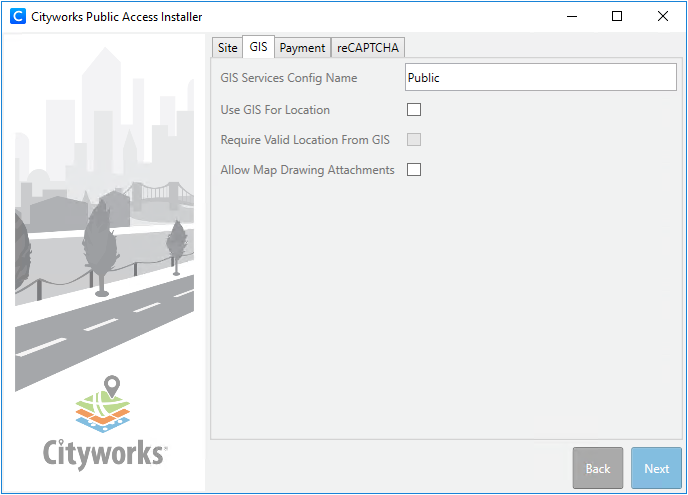
- Click the GIS tab to configure GIS-related settings.
- In the GIS Services Config Name field, enter Office, Tablet, Mobile, Public, or Other to specify which map services from the service user's service definition to use in Public Access. The default is Public. See Configure GIS Services in the Admin 3.2 Guide for more information.
- Select Use GIS For Location to use the user's location when creating a case.
- Select Require Valid Location From GIS to require that users enter a valid location on the case. If this is not enabled, users can enter an address without geocoding it. Not using a geocoded address means the location field will be populated on the case but the X and Y coordinates will not be populated.
- Select Allow Map Drawing Attachments to allow users to draw on the map and attach the drawing to the case.
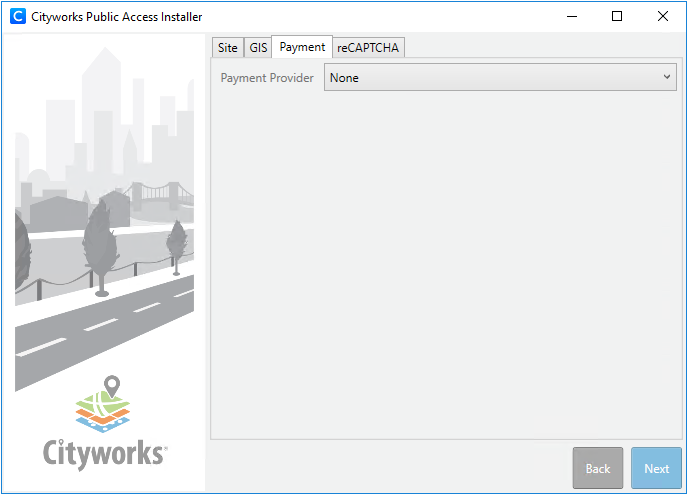
- Click the Payment tab to configure payment-related settings.
- Select Paypal, AuthorizeNet, or XpressBillPay from the Payment Provider drop-down list. Additional configuration fields show depending on the selected payment provider.
- Select None from the Payment Provider drop-down list to not configure a payment provider.
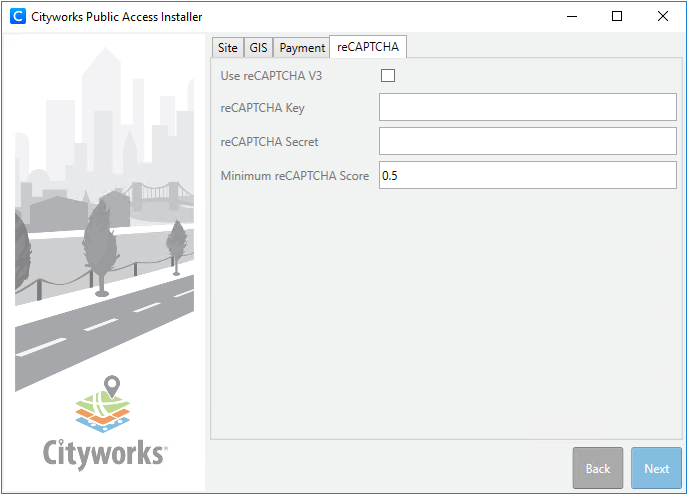
- Click the reCAPTCHA tab to configure reCAPTCHA-related settings.
- Select Use reCAPTCHA V3 if you are using reCAPTCHA.
- Copy the site key from your Google reCAPTCHA settings page and enter it in the reCAPTCHA Key field.
- Copy the secret key from your Google reCAPTCHA settings page and enter it in the reCAPTCHA Secret field.
- The default Minimum reCAPTCHA Score is 0.5 but you can change it.
- Once you have configured the desired settings on the Site, GIS, Payment, and reCAPTCHA tabs, click Next.
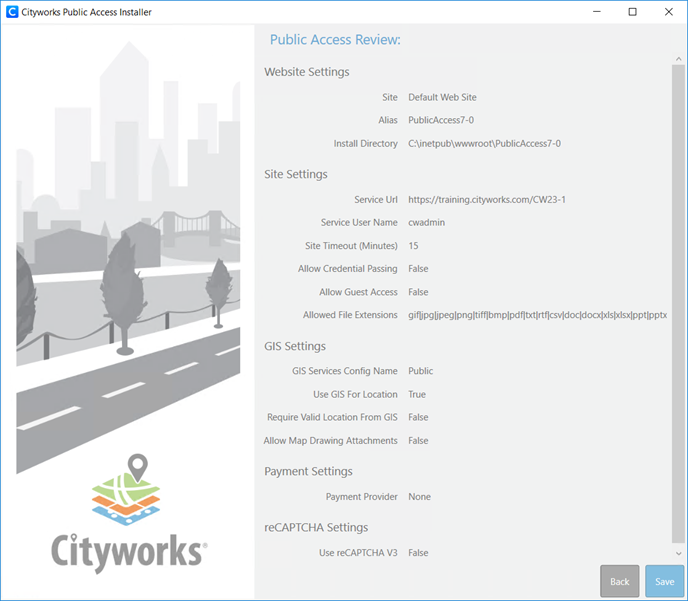
- Verify that the site information is correct and click Save.