Configure Consequence of Failure
Consequence of failure is the impact of an asset's failure. You need to define the factors that contribute to an asset's consequence of failure, such as the material type. The final consequence of failure is a weighted average based on the weights you define.
When configuring factors with related data tables, only one-to-one relationships are supported. One-to-many relationships are not supported.
- Open the Asset Strategy Setup page.
 NOTE: The first time you install
 IMPORTANT: The risk formula has been modified so that if the consequence of failure is not configured with factors, it defaults to 1. This allows users without consequence of failure risk scores to still run a calculation.
- From the Asset Strategy panel, select the desired Asset Group and Asset Type if they are not already selected.
- Select the asset strategy that you want to add the consequence of failure to.
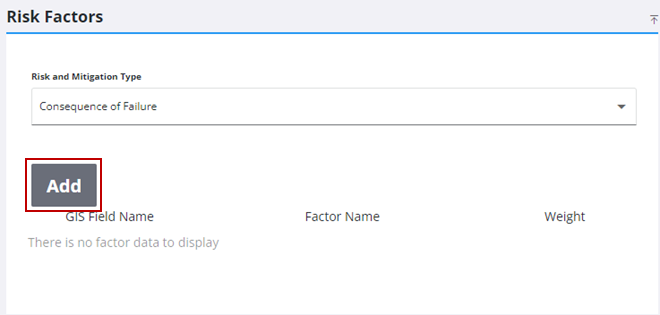
- In the Risk Factors panel, select Consequence of Failure from the Risk and Mitigation Type drop-down list.
- Click Add.
- Select the GIS Field Name for the risk factor that will affect the consequence of failure.
- If the GIS Field Name is a string field, the Rating Method drop-down list is set to Value and it cannot be changed (an error message appears when you click Save). If the GIS Field Name is a numeric or date field, the Rating Method drop-down list is set to Range but it can be changed to Value if desired.
- Range is used to configure ranges, such as numbers (1–100) or dates (1/1/2010–1/1/2015).
- Value is used to configure individual values (PVC, cast iron, etc.).
IMPORTANT: When configuring range limits, consider using decimals to include all possible numbers. For example, if you have range limits from 2-4 and 5-7, any values between 4 and 5, such as 4.25, are not captured. Instead, consider configuring the range limits to 2.001-4, 4.001-6, etc., or 5-7.999, 8-10.999, etc.
- Enter a name for the risk factor in the Factor Name field.
- Select or enter a number for the Weight to be assigned to the risk factor. This can be any positive number. Values of zero are ignored.
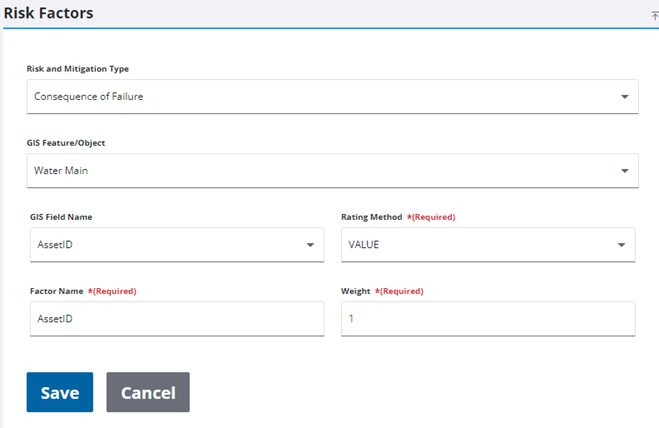
- Click Save.
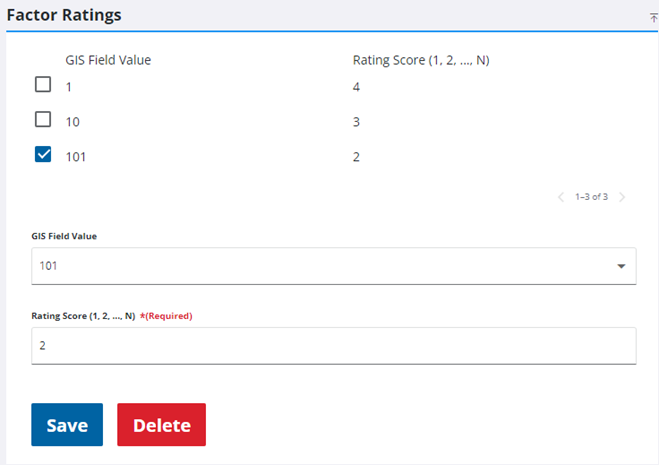
- Select the risk factor you created for consequence of failure. The Factor Ratings panel opens.
- If the Rating Method is set to Value, select the value from the GIS Field Value drop-down list and assign a Rating Score to it. Click Save. Repeat this for each GIS Field Value present, including null or negative values (if present). It is important that each GIS Field Value is assigned a Rating Score.
- If the Rating Method is set to Range, enter a Lower Limit and Upper Limit (or select them using the arrows) for the range and assign a Rating Score to it. Click Save. Repeat this for each desired range. It is important that each GIS Field Value is included in a range, including null or negative values (if present). For null values, leave the Lower Limit and Upper Limit fields blank.
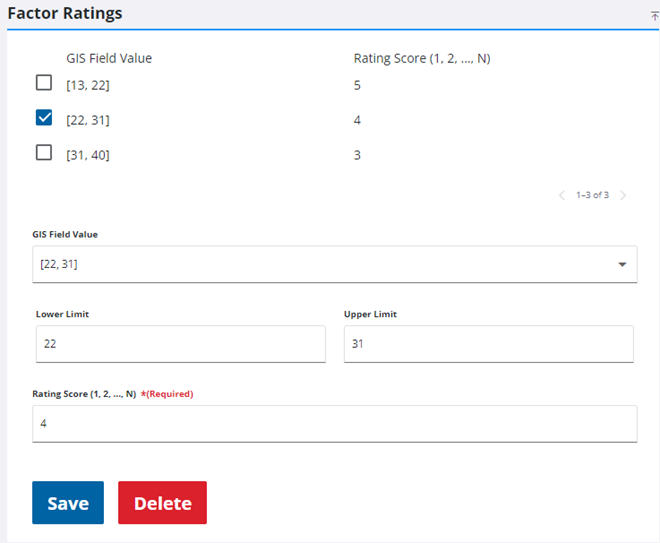
IMPORTANT: Make sure that all GIS Field Value options are assigned a Rating Score, including null or negative values (if present).
- Repeat these steps to add any other desired consequence of failure risk factors.