Add a Data Source
A custom data source or a Cityworks SQL data source can be added to connect to database information. The steps for adding a data set differ depending on the version you have installed. Select the version you are on below to complete the task:
 IMPORTANT: In Respond 5.9, the Data Sources section is hidden in the Report Designer.
Starting in Respond 5.3, the data source cannot be edited. If a data source needs to be changed, it must be removed and a new data source must be added.
 TIP: Starting in 23.3, the data source is automatically populated based on the site information.
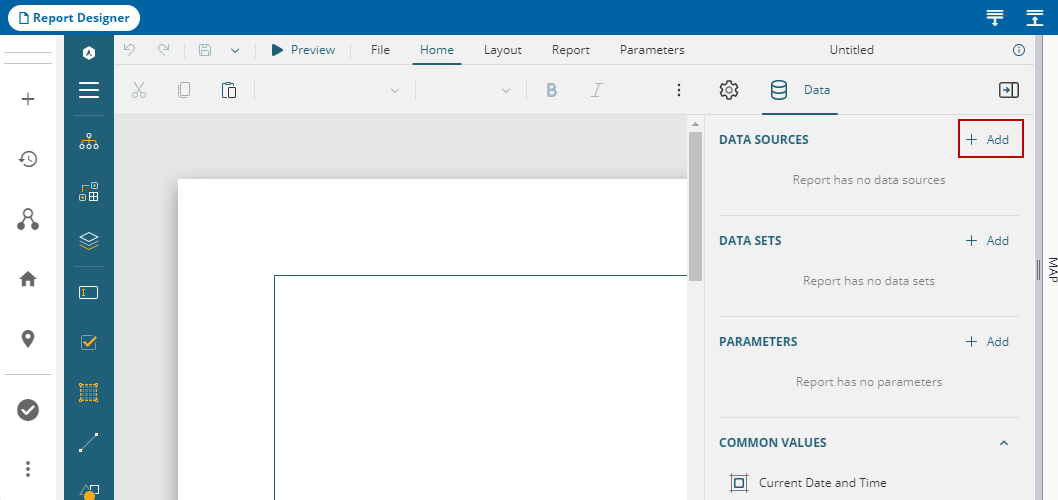
- Open the Report Designer.
- Click the Data tab and click Add.
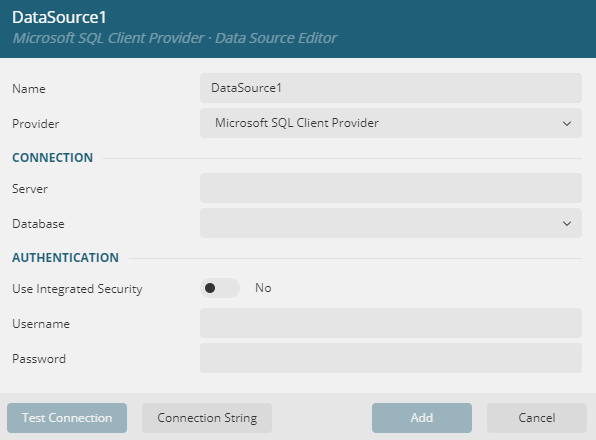
- Enter the Name of the data source.
- Select the Provider.
- Enter the Server and select the Database.
- Select Use Integrated Security if desired.
- Enter the Username and Password.
- Click Test Connection to validate the data source.
- Click Add.
After the data source is connected, a data set needs to be added as well.
The data source is automatically added if you add the DefaultDataSet first. See Add a Data Set for more information. Starting in Respond 5.3, the data source cannot be edited. If a data source needs to be changed, it must be removed and a new data source must be added.
TIP: Starting in 23.3, the data source is automatically populated based on the site information.
- Open the Report Designer.
- Click the Data tab and click Add.
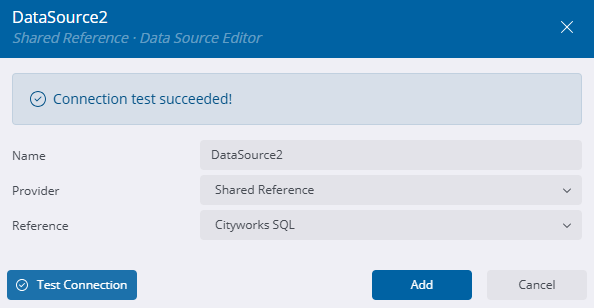
- Enter the Name of the data source.
The Provider is set to Shared Reference.
- Select the Reference:
- Cityworks Resources: Select to add a custom data source that allows access to attachments or GIS thumbnails that can be added to reports. Once the data source is added, queries need to be created in a data set to pull in the wanted attachments or GIS media. To see the full process of configuring attachments for a report, see Configure Attachments for ActiveReports for more information.
- Cityworks SQL: Select to connect to the SQL database of your site.
- Click Test Connection to validate the data source.
- Click Add.
After the data source is connected, a data set needs to be added as well. See Add a Data Set for more information.

