Run a Trace

You can select points on the map, add barriers, and run a trace to view results that match your search.

PREREQUISITES:

  • The published web map must include trace configurations and a feature service that supports the utility network. See Configure an Application to Trace a Utility Network on Esri's blog for more information.
  • Feature services must be secure, which allows you to log in with an ArcGIS account.
  • You must have an ArcGIS Utility Network user type extension to run a trace.
  • Network topology must be enabled and validated to show the most recent updates and edits made to the network.
  • An asset utility network service must be configured in Admin. See Utility Network in the Admin 3.4 Guide for more information.
  1. Open the map.
  2. Tap Trace in the map toolbar.
  3. Select the trace type you want to run from the Trace types drop-down list. This populates based on the trace configurations setup in the web map.
  4. Tap the add icon and select Starting points on the map.

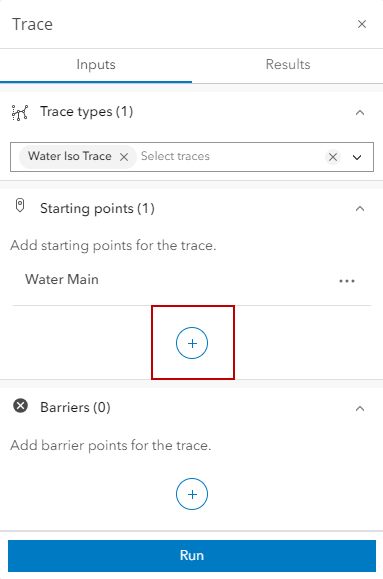
  1. Select any barriers by tapping the add icon and selecting a point or points on the map.
  2. Tap Run.

The map and Results tab display the trace results. Trace results also appear in the Assets panel on the Asset Details page.

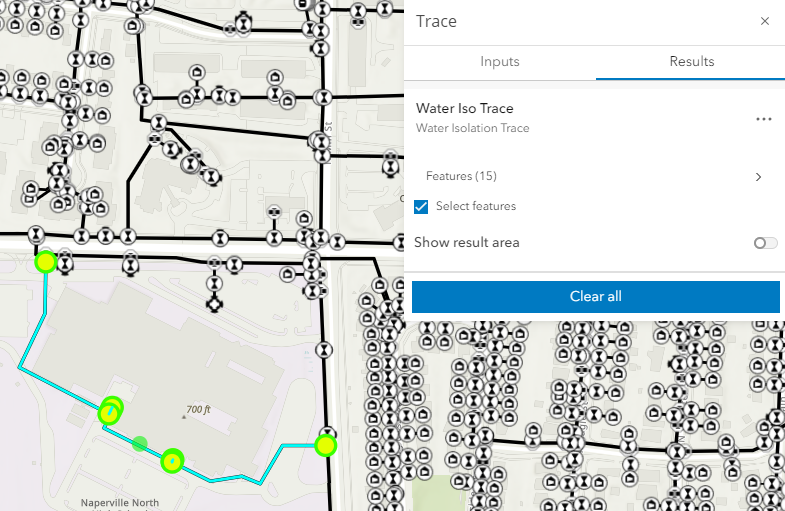
  1. Enable Show result area to display a buffer area around the trace results.
  2. Select a Color for the buffer area.
  3. Enter a number in the Buffer field to increase or decrease the buffer area surrounding the trace results.