Configure Single Sign-on
Single Sign-on is managed in Admin using the Oauth 2 Clients page. Starting in 23.2, when you log out and you are using Single Sign-on, it logs you out of your ArcGIS account as well.
|
|
 PREREQUISITES:
- In Admin, click the Admin tab and click OAuth2 Clients.
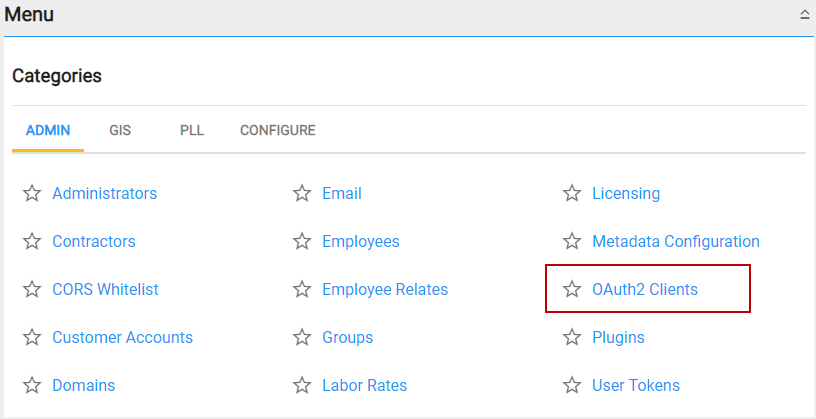
- Click Add record to add a client.
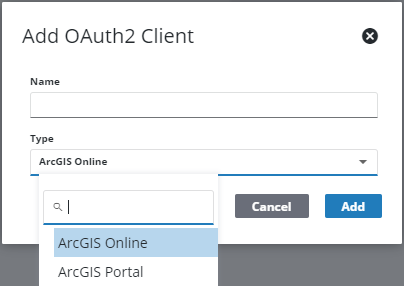
- Enter a name for the client and select the client Type from the drop-down list.
-
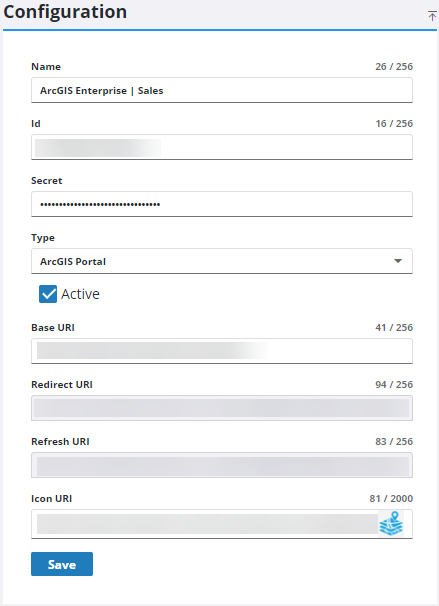
Enter the App ID in the Id field. See Create the Application in ArcGIS Online or Portal for ArcGIS.
- Enter the App Secret in the Secret field. See Create the Application in ArcGIS Online or Portal for ArcGIS.
- The Type displays the type selected when the client was made, but can be changed using the drop-down list.
- Select the Active check box to mark the client as active.
- For the Base URI, enter the URL to access your organization's ArcGIS Online or Portal for ArcGIS site. For example: https://gis.cityworks.com/portal.
- The Redirect URI and Refresh URI fields are automatically populated based on the redirect field entered in the ArcGIS Online or Portal for ArcGIS application.
- To include an icon on the login page next to this single sign-on option, enter the Icon Uri in the field. A preview of the icon is shown next to Icon Preview. A valid URL that the server can access is required. If the URL is not in the same URL domain as the Cityworks website, you may encounter CORS issues.
- Click Save.
Once Single Sign-on is configured for the site, the Collapse Default Login preference in Admin should be turned on. See Configure Global Preferences in the Admin 2.2 Guide for more information.
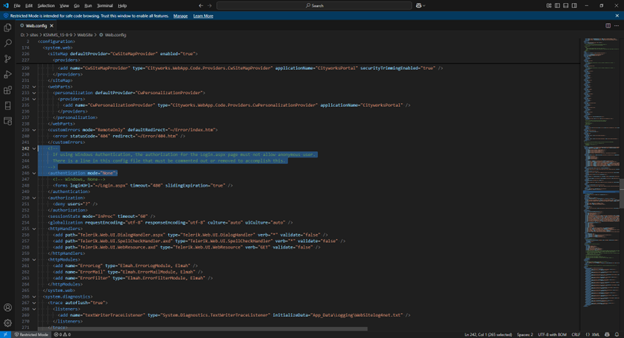
Office Companion sites previously configured as Windows Authentication should either reinstall their Office Companion site using forms authentication (not Windows Authentication), or add back the entries in the web.config file changed during the Windows Authentication installation process. See the following images that show where things are edited in the web.config file: