Configure Material Hierarchy
The material hierarchy is used to organize material into categories.
- Click Config on the Storeroom toolbar and click Material.
- Click the double arrows in the top-right corner of the materials panel to expand the hierarchy.
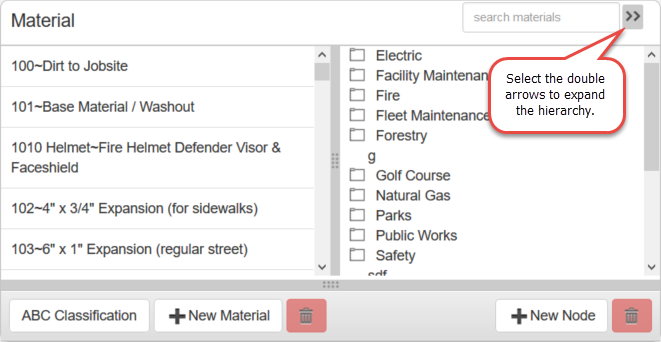
TIP: You can resize the hierarchy panel by clicking the gray bar on the left side of the panel and dragging it left or right.
- Click New Node to add a new category of material. Type the name of the category and press Enter or click New Node.
- To add a subcategory, select the parent category and click New Node. Type the name of the subcategory and press Enter or click New Node.
- Click the folder next to any category to expand it.
- Double-click a category name to edit it.
- To add material to a category, click the material and drag it to the desired category in the hierarchy.
- To remove a material from the category, select it and click the red delete icon next to New Node.
NOTE: This does not delete the material from the system, but removes it from the category.
- To remove a category, select it and click the red delete icon next to New Node.
NOTE: If you delete a category, it deletes all of the material in that category from the hierarchy.
NOTE: Storeroom automatically saves the changes you make. A notification will appear in the top of the window that says Data Saved when you make changes to the page.
Last updated 1/3/2020.
Copyright© 2014–2018 by Azteca Systems, LLC. All rights reserved.