Transfer Material
The Transfer panel is used to move materials from one storeroom to another.
|
|
- Tap Transfer from the menu.
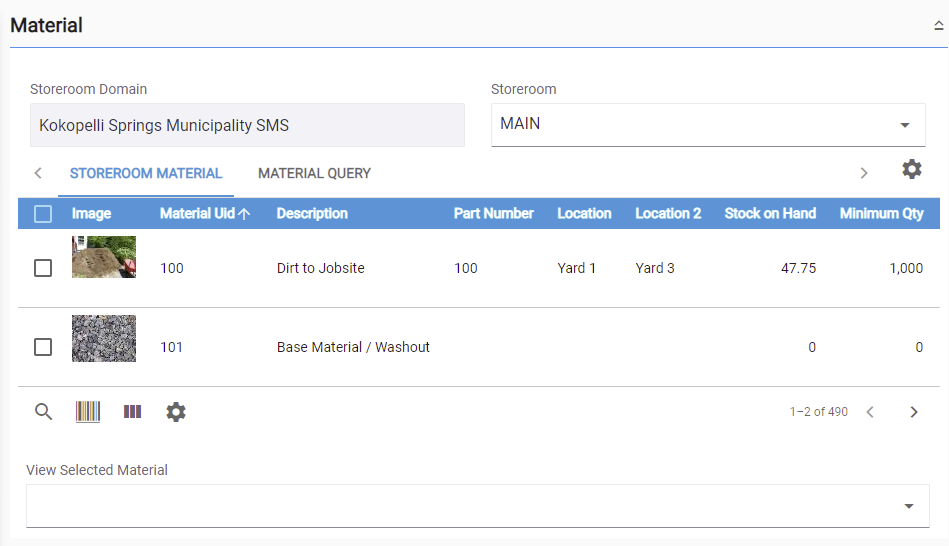
- On the Material panel, select a Storeroom from the drop-down list. This changes the list of materials. Materials can only be selected from one storeroom at a time.

-
Select materials from the list. See Search Materials for more information on using the search tabs to find materials.
- Enter the information in the Transfer panel to transfer the material.

For an explanation of the fields found on the Transfer panel, see Transfer Transaction Fields.
- Tap Add to List to add the materials to the Pending Transfers panel.
You can filter the material in the list by tapping Filter records and entering the first few letters or numbers of the material name, bin location, or part number.

You can modify the Pending Transfers panel in one of the following ways:
- Tap Column menu to modify the columns shown, such as if a column is included, or to change the order of the columns. Alternatively, reorder the columns by dragging and dropping them. Any changes made to the column settings are remembered.
- Tap Rows to adjust the number of rows shown in the panel. The number set in this panel will persist on all other transaction pages for the corresponding pending material panel.
- If you would like to add other materials to this transfer transaction, tap Clear in the Transfer panel to clear the fields, then add another material to the list.
- To remove one of the records from the Pending Transfers list, select the record and tap Delete selected records.
- To add an attachment, tap Add and browse to the desired file.

- Tap Commit to process all transfers listed. Tapping Commit adjusts the stock on hand for the storerooms selected.
- Tap Sign or Close on the Transaction Complete panel.
If you don't wish to sign the transaction now, see Capture a Signature on an Existing Transfer Transaction for more information.

