Add Serialized Material
Add or upload serial numbers for existing material or new material. Splittable material cannot be serialized.
|
|
 PREREQUISITES:
- Tap the arrow to the right of the material.
 TIP: The .csv template file is located in the Upload a CSV File panel. Tap Download Template to download the template.
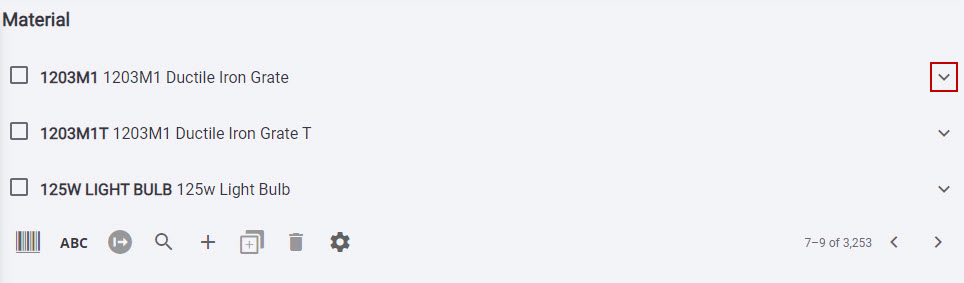
The Material panel lists all materials. You can filter the material in the list by tapping Filter records and entering the first few letters or numbers of the material name, bin location, or part number. Tap Rows to adjust the number of rows shown in the panel. The number set in this panel persists on all other administrative pages.
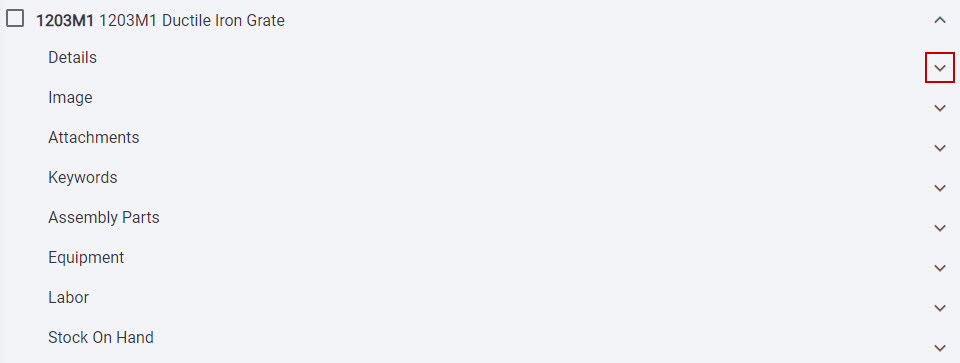
- Tap the arrow to the right of the Details panel.
- Select Is Serialized.
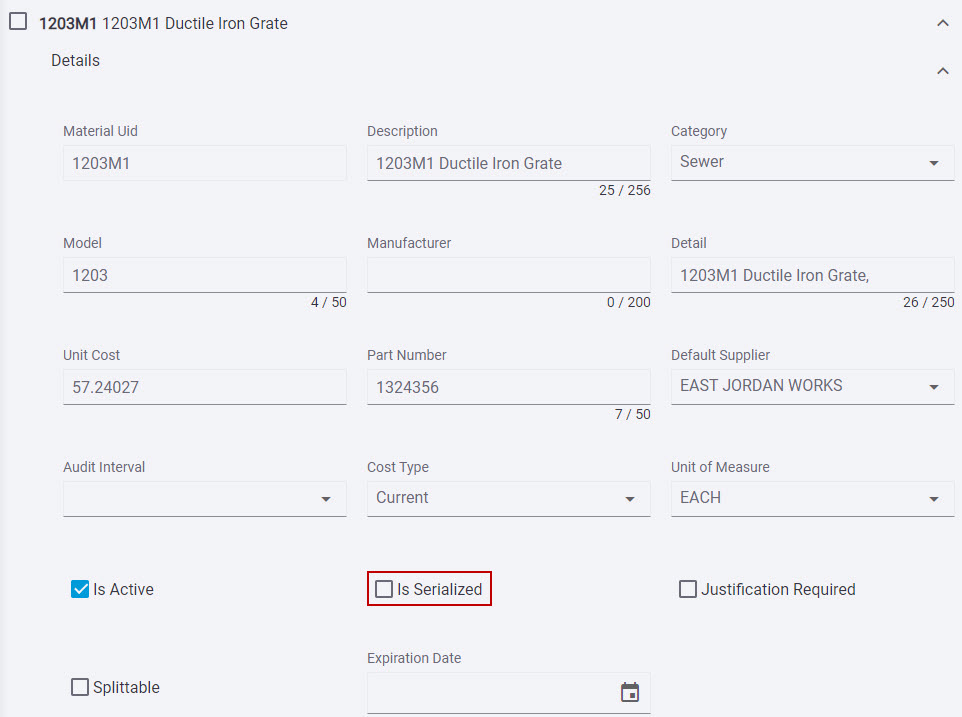
 NOTE: If Splittable is selected or the material has children material, then the Is Serialized check box cannot be selected.
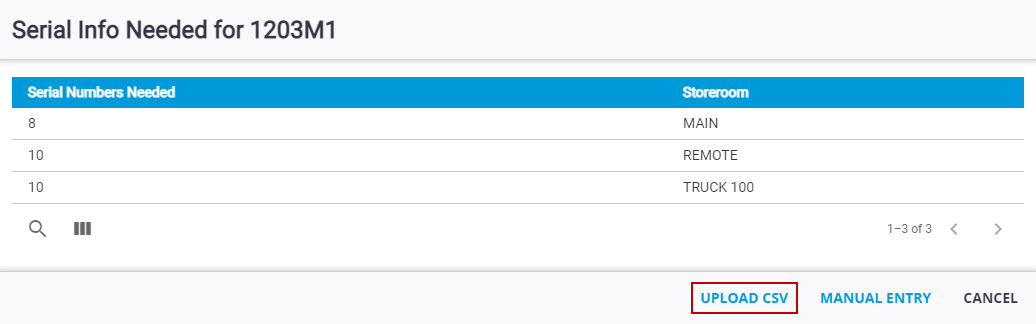
- Tap Upload CSV.
- Tap Download Template to download the .csv template file.
NOTE: The columns in the template are Serial Number, Warranty Date, Expiration Date, Storeroom, and Unit Cost. The Serial Number column is a required column. The Date columns are optional. The Storeroom column may be left blank if only one storeroom has stock on hand. Otherwise, it is a required column. The Unit Cost column is optional, to be used if converting the cost type to serial and individual unit costs for each serial number is desired. Otherwise, the material’s current unit cost will be applied to each serial number. The first row of the .csv file will be ignored by Storeroom, as it is meant to be used for headers.
- Tap Choose File. Browse to the file.

- Tap Done.
- Tap the arrow to the right of the material.
The Material panel lists all materials. You can filter the material in the list by tapping Filter records and entering the first few letters or numbers of the material name, bin location, or part number. Tap Rows to adjust the number of rows shown in the panel. The number set in this panel, will persist on all other administrative pages.
- Tap the arrow to the right of the Details panel.
- Select Is Serialized.
NOTE: If Splittable is selected or the material has children material, then the Is Serialized check box cannot be selected.
- Tap Manual Entry.

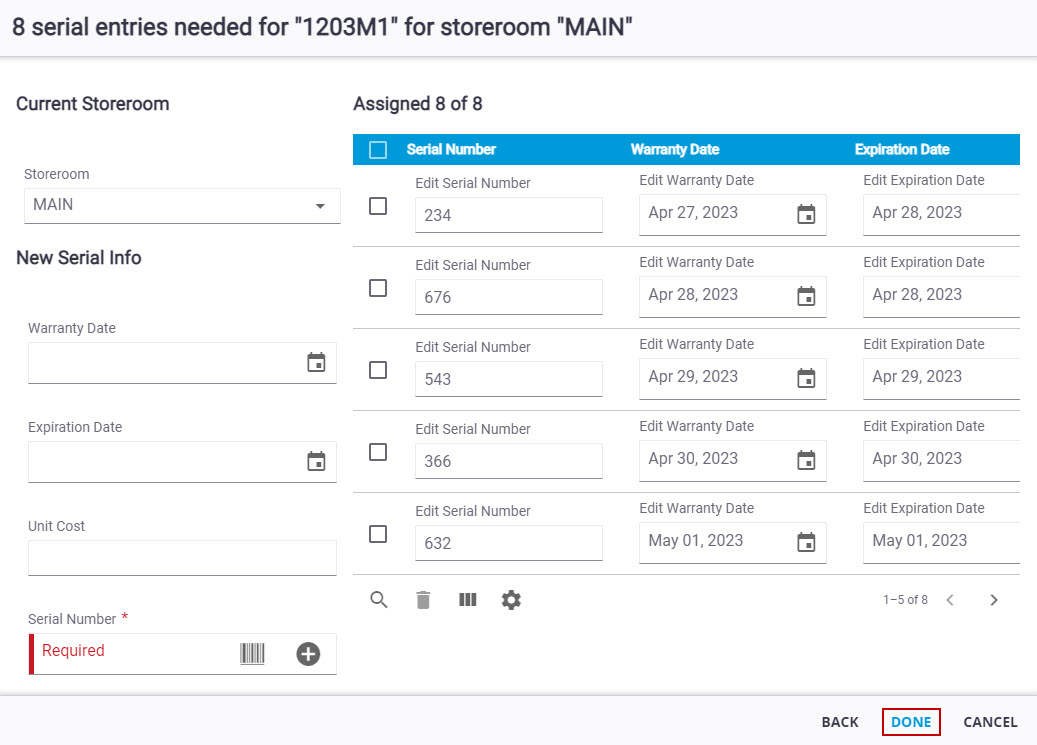
- Select the storeroom from the Storeroom drop-down list. The number of serial numbers needed for the selected storeroom is displayed at the top of the panel.
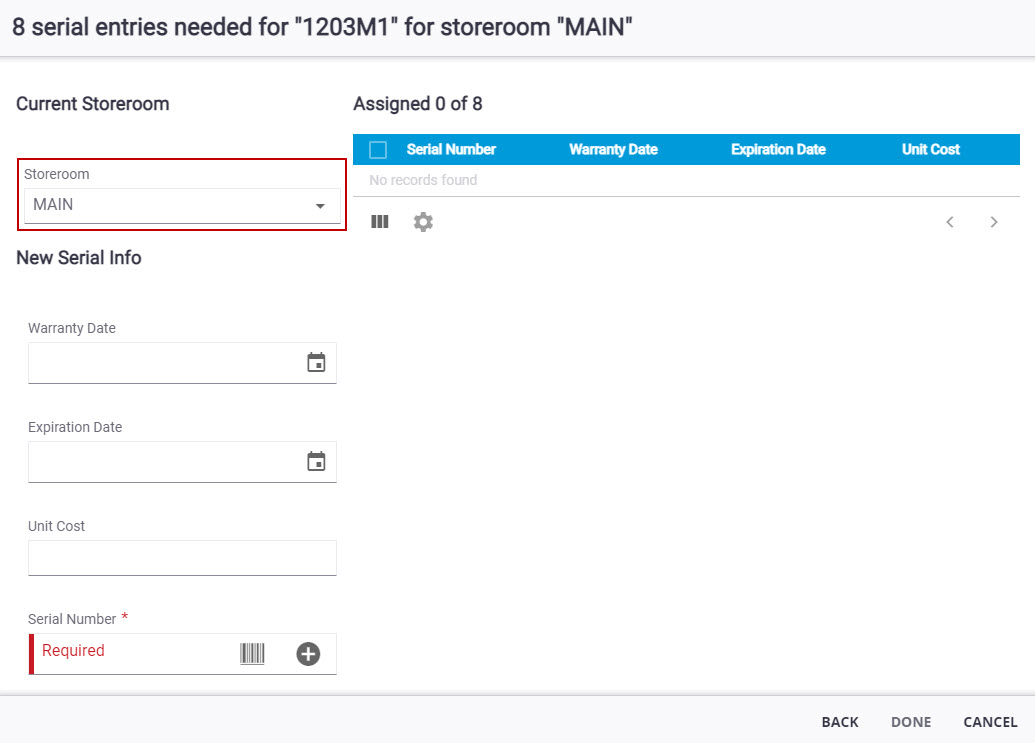
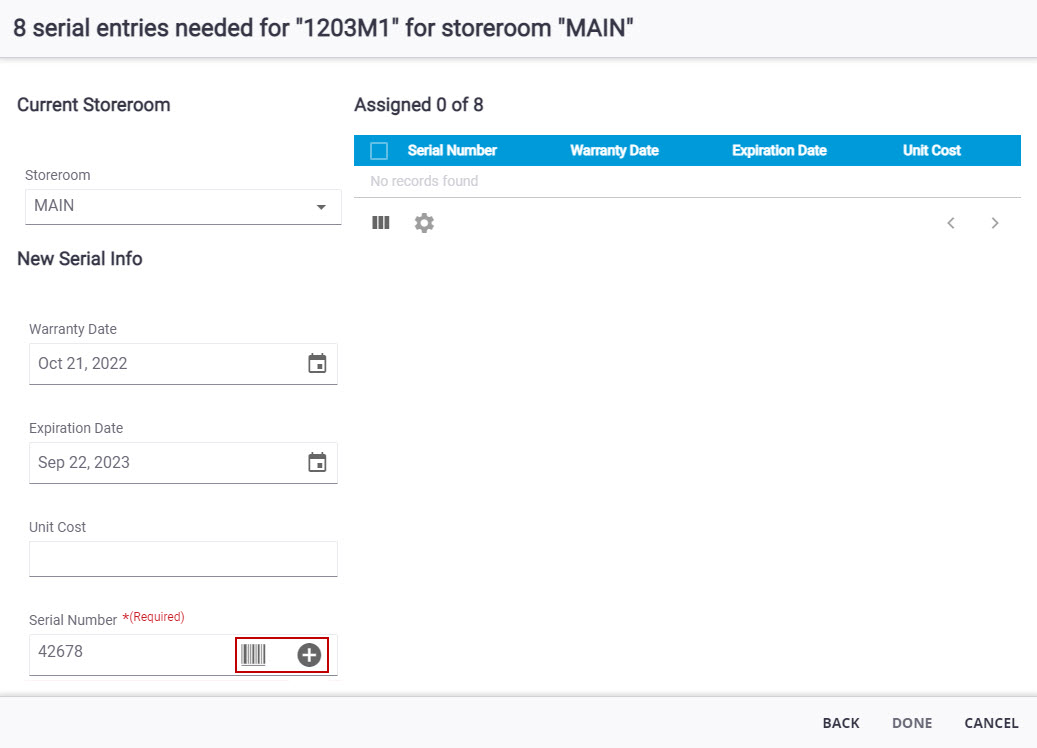
- Enter the serial number in the Serial Number field or use Scan Barcode to scan the serial number.
- Add the Warranty Date and Expiration Date using the calendar icon and add the unit cost in the Unit Cost field, if desired.
- Tap Add in the Serial Number field to add to the Assigned panel.
- Change the Storeroom to add serial numbers of the same material to a different storeroom. The number of serial numbers needed will update at the top of the panel when the storeroom is changed.
- When all the serial numbers are added, tap Done.
NOTE: Done is grayed out until all of the serial numbers have been added.