Add or Edit a Group
|
|
 PREREQUISITES:
- From the home page or General tab, click Groups.
The Groups panel lists all of the groups.
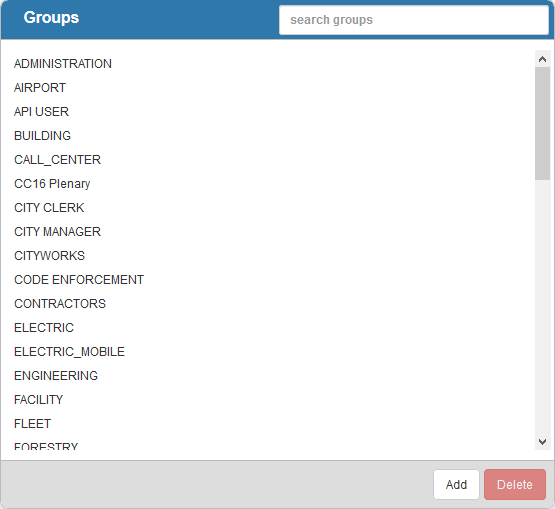
- Click Add to add a new group.
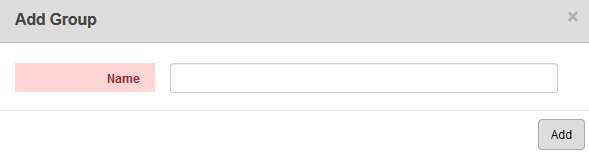
- Enter a Name for the group and click Add.
The new Group will display in the Groups panel. You can filter the list to find the new group by typing the first few letters of the group in the search box in the top-right corner.
- Select it and finish editing the details of the group in the Group Details panel.
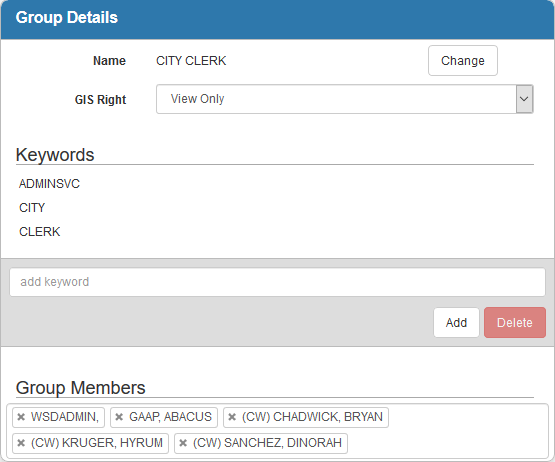
- If needed, edit the group's Name by clicking Change.
- Select the GIS Right for the for the group:
-
View Only for groups who will not be editing GIS data at any level and only viewing it.
 NOTE: There is one exception; the ability to update editable fields on an inspection is controlled by template security rather than by GIS Right. If a user is assigned View Only, they can still update editable fields on an inspection if they are a part of a group that has the Update permission assigned to them on the inspection template under Designer > Inspections > Template Security. Please see How To Edit Asset Attributes in Office on MyCityworks for more information.
- Attributes for groups who are allowed to edit only GIS attributes. In Office, it would be on the Editor form accessed via the GIS Search or work order Assets panel, as well as the inspection Assets panel under Editable Fields (if configured).
- Geometry for groups who are allowed to edit both GIS attributes and the map geometry.
- Add Keywords to the group by entering a keyword in the add keyword field and clicking Add.
- To delete a keyword, select it and click Delete.
- Add Group Members to the group by clicking in the Group Members field and selecting the members. Scroll to find the desired employee, or you can filter the list by typing the first few letters of the employee's name.
 TIP: Click the X next to the employee's name to remove them from the group.
- To edit a Group, open it from the Groups panel and make the desired changes.
NOTE:
