Update Cityworks


|
|
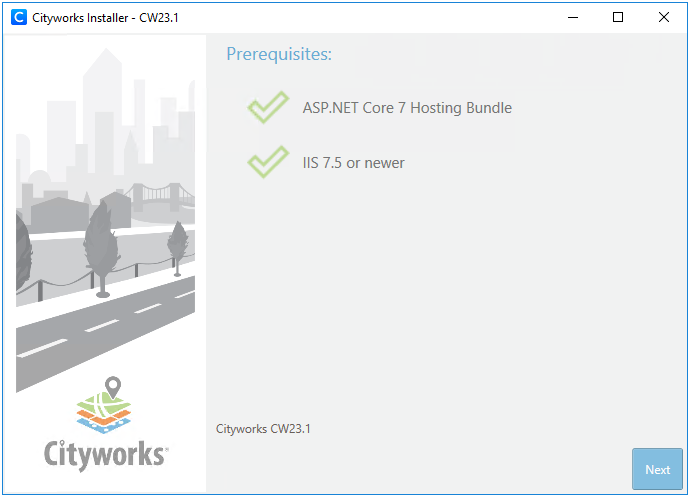
 PREREQUISITES:
- Navigate to where the Cityworks installer is located.
- Right-click the installer and select Run as Administrator to launch the installer.
The installer automatically checks to make sure all the prerequisites are installed. If an application is missing, the installer will display a message instructing you to install the needed prerequisites.
If all prerequisites are properly installed, two green check marks appear.
- Click Next.
The installer includes the following function:
- Install: This option is used when first creating a Cityworks site or to update an existing database.
 IMPORTANT: The impersonate user's password cannot contain special characters.
- Click Next.

- Select a Web Site under which the site will be installed. In this case, select Default Web Site.
- Enter the Alias of the existing site.
IMPORTANT: The Alias must be different from the Office Companion Alias so that each site can be accessed separately, even though they are using the same database.
- Enter the Install Location of the existing site.

- Click Next.
The user data location can be set to Default, or you can enter a custom path that Cityworks will publish user data to.
- Select either Default or Custom. If you selected Custom, enter the Data Location.
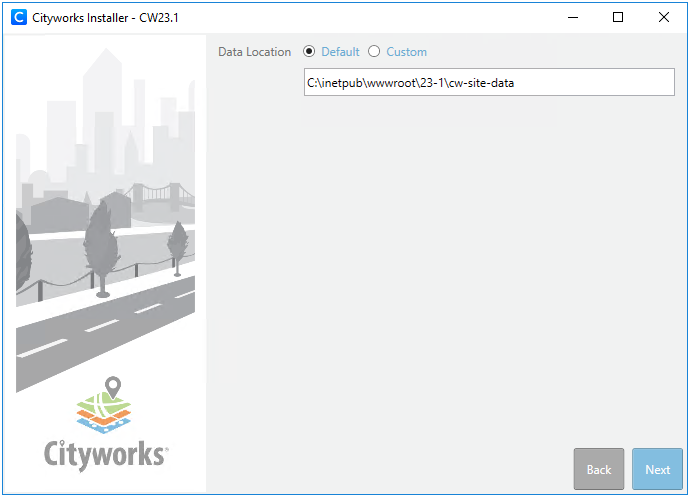
- Click Next.
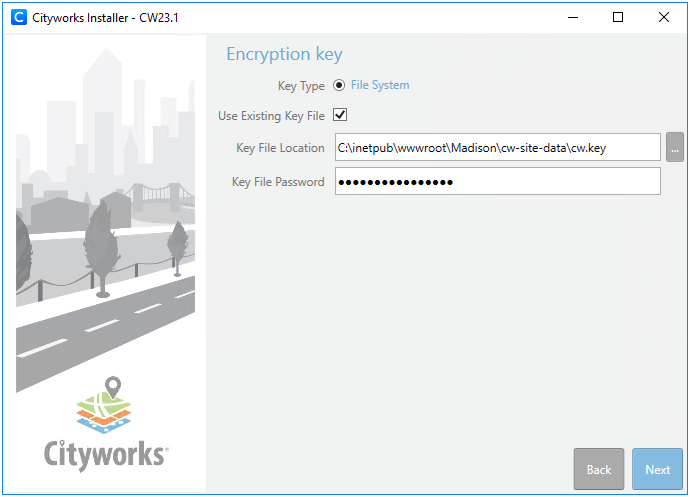
Key files encrypt data to provide greater security.
IMPORTANT: Once the key file is created, copy the key file and back it up in a secure location. If a server is destroyed and only one copy of the key file exists on that server, the encrypted data will be lost. The password must also be retained. If the password is lost, the encrypted data cannot be accessed.
- Select Use Existing Key File.
- Browse to your Key File Location if the field doesn't autopopulate.
- Enter the Key File Password.
- Click Next.

- Click Next.

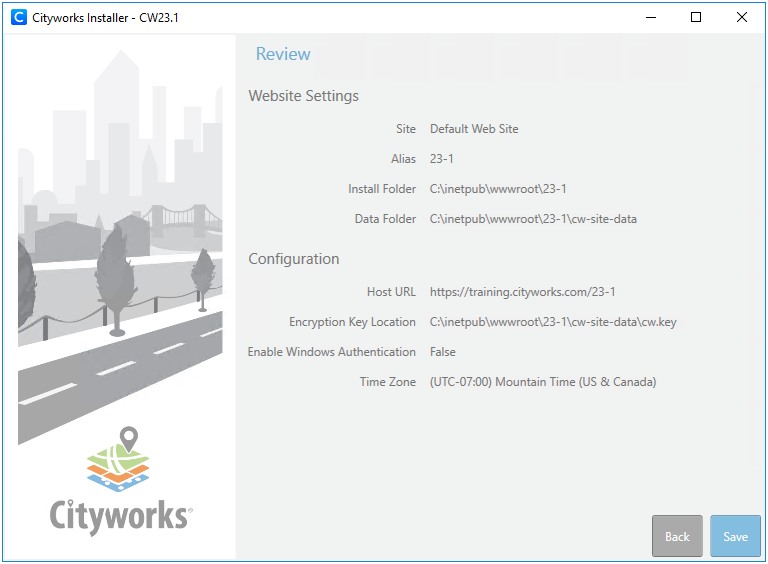
- Verify that the site information is correct in the Review section and click Save.
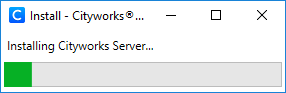
You will be asked if you want to proceed.
- Click Yes.

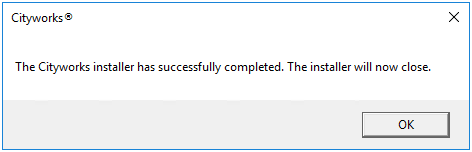
A box with a status bar displays while the virtual application is created. This could take several minutes.
- Click OK.
 NOTE: At this point, the site folders have been created under the alias and site location specified in the installer. These include the WebSite, cw-site, cw-site-data, DataMigrationManager, PluginManagerCli, and DatabaseManager folders.
IMPORTANT: The docx folder must be manually created or moved to the wwwroot folder when upgrading to 23.x.
Database Manager opens if .Net Framework 4.8 or newer is installed. If not, a message will display telling you to open and run Database Manager.
 TIP: If you need to manually open Database Manager, it can be accessed under ...\inetpub\wwwroot\<site_name>\DatabaseManager\Cityworks.DatabaseManager.exe or from the Cityworks 23 download file that you downloaded from MyCityworks.
NOTE: If you are using PLL, before running Database Manager, please check the DEFAULT_DURATION_TIME value in the TASK table. If the value is not NULL, 0, or an increment of 15, update this via the Edit:Task panel in PLL Admin.
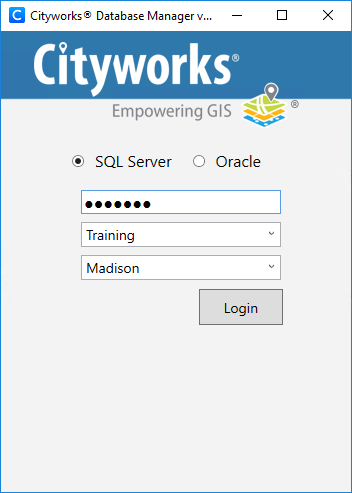
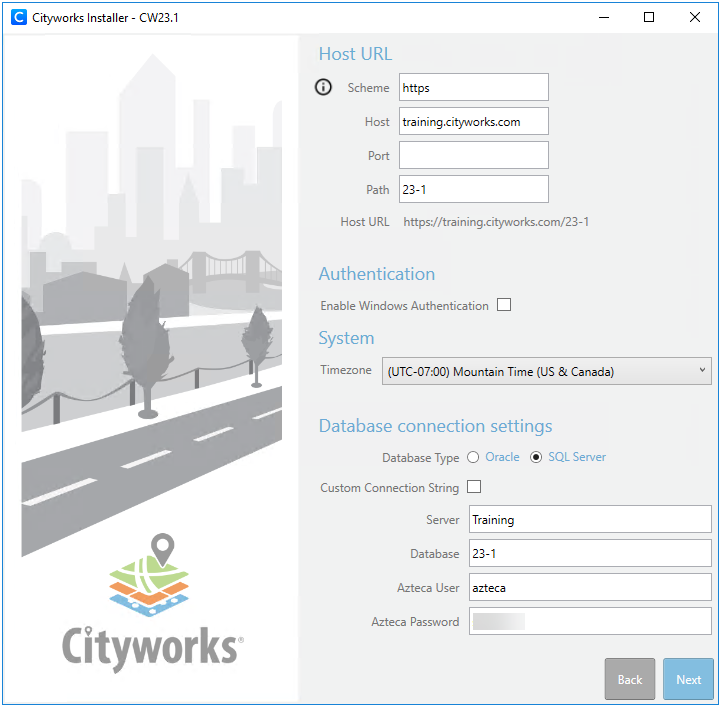
- Select either SQL Server or Oracle.
- Enter the Azteca user's password in the first text box.
- Select the server instance and Cityworks database from the drop-down lists.
- Click Login.
The Database Manager screen shows the progress while it checks the CWVERSION and migration history tables. Click Log to open or close the log. When the log is open, there are three options: Clear the contents of the log, Copy the log’s contents to clipboard, or Save the log’s contents.
Click the arrow next to Advanced Options for the following options:
- Verify Database: This option verifies the structure of the Cityworks database and identifies any errors. The errors are displayed in the log, followed by a list of SQL scripts that can be run to correct the errors.
- Check Database Version: This option checks the Cityworks database version.
- Configure CWDBAs: This option allows for the configuration of Cityworks Database Administrator (CWDBA) users. A CWDBA is created during the installation of the Cityworks database. These users will have access to the Admins and Domains options in Designer via the home page or General tab.
- Generate SQL: This option generates SQL syntax for the update. The syntax could be copied and ran directly against the Cityworks database outside of Database Manager.
- Disconnect: This option disconnects from the Cityworks database.
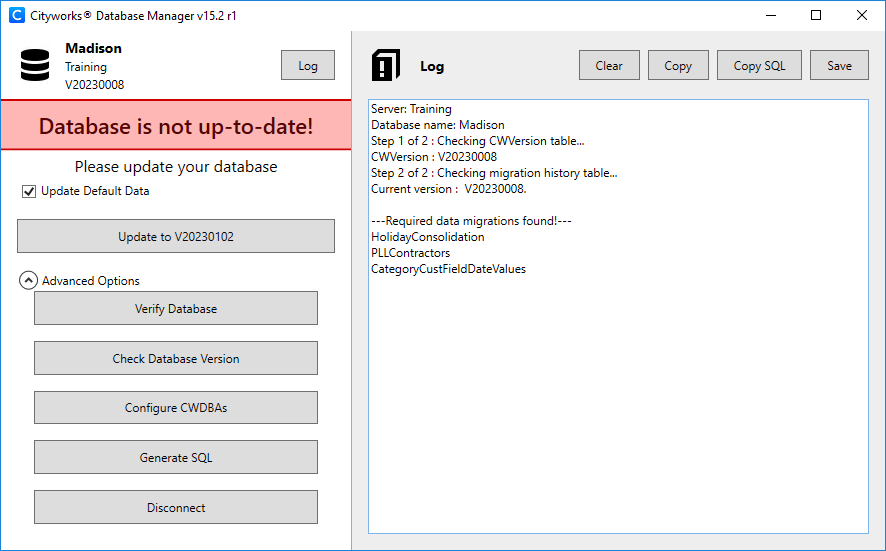
IMPORTANT: The red Database is not up-to-date message might not appear under certain circumstances, such as when upgrading from one service pack to another of the same version (for example, 23 to 23.1). Even if it does not appear, you still need to complete the following steps to update the database.
- The Update Default Data check box is selected by default. If left selected, Database Manager will check the default data in each of the tables listed below and update the data if it does not match the default values. Check the default behavior for these tables. If you have modified any of the default data in these tables and feel like those changes could be altered based on this information, you should clear the Update Default Data check box before proceeding. Ask our support department for more information.
- Data in these tables will always insert new or missing, and update existing records:
- azteca.CODEDESCFIELD
- azteca.DESCSCOREFIELD
- azteca.DEPOSIT_TYPE
- azteca.DISTRESSCODE
- azteca.EMPRELTABLEFIELD
- azteca.FEATURE_CONSOLE
- azteca.FEE_TYPE
- azteca.FLAG_SEVERITY
- azteca.FUNCTIONS_LEVELS
- azteca.INSPECTIONTYPE
- azteca.REPORTCATEGORY
- azteca.SOURCETABLEFIELD
- azteca.SYSTEM_STATUS
- azteca.SYSTEM_TABLES
- azteca.TASK_TYPE
- Specific codes involved with our Paver integration will also be updated like this.
- Data in these tables will only insert new or missing records:
- azteca.AUDIT_TRACE
- azteca.FUNCTIONS
- azteca.PWCODE
- azteca.PWCODETYPE
- azteca.QUERYFIELDCONFIGURATION
- azteca.SYSTEM_TABLES_COLUMNS
- Data in these tables is only insert if the table is empty:
- azteca.CCTVSCORE
- azteca.PWCONDSCORE
- azteca.PWUNIT
- azteca.TABLEFIELDMAP
- Click Update to V2023XXXX. You must do this step, regardless of which version of Cityworks you are upgrading from and to.
NOTE: When new tables are added to the database, they are not added to the PWSYSID table until they are populated through the Cityworks UI. This means that data imported to other tables is not added to the PWSYSID table until something else is added to that table via the UI.
Once the six steps have been successfully completed, users will receive a message indicating that the database was successfully updated. If not, the log will show where any issues were encountered.
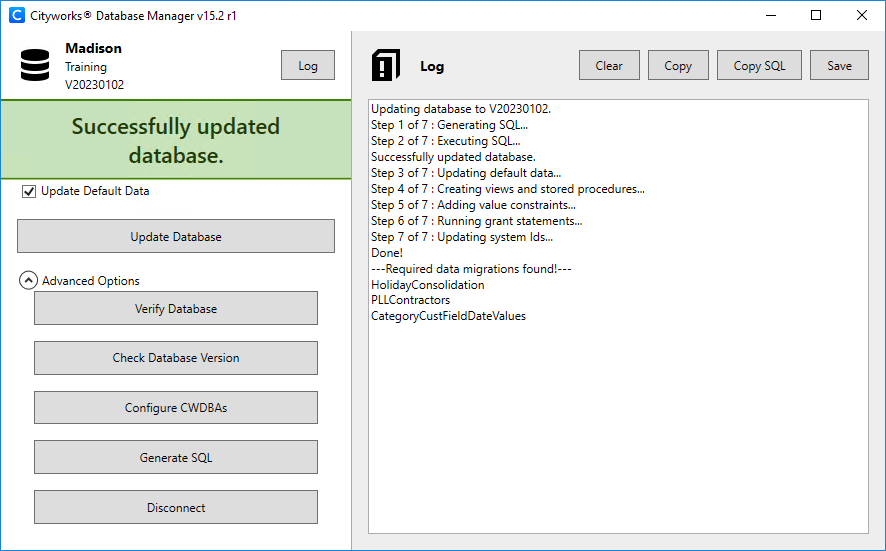
- Click Verify Database, found under Advanced Options, to identify any additional schema changes that need to be made. If there are any errors in the log after verifying the database, you can fix them by running the SQL scripts provided at the bottom of the log. For more information, see Knowledge Base article 11674: Upgrade Existing Cityworks Databases.
Once a 23.x site has been installed using an existing database, users logging in via Forms Authentication need to update their password when they log in for the first time. The password only needs to be reset once when upgrading to Cityworks 23.x or newer. See Reset Password for more information.