Create a Report
A report opens with just a body by default. A header and footer can be added. If master reports or templates are set up, a new report can be quickly created from them and edited to the specifications needed. Master reports are used when the content of the report doesn’t change but the data that’s under it does change. Templates are used to create a copy from the template that can then be modified. See Master Report in the Mescius online help for more information.
- Open the Report Designer.
The Data Source is automatically populated.
 NOTE: If the data source needs to be changed, click Data and click Add to add the data source.
- Click the Report tab at the top and click Add Header or Add Footer to add it to the report.
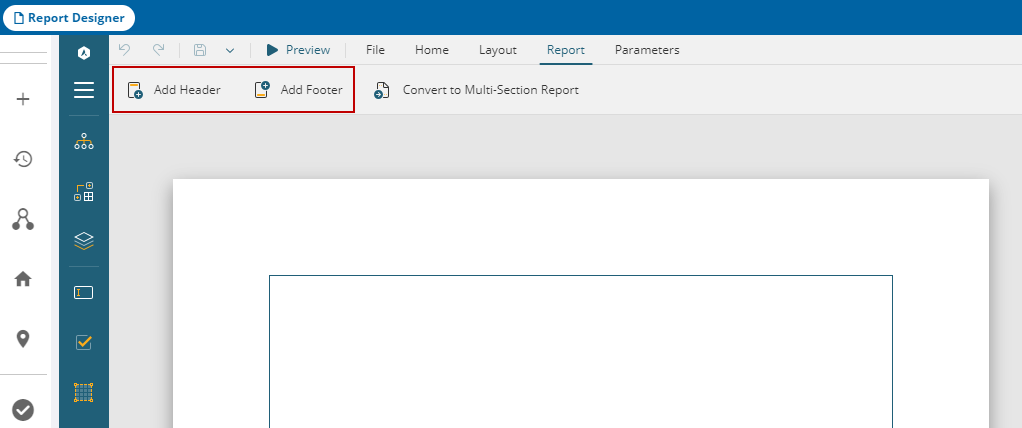
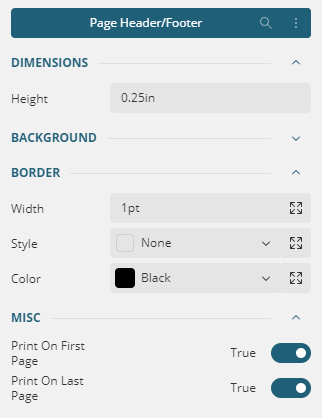
- Select it and use the panel on the right side to adjust the header and footer.
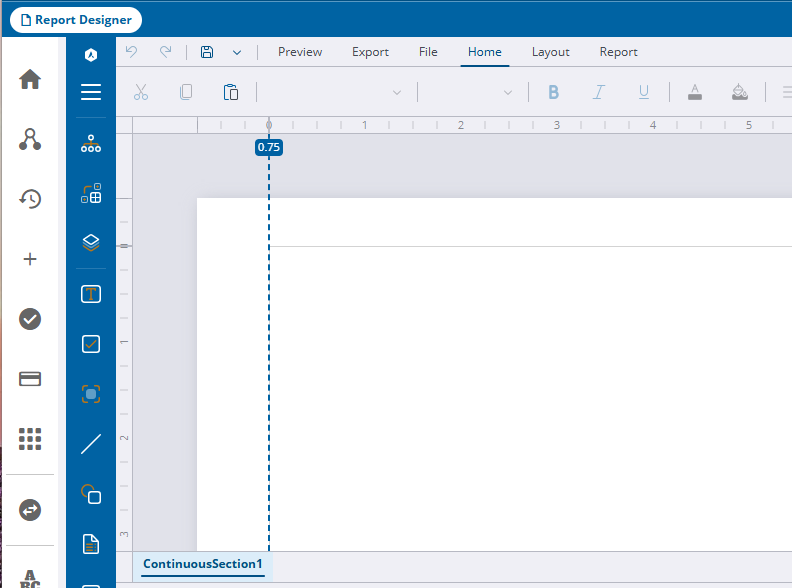
- In the lower-right corner, click Show Rulers and use the sliders to adjust the margins on the report. The default is 1" around.
The margin size should be consistent between a main report and any connected subreports.
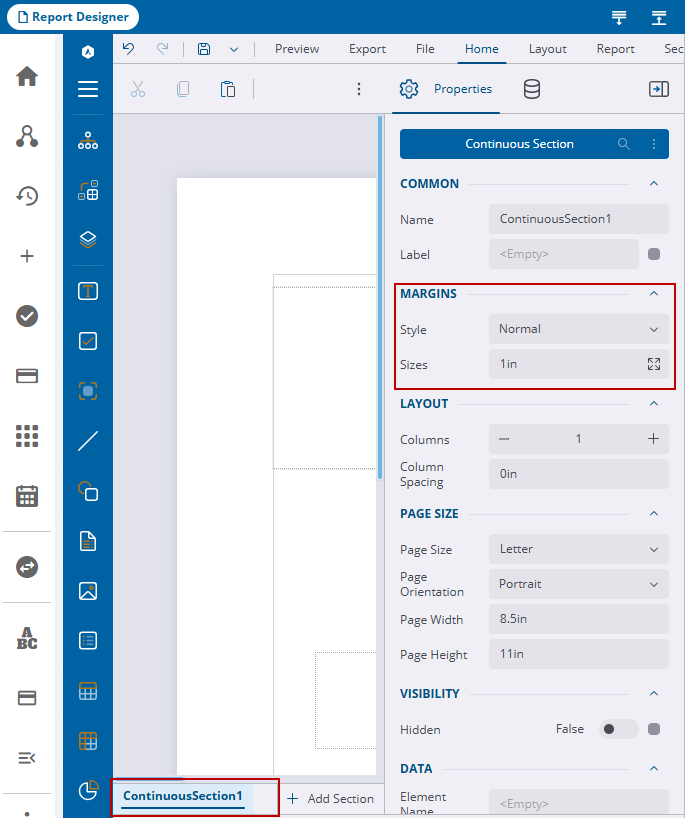
- Alternatively, click ContinuousSection1 in the lower-left corner of the report and click Properties to adjust the margins.
- Select the size under the Margins section.
- Select TextBox from the left side and paste it where you want to create a report title, and to start building the report.
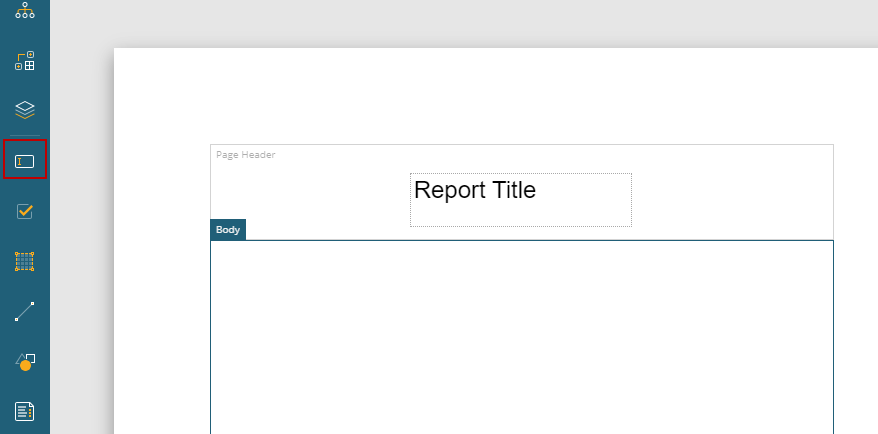
- Use the panel on the right side to adjust the text box.
There is a default or basic Data Set that needs to be edited.
- Click Add in the Data Sets section.
- Click DefaultDataSet to edit the data set or create a new one.
- Enter your SQL string to select your database and the tables you want to work with.
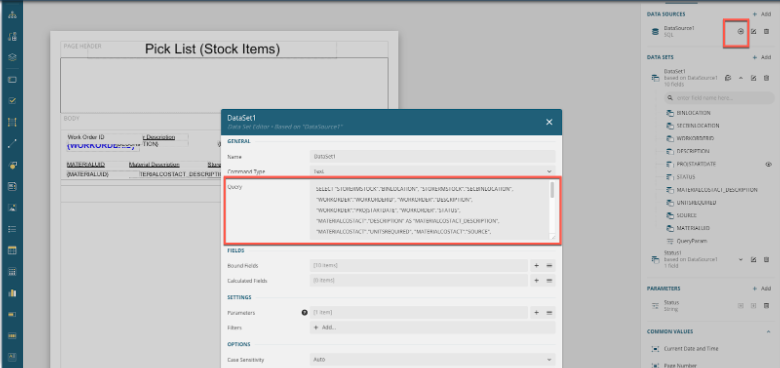
- Click Validate.
- Click OK.
Once the tables are selected, they are listed on the right.

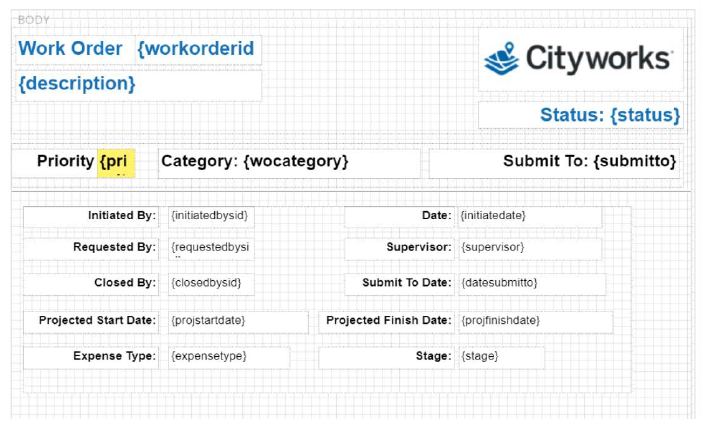
- Drag and drop fields from the data set to add the Cityworks data, or from the Common Values panel. See Add Fields to a Report for more information.
To print reports, certain parameters must be set for certain work activities. See Print Parameters for the name and data type required.
- Click Save in the upper-left corner of the top toolbar.
 IMPORTANT: Storeroom has a strict naming convention for printing to work, for example Audit.rdlx, Issue.rdlx, Receive.rdlx, Requisition.rdlx, and Transfer.rdlx.
- Click Preview to see if the report looks as expected. See Preview a Report for more information.
For more information on creating parameters, subreports, formatting reports, and more, see the ActiveReports training options on Learn.Trimble.com.
- Open the Report Designer.
- Click the Report tab at the top and click Add Header or Add Footer to add it to the report.
- Select it and use the panel on the right side to adjust the header and footer.
- In the lower-right corner, click Show Rulers and use the sliders to adjust the margins on the report. The default is 1" around.
The margin size should be consistent between a main report and any connected subreports.
- Alternatively, click ContinuousSection1 in the lower-left corner of the report and click Properties to adjust the margins.
- Select the size under the Margins section.
- Select TextBox from the AR Web Designer toolbar and drag it where you want to create a report title, and to start building the report.
- Use the Properties tab on the panel on the right side to adjust the settings of the text box.
- The default data set needs to be added, then edited to pull in the desired fields. See Add a Data Set for more information.
Once the tables are selected, they are listed on the right
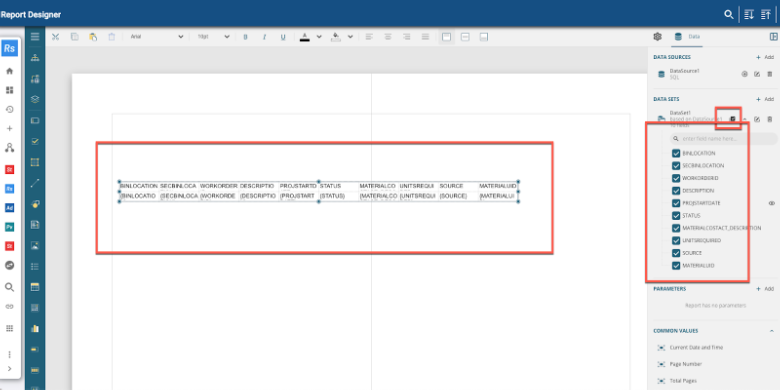
- Drag and drop fields from the data set to add the Trimble Unity data, or from the Common Values panel. See Add Fields to a Report for more information.
NOTE: If you are an Oracle client, additional formatting for fields is required. After a field is dropped in the report, it must be formatted this way: (First(field, "DataSetName")). For example, if the case number field was added it would look like the following: (First(CASE_NUMBER, "DefaultDataSet")).
 TIP: To use a grid to help spatially place fields on the report, click Show Grid in the lower-right corner. Click Snap Disabled to adjust the grid size and determine if you want the fields to snap to the grid or to the guides.
- Click Save in the upper-left corner of the top toolbar.
- Enter the name of the report and click Save.
IMPORTANT: Storeroom has a strict naming convention for printing to work, for example Audit.rdlx, Issue.rdlx, Receive.rdlx, Requisition.rdlx, and Transfer.rdlx.
- Click Preview to see if the report looks as expected. See Preview a Report for more information.
NOTE: If a report is created in the Report Designer, it may not appear in the Report Manager in Admin if the report doesn't meet the requirements to be classified as a work order, service request, or inspection report template. If the report is complex, or involves multi-parameters, it also does not appear in the Report Manager.
To print reports, certain parameters must be set for certain work activities. See Print Parameters for the name and data type required.
Here are some basic topics to help get started creating a report further:
For further instruction on creating reports, view ActiveReports training options on Learn.Trimble.com.