Create the Application in ArcGIS Online or Portal for ArcGIS
You will need to create an application in your ArcGIS Online or Portal for ArcGIS account in order to complete the installation of Single Sign-on.
For more information on creating an application in ArcGIS Online or Portal for ArcGIS, see Esri's documentation: ArcGIS Online Help or Portal for ArcGIS Help.
|
|
 PREREQUISITES:
- Log in to your ArcGIS Online or Portal for ArcGIS account.
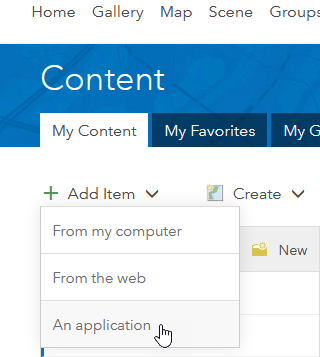
- Under My content, click Add Item and select An Application.
- Select Application for the Type, and enter a Title for the application. Enter Tags to make it easier to search for this application.
- Click Add Item.

- Navigate to the Settings tab for the application.
- In the Application Settings section, click Registered Info.
- The App ID is shown, and you can click Show Secret to view the App Secret. You will need these values to Install Cityworks Single Sign-on, so leave this window open.
- Return to your ArcGIS Online or Portal for ArcGIS account and click Update next to the application.
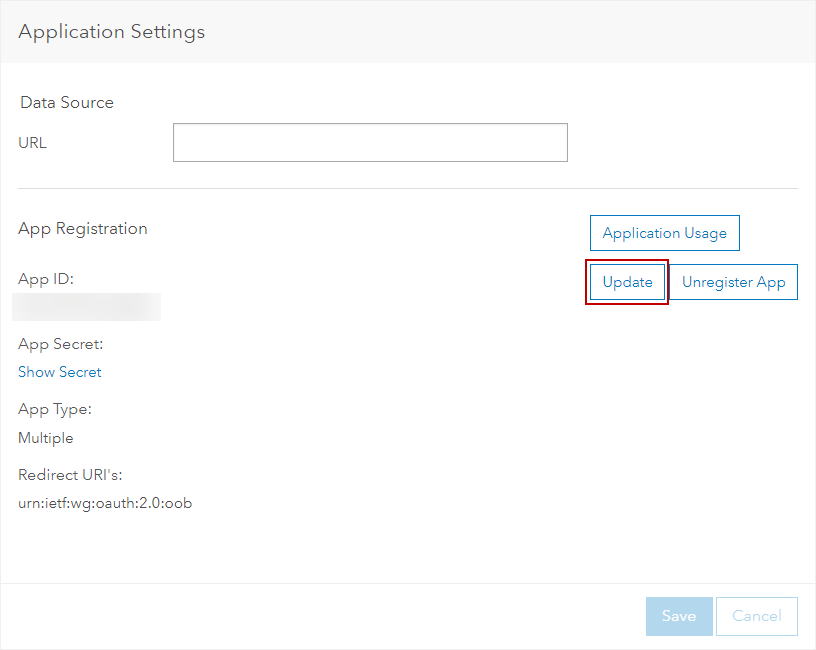
- Click Update next to the application.
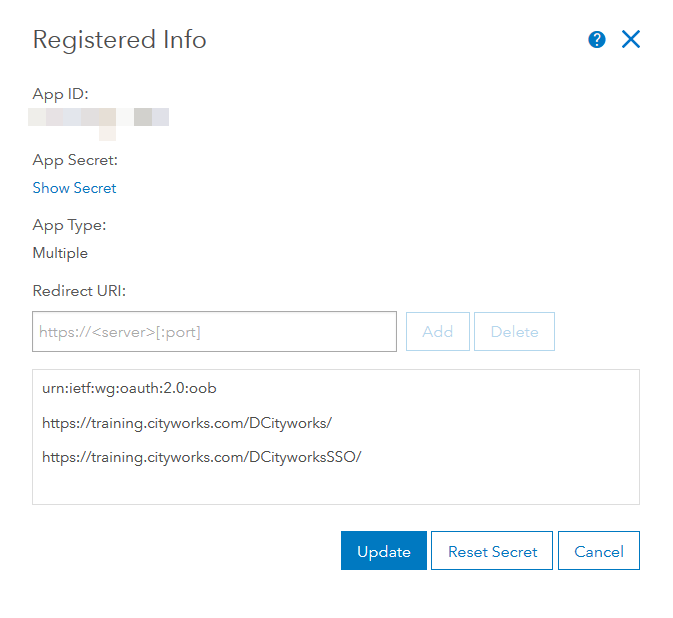
Note that there is already a Redirect URI value for urn:ietf:wg:oauth:2.0:oob. Leave this value.
- In the Redirect URI field, enter the URL for your main Cityworks site. Then enter the URL for your Single Sign-on site (for example, https://<server_name>/<SSO_site_name>). The tow URLs should be separated by a comma. Click Add.
The next step is to install Single Sign-on.

Documentation Feedback Form
Please give us feedback about this Cityworks guide.
If you have a feature enhancement request, please see the Ideas page on MyCityworks.
Last updated 2/25/2020.
Copyright© 2017–2019 by Azteca Systems, LLC. All rights reserved.