Add or Edit an Action Template
Action Templates determine what information is being sent and who it is being sent to, while an Action Event determines when this message is sent.
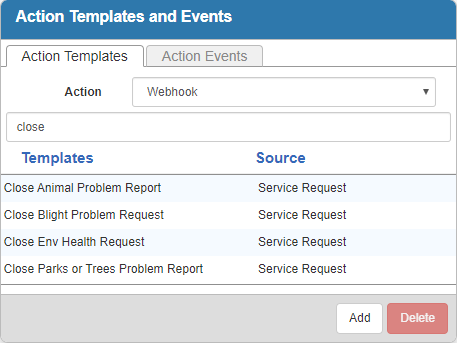
- From either the home page or General tab, click Action Manager.
- Click the Action Templates tab and select Webhook as the Action.
Any existing webhooks templates appear with the Source listed to the right of the template name. Any templates that are not associated to an Action Event appear grayed out in the list. You can filter the list by typing a few letters of the template in the search box.
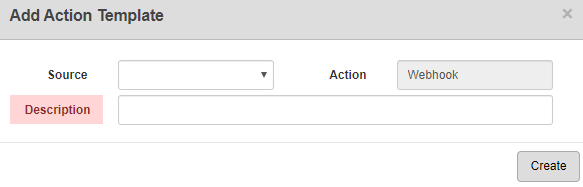
- Click Add.
- Select the Source and enter a Description.
- Click Create.
- Once the template is added, finish creating the template in the Template Details panel.
- To edit an Action Template, select it and make the desired changes.
- Click Save.
For an explanation of fields on the Template Details panel, see Action Manager Fields.
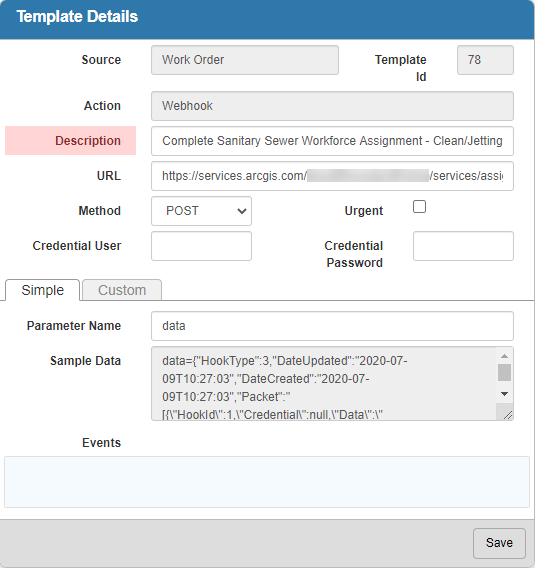
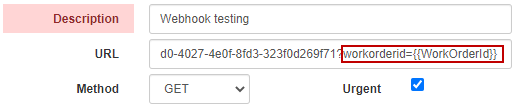
- Enter the URL the information is sent to.
The URL can be configured to inject values (keywords) from Cityworks, such as a work order ID, directly into the destination URL.
Starting in 15.6, the following notable keywords were added:
- Related work activity keywords: To use these, preface most existing keywords with the word Related, for example, RelatedRequestId or RelatedWorkOrderId.
- SiteBaseUrl: This keyword fills in the Cityworks URL preceded by https. This is useful when using multiple Cityworks sites. For example, when there are different Cityworks sites used for testing and production.
- Select the Urgent check box to send the webhook immediately after the event has been triggered.
 BEST PRACTICE: Do not select Urgent unless the webhook is time-sensitive. Typically, webhooks are sent to the message queue service where they are processed at a preset interval.
- Enter the Credential User and Credential Password if the URL the webhook is being sent to uses basic authentication. For more information on basic authentication and other authentication schemes, see https://developer.mozilla.org/en-US/docs/Web/HTTP/Authentication.
 NOTE: Cityworks, ArcGIS, and other APIs often use securely generated tokens instead of basic authentication for client connections.
There are two tabs on the Template Details panel that you can use to configure the Webhook, the Simple tab and the Custom tab.
Use the Simple tab if you'd like to create a webhook that sends a message that an event has occurred in Cityworks to a third party.
- Click the Simple tab.
- Enter a Parameter Name. The default parameter name is data.
The Sample Data box shows a sample of the information that is sent once triggered.
- Click Save.
Use the Custom tab if you'd like to configure your own webhook with a number of different values and actions available. This allows you to link and configure custom workflows in Cityworks and in conjunction with third parties that aren't currently supported.
 IMPORTANT: When using custom webhooks, the user is responsible for the information and the format in which the information is being sent out to third parties. Any sensitive or malformed data is the responsibility of the user. We recommend someone with API experience configure any custom webhooks.
- Click the Custom tab.
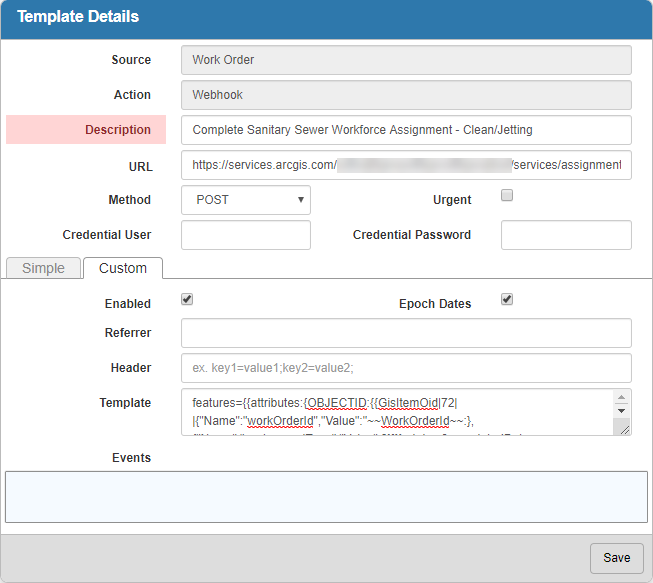
- Select the Enabled check box to create a Custom webhook. If this is not selected, the webhook defaults to the Simple tab.
- Select Epoch Dates if you'd like the date expressed in milliseconds since January 1, 1970. Epoch Dates are used to work specifically with Esri's epoch date model.
The Template field is what contains the body of the HTTP request sent by a webhook.
- Create the custom webhook in the Template box according to your specified needs.
Custom webhooks use core object properties of RequestBase, InspectionBase, WorkOrderBase, CaObjectItemBase, and others for related information like attachments, comments, etc. See Access Complete List of Webhook Properties for more information.
NOTE: Certain IDs are required to set up the webhook accurately such as the desired GIS Service ID, Employee Sid, or Inspection Observation.
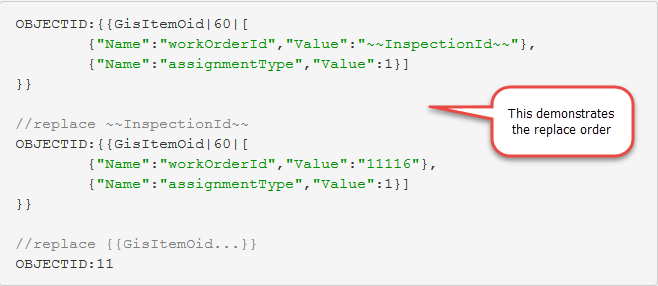
The properties included in the template are replaced with real Cityworks data once the action is triggered according to an "order of operations" algorithm. The replace order is ``property``, ~~property~~, {{property}}.
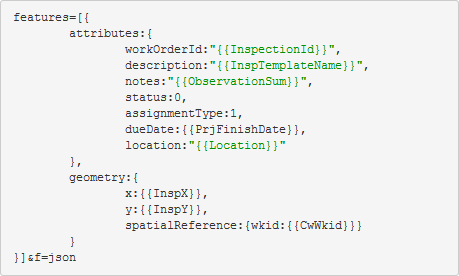
Here are some examples of a custom webhook Template designed to call a Workforce service:
Create a Workforce Item on Inspection Create
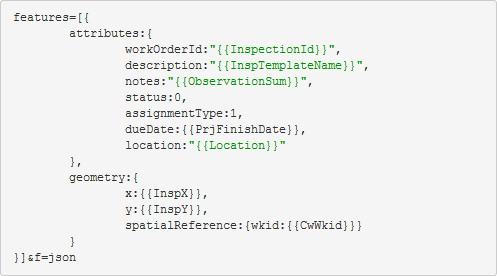
Update Workforce Item on Inspection Close
Delete Workforce Item on Inspection Delete

- Click Save.
Once an Action Template is created and associated with an Action Event, the Webhook calls out to an outside party once triggered. See Add or Edit an Action Event to finish configuring a Webhook.