Define GIS Services
This section covers some basics regarding GIS services. For more detailed information, see Configure GIS Services in the Designer Office Companion 23 Guide on MyCityworks.
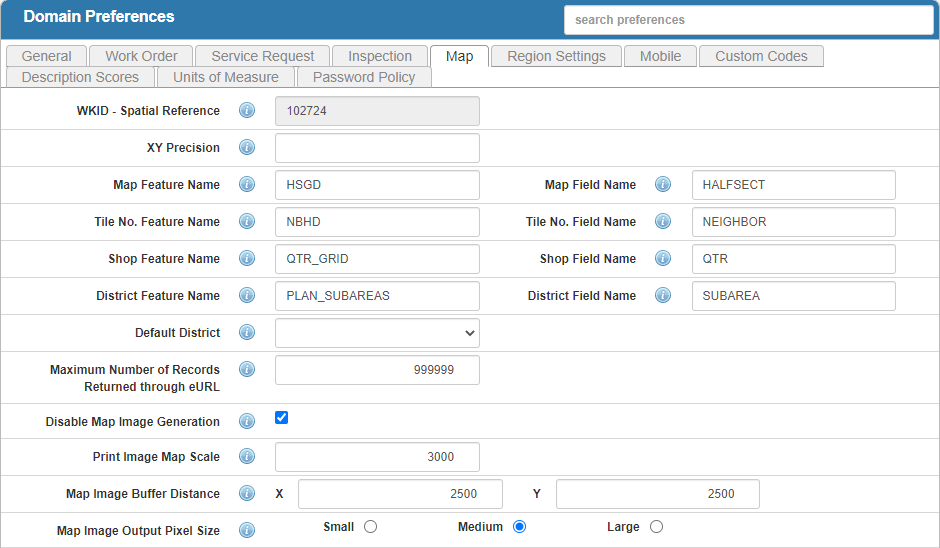
- Log in to Designer and navigate to Preferences > Map.
- The WKID - Spatial Reference is a read-only field that cannot be changed.
- Navigate to GIS > Services.
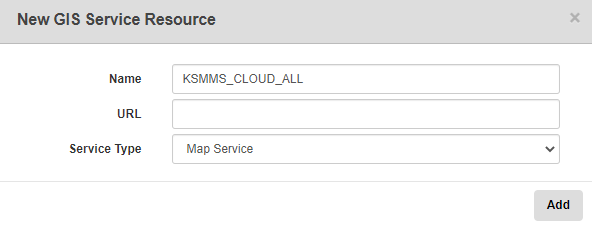
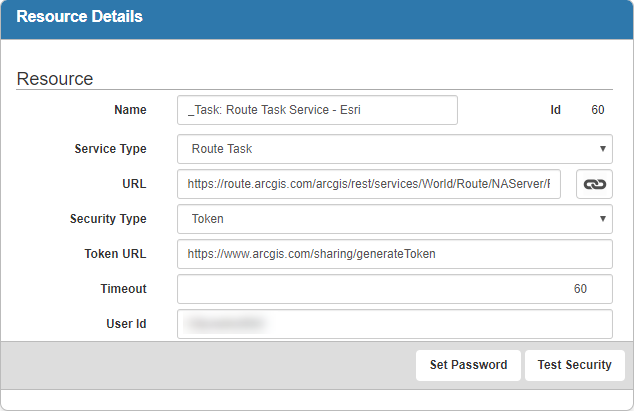
- Click Add in the GIS Service Resources panel.
- Enter the Name of the service, the Url of the service, and select a Service Type. Click Add.
The following service types are available:
- Feature Layer: Select when using a specific layer from the map service, not the entire map. The layer can be either a layer (spatial) or a table (non-spatial). Starting in 15.6, a feature service can be used with Equipment Change Out.
- Geocode: Select when using a geocode service (/GeocodeServer).
- Geometry: Select when using a geometry service (/GeometryServer).
- Image Map Service: Select when using an image service (/ImageServer).
- Map Service: Select when using a non-cached map service (/MapServer) where the data is dynamically rendered. A non-cached map service has Single Fused Map Cache set to false in the REST URL defined for the service resource. This is an Esri published option.
- Mobile Map Package: Select when using a mobile map package (.mmpk) for offline use in the version 7 or newer Android and iOS apps.
- Print Task: Select to add a printing service to generate images for map printing. The print task service must point to an Export Web Map Task service.
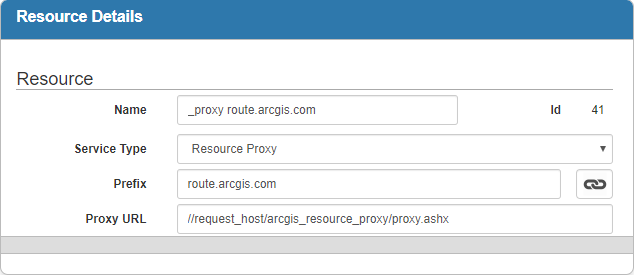
- Resource Proxy: Select to configure proxy entries for use in the JavaScript map only. Enter a Prefix and Proxy Url. See Add a Resource Proxy in the Designer Office Companion 23 Guide for more information.
- Route Task: Select to add a routing service for use with the Routing map tool.
- SOE: Select when using an SOE service (/MapServer/exts/CityworksSOE). An SOE service only needs to be defined if working with related assets or interactions with assets not present in the map services. The SOE can be used with Equipment Change Out.
- Tile Package: Select when using a tile package (.tpk) file for offline use in the Android and iOS native apps. See Add a Tile Package in the Designer Office Companion 23 Guide for more information.

- Tiled Map Service: Select when using a cached map (/MapServer) where the data is pulled from saved images rather than being dynamically rendered. A cached map service has Single Fused Map Cache set to true in the REST URL defined for the service resource. This is an Esri published option.
- Vector Tile Service: Select when using a vector tile map service to better represent scale when zooming in or out on the map. It usually serves as a basemap layer or reference layer under a map service layer.
- Web Map: Select when using an ArcGIS.com or Portal web map. Copy the ID portion of the web map URL and paste it in the Web Map Id field, and enter a Sharing Url.
The following Security Types are available:
- No Security: Select this option if your services do not have security.
- Generate Token: Select this option to use token-based security.
- OAuth2 User: Select this option if you use ArcGIS Online and want user-based security.
- OAuth2 App: Select this option if you use ArcGIS Online and want application-based security. This option allows you to use a client ID instead of your ArcGIS Online login or password.
See Configure GIS Services in the Designer Office Companion 23 Guide for more information about each security type and their configuration.
The Geometry REST URL, as with any REST URL, can be determined by navigating to the ArcGIS Services Directory (http://<host>/ArcGIS/rest/services/Geometry/GeometryServer if accessing the server from another machine, or http://localhost/ArcGIS/rest/services/Geometry/GeometryServer if accessing it straight from the server). As well, you may need to include the port number, if access has not been set up via the Web Adaptor (HTTP is :6080 and HTTPS is :6443). Then select the desired service from the home page and copy the address in the browser.
REST URL fields are required for any map, geocode, geometry, or SOE service. This guarantees that the GIS services are looked for in the correct location. REST URL fields are included to not only allow for online service resources to be accessed, such as ArcGIS.com (formerly ArcGIS Online), but because this method is now the preferred way to identify where a resource is located. The URL must be populated with a value that can be resolved. For example, http://localhost/arcgis/rest/services/main/MapServer only works when on the actual machine hosting the service, whereas http://<host>/arcgis/rest/services/main/MapServer works wherever the host can be resolved.
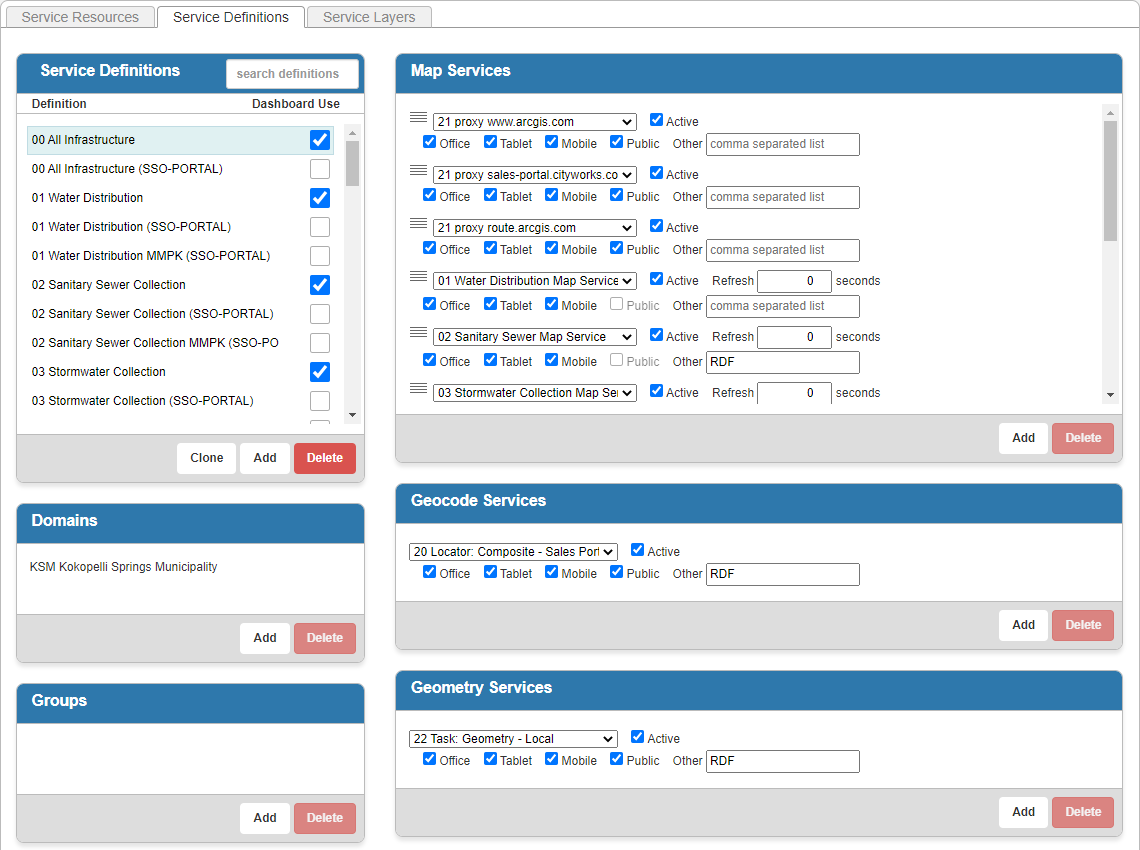
- Click the Service Definitions tab.
-
There are three panels for defining the services: Map Services, Geocode Services, and Geometry Services. You can
- Click Add in the respective panel to add a new service.
- Select the uses for the service: Office, Tablet, Mobile, Public, or Other.
- To associate the service to a Domain, Group, or individual Employees, click Add in the respective panel.
At least one service definition needs to be assigned to a domain, even if there are other service definitions assigned to groups and/or employees. This allows for the CWDOMAIN table to have the MAPSERVICEID populated.
 NOTE: If a service is not defined for Public use, the search results that a user displays on a map defaults to an ArcGIS Online map service. Users can change it to another ArcGIS Online map service, but the change is only respected during the current user session.
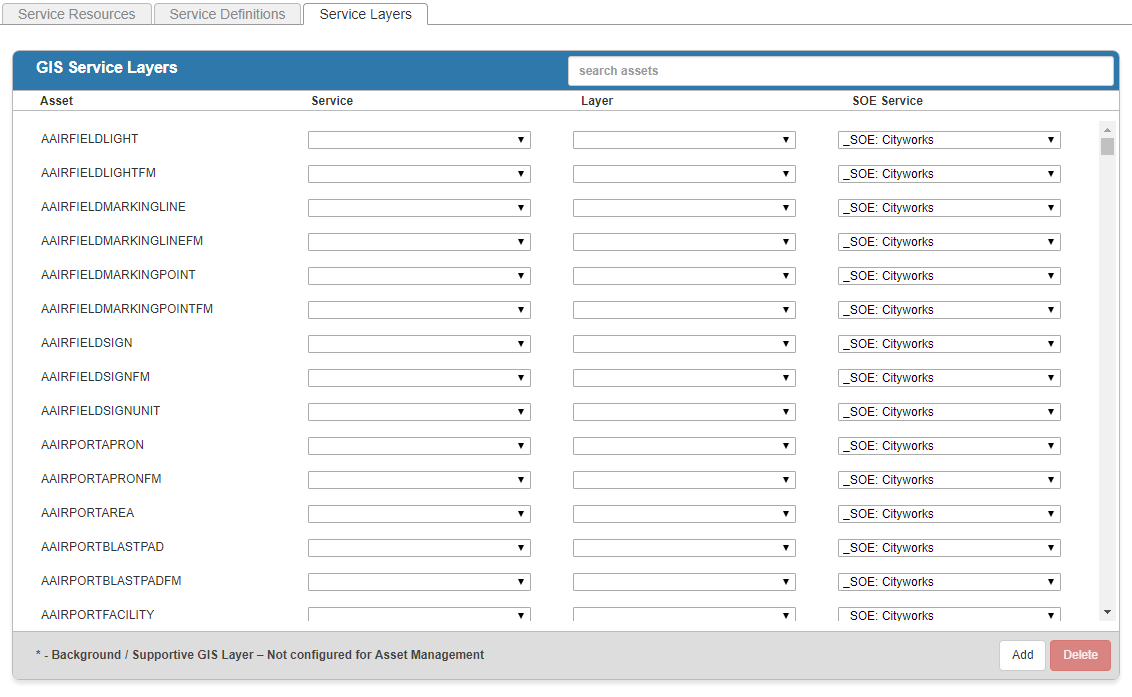
- Click the Service Layers tab.
The Service Layers tab is used to configure the services for the asset layers, as well as other GIS layers used throughout the application (map page, tile number, etc.).
- Select the desired GIS service from the Service drop-down list and the corresponding layer name from the Layer drop-down list if you want the defined asset to be resolved via the REST. Select the desired SOE service from the SOE Service drop-down list if you want the defined asset to be resolved via the Cityworks SOE.