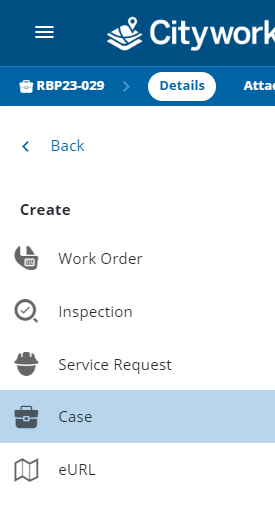
Create a Case
Once a case template is created, you can create a new permit, business license, or code enforcement from the Case Templates panel.
 NOTE: Custom forms can be configured by the administrator and applied to specific areas in the UI, such as based on a specific template, fees, comments, and more. See
 BEST PRACTICE: For PLL case templates configured for use in the mobile apps, we recommend not using Skip Intake when creating cases in Respond.
|
|
 PREREQUISITES:
- To create a new case,
 TIP: See Create a PLL Case on MyCityworks for a help video on this subject. See Create a PLL Case on MyCityworks for a quick start guide.
The Case Templates panel appears.
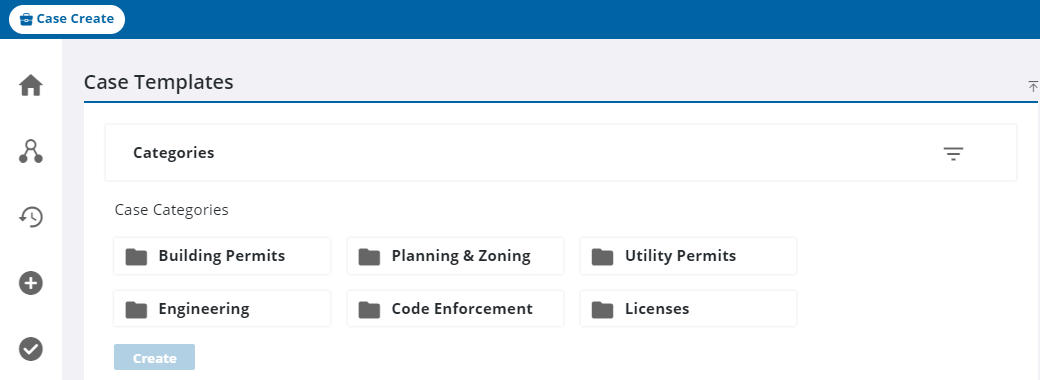
- Select the desired category for the case. You can use the filter icon to filter the categories.
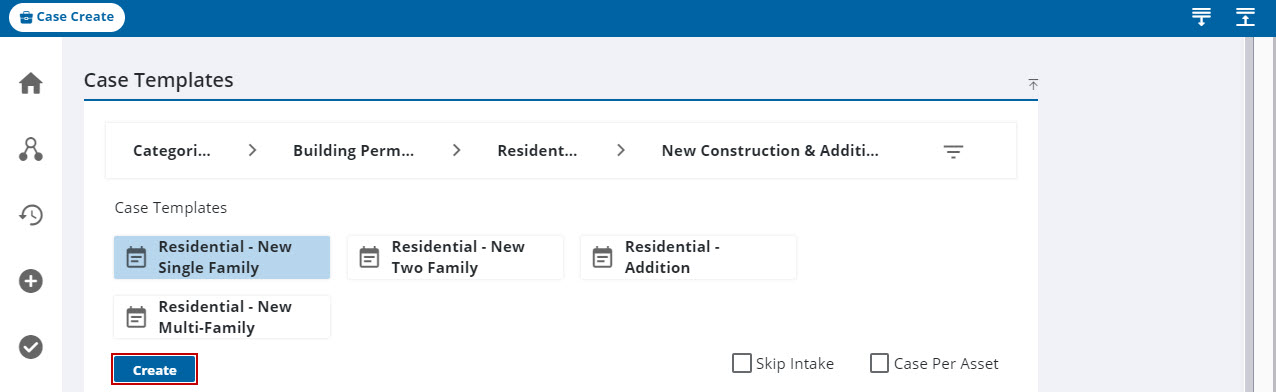
- Once a category is selected, select a case template. There may be more than one set of categories.
- Clear the Skip Intake check box to proceed to the Case Intake page. Select the Skip Intake check box if you want to skip the Case Intake page and move directly to the
NOTE: The Cityworks administrator has the ability to hide this check box as well as make it selected by default for the end user. See
- Select the Case Per Asset check box to create a case for each asset selected on the map. See Add an Address for information on adding assets to the case.
NOTE: As of Respond 4.1 and newer, a Case Per Parent Address check box has been added when creating a PLL case from a parent case. Select this check box to create a case for each asset selected on the map. See Create a Related Work Activity for more information on creating a work activity from a parent case.
See Case Intake or Case Summary depending on how the template is set up by your administrator or if you selected/cleared the Skip Intake check box to complete the process of creating a case.
 IMPORTANT: If you select a case template which requires default case data and the Skip Intake check box is selected, a "Case Data is required on create case" message appears and the case cannot be created. Clear the Skip Intake check box to open the Case Intake page and add the required case data in order to create the case.