Update Cityworks
Existing Cityworks 23.x sites can be updated using the installer, using the New Installation option. Even though it is called New Installation, during the process on an existing site, the 23.x site is overwritten with the newer version.
 IMPORTANT: Back up your site files in case the upgrade process fails, or other unforeseen errors occur.
|
|
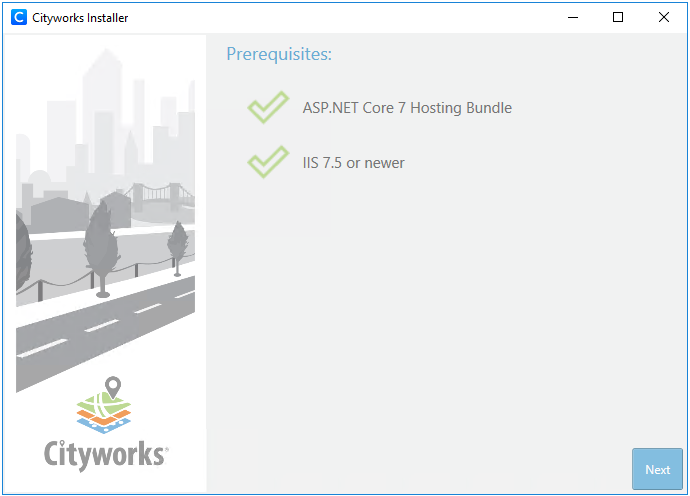
 PREREQUISITES:
- Navigate to where the Cityworks installer is located.
- Right-click the installer and select Run as Administrator to launch the installer.
The installer automatically checks to make sure all the prerequisites are installed. If an application is missing, the installer displays a message instructing you to install the needed prerequisites.
If all prerequisites are properly installed, two green check marks appear.
- Click Next.
- Click Launch Host Installer.
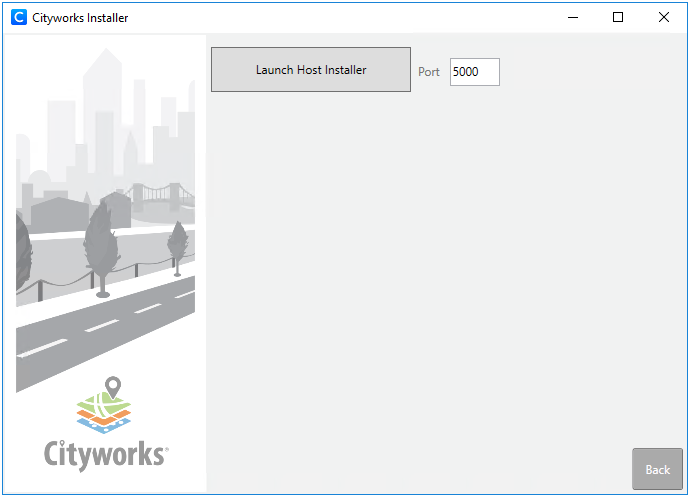
The host installer opens in a web browser.
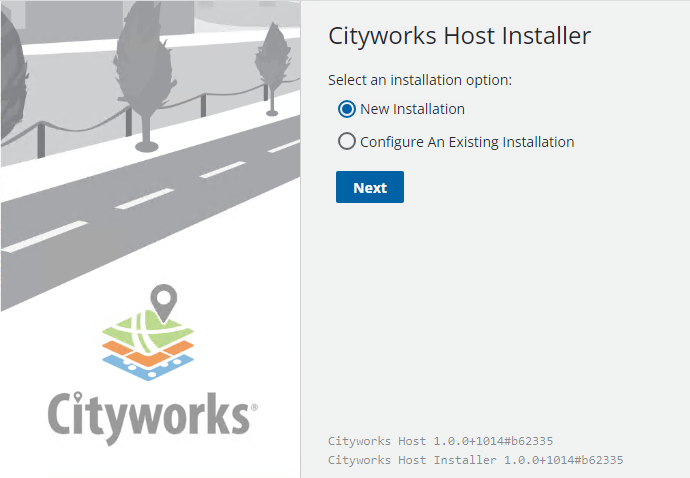
The installer includes the following functions:
- New Installation: This option is used when first creating a Cityworks site or to update an existing database.
- Configure An Existing Installation: This option is used to edit any settings previously configured for the host application or core app.
- Select New Installation and click Next.
- Select a Website under which the site is installed.
- Enter the Alias of the existing site.
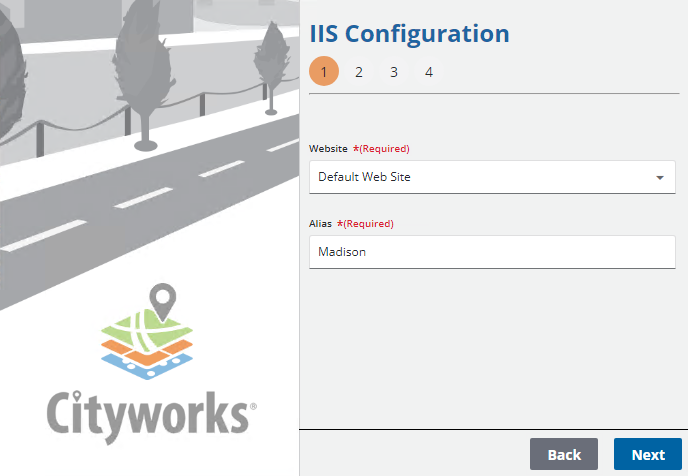
- Click Next.
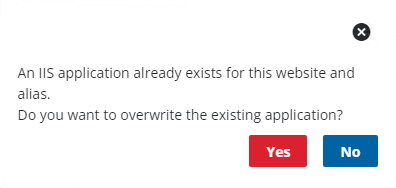
A message appears to let you know an IIS application already exists for the website and alias.
- Click Yes to overwrite the existing website and alias.
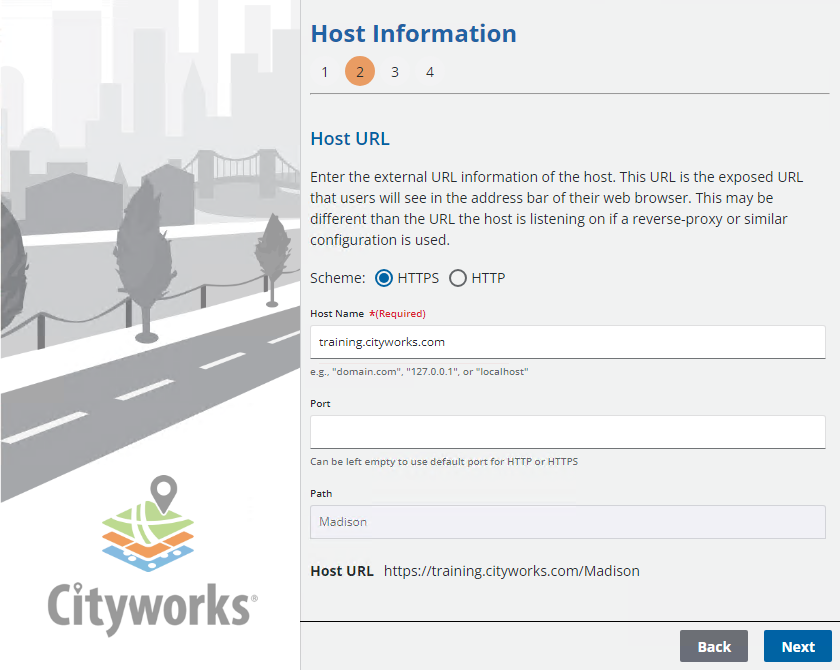
- Select HTTPS or HTTP for the Scheme.
- Enter the Host Name.
- Enter the Port if desired.
The Path is automatically populated with the Alias.
- Click Next.
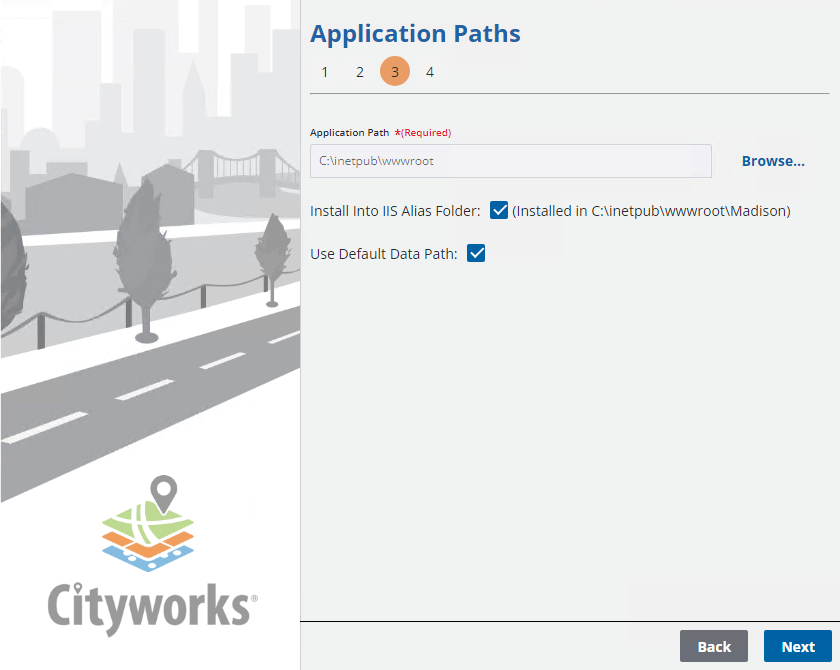
- The Application Path is automatically populated, but can be changed by clicking Browse.
- Select Install Into IIS Alias Folder if desired.
- Select Use Default Data Path or clear the check box and browse to a new location.
- Click Next.
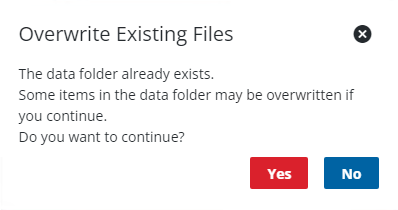
A message appears explaining that the data folder is overwritten during the update process.
- Click Yes.
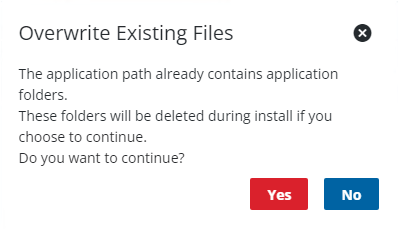
A message appears explaining that the application folders are overwritten during the update process.
- Click Yes.
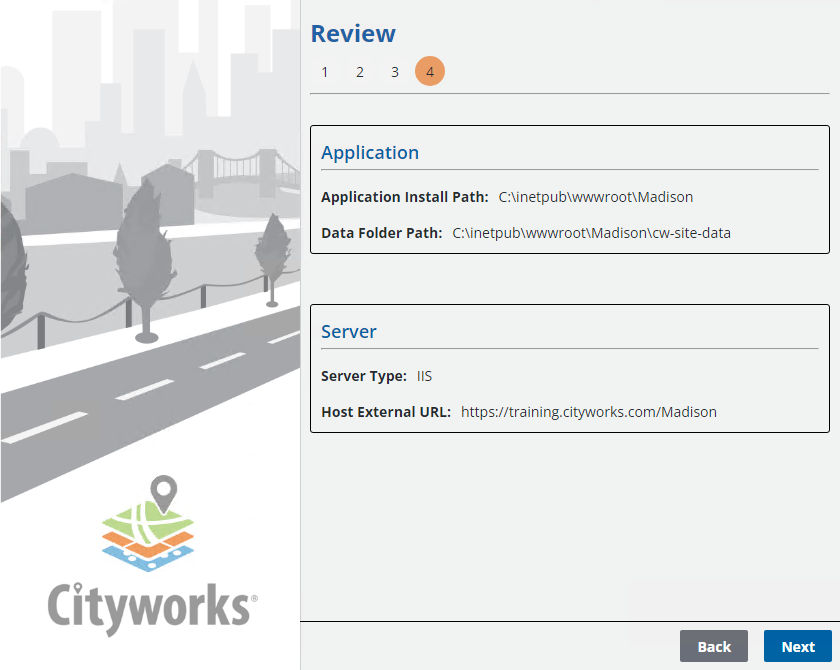
- Verify that the site information is correct in the Review section and click Next.
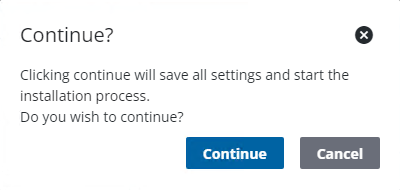
You are asked if you want to proceed.
- Click Continue.
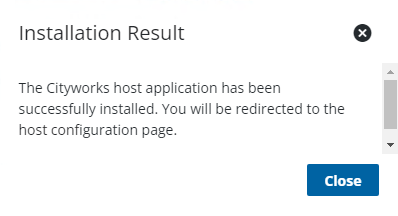
After a few minutes, a message confirms if it was updated successfully or not.
 NOTE: At this point, the site folders have been created under the alias and site location specified in the installer. These include the WebSite, cw-site, cw-site-data, DataMigrationManager, PluginManagerCli, and DatabaseSchemaManager folders.
IMPORTANT:
- Click Close.
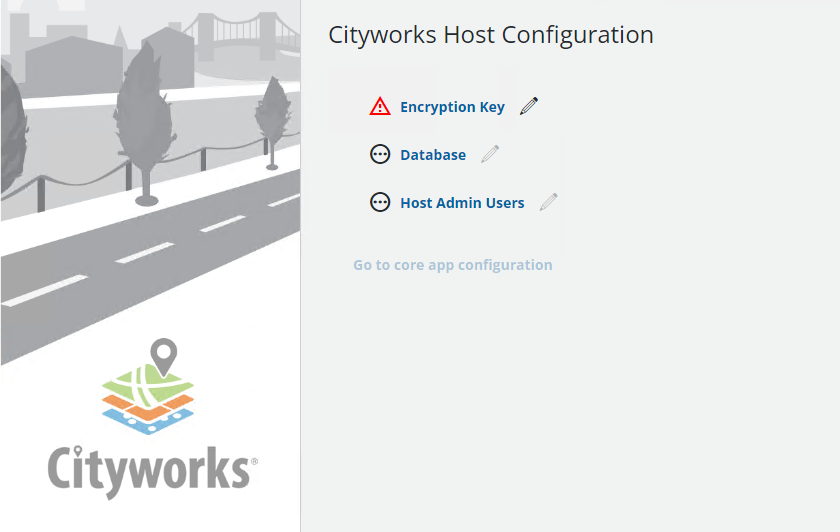
Starting in 23.2 and newer, a host application must be configured first.
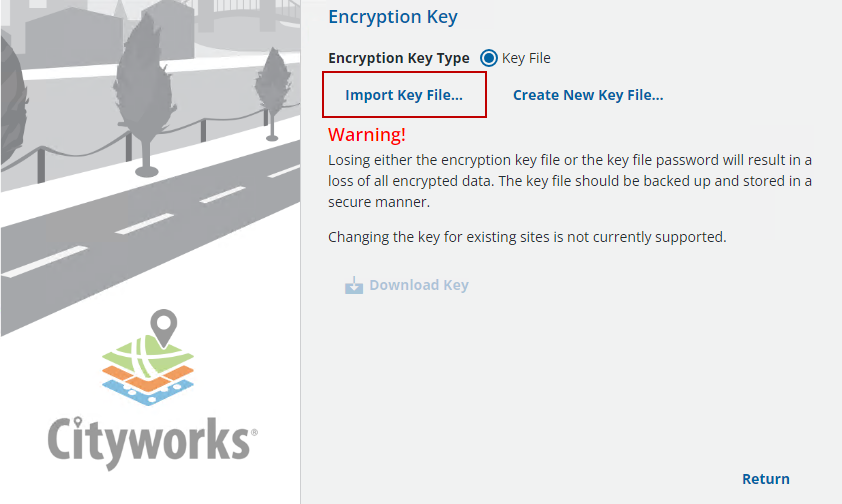
- On the Cityworks Host Configuration page, click the edit icon next to Encryption Key to configure the key file.
Key files encrypt data to provide greater security.
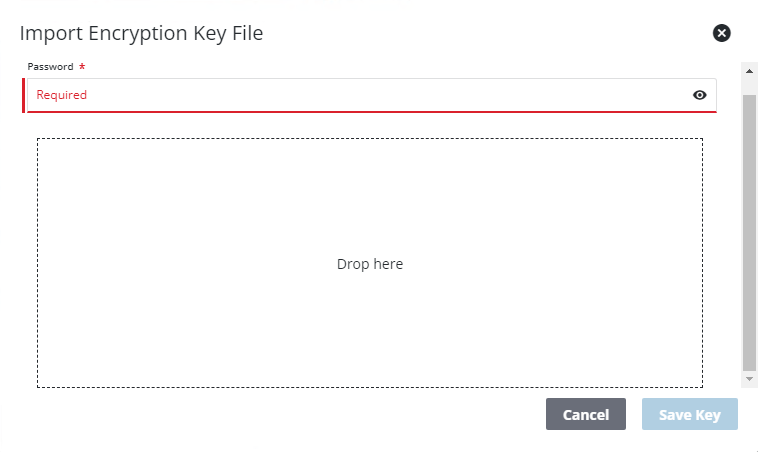
- Click Import Key File.
- On the Import Encryption Key File panel, enter the Password.
-
- Click Save Key.
- Click Return to return to the Cityworks Host Configuration page to continue setting up the site.
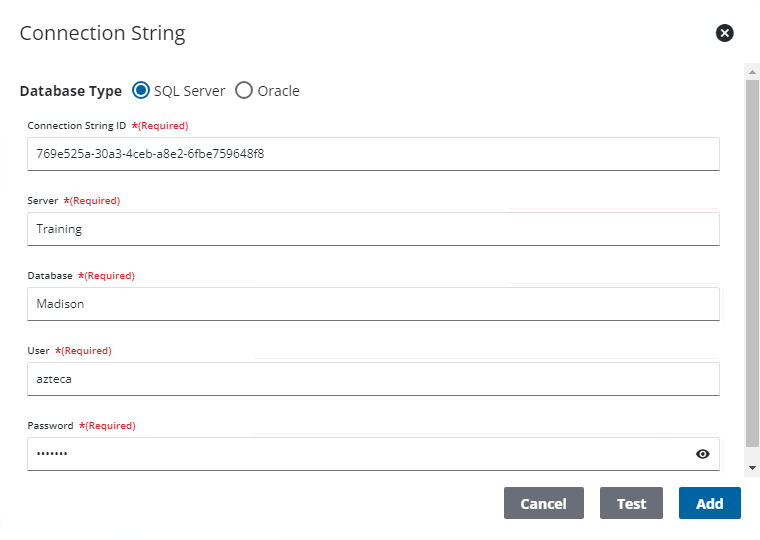
- Click the edit icon next to Database.
- Click the add icon to add a connection string.
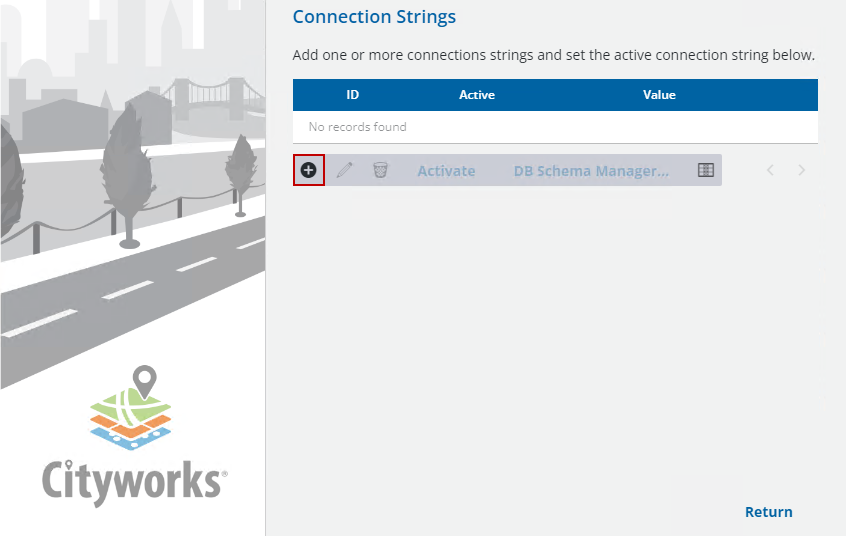
For existing Cityworks databases, this is where you enter your existing database.
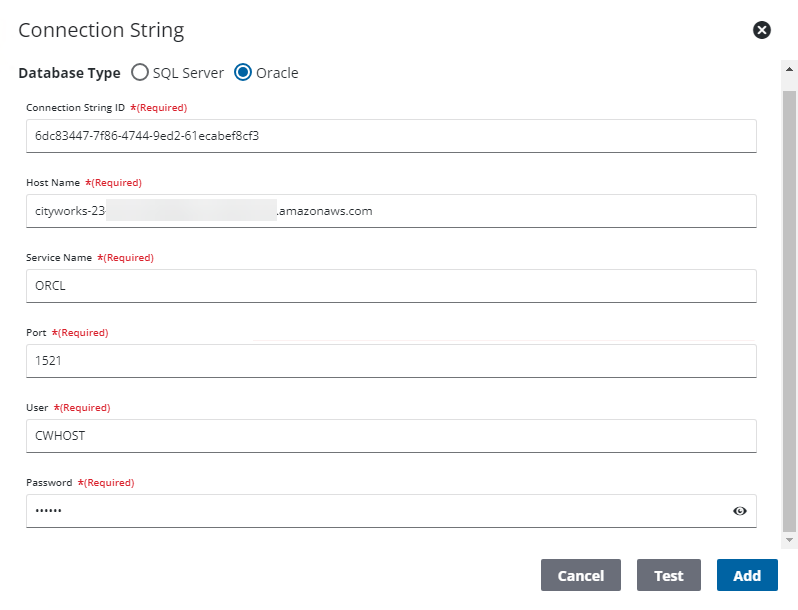
- Select either SQL Server or Oracle for the Cityworks database.
- Enter the Server instance that the database resides on.
- Enter the existing Database name.
- Enter the User.
IMPORTANT: If you are an Oracle user, a CWHOST user must be manually added and assigned permissions. This user should be used for the host User and Password fields. See Upgrade to Cityworks 23.2 and Newer in Oracle for more information.
- Enter the Password.
- Click Test to see if the connection string is valid.
- Click Add.
Here is an example of an Oracle Connection String:
- Select the connection string and click Activate.
A message appears saying it was activated successfully.
This creates and updates the host database.
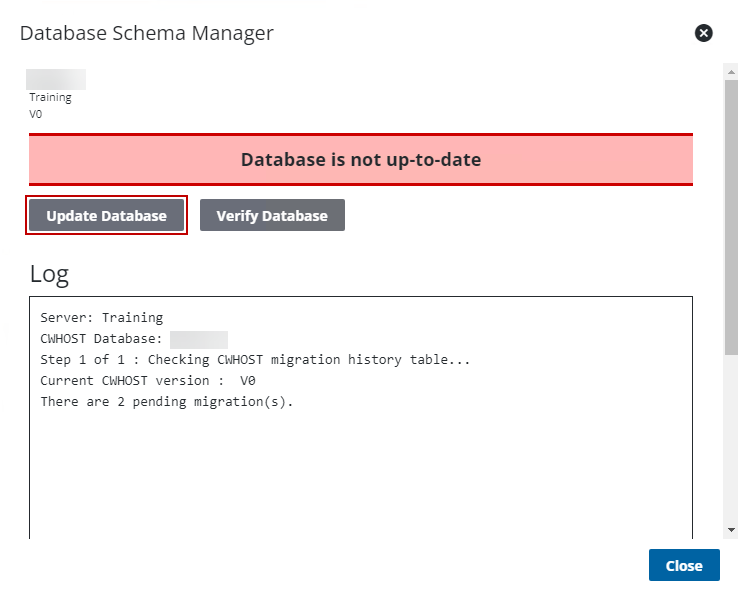
IMPORTANT: The red Database is not up-to-date message might not appear under certain circumstances. Even if it does not appear, you still need to complete the steps to update the database.
Once it's successfully completed, users receive a message indicating that the host database was successfully updated. If not, the log shows where any issues were encountered.
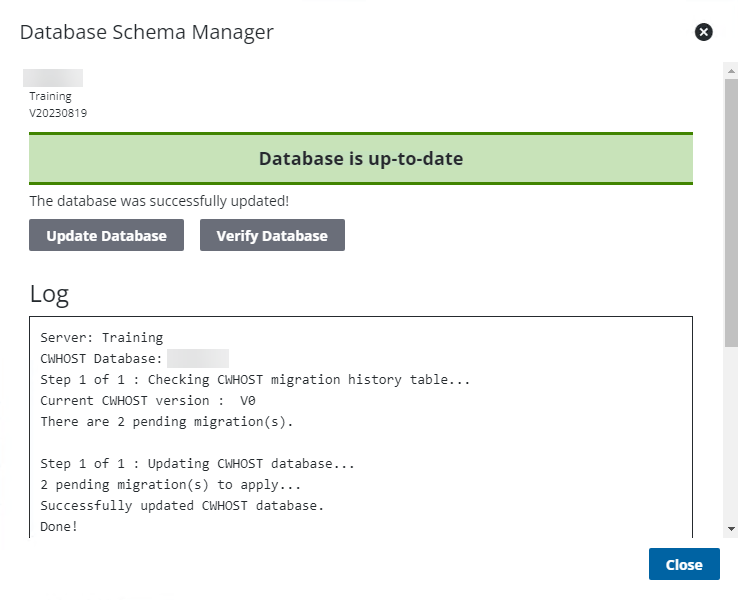
- Click Verify Database to identify any additional schema changes that need to be made. If there are any errors in the log after verifying the database, you can fix them by running the SQL scripts provided at the bottom of the log.
- Click Close.
- Click Return.
A Host Admin User needs to be created to manage the host.
- Click the edit icon next to Host Admin Users.
- Click the add icon.
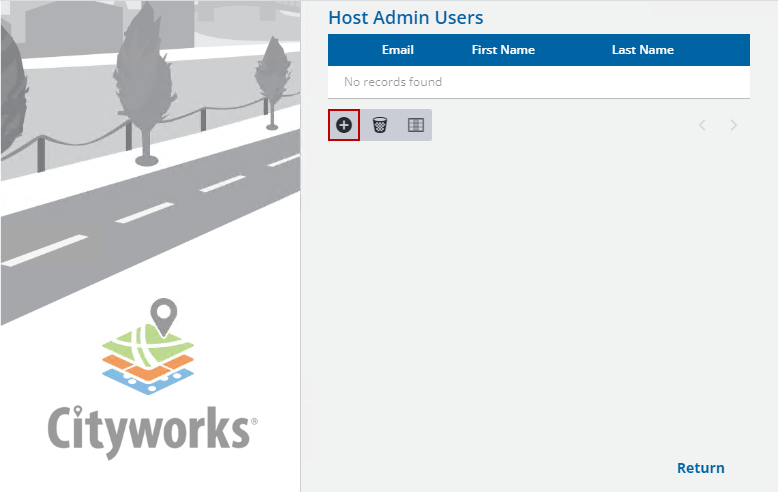
- Enter a Email, First Name, Last Name, and Password.
- Click Save.

- Click Return.
The host is now configured. Next the core app can be configured. See Update the Core Application for more information.