Add Material to a Storeroom
You can add material to individual storerooms to keep track of where your material is located.
|
|
 PREREQUISITES:
- Click Config on the Storeroom toolbar and click Storeroom Materials.
- Select the storeroom you'd like to add material to from the Storerooms panel.
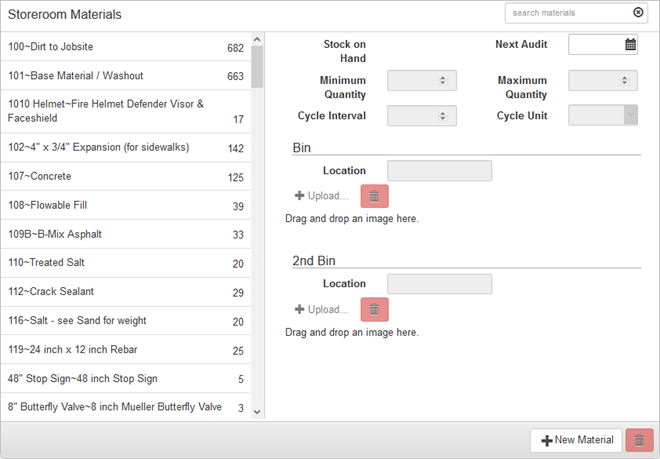
The Storeroom Materials panel, below the Storerooms panel, displays the list of materials in that storeroom with the number of stock on hand on the left side of the panel. The right side of the panel lists the details of the storeroom material. The details cannot be edited unless a material has been selected. You can filter this list by typing the first few letters of the storeroom material in the search box in the top-right corner of the panel.
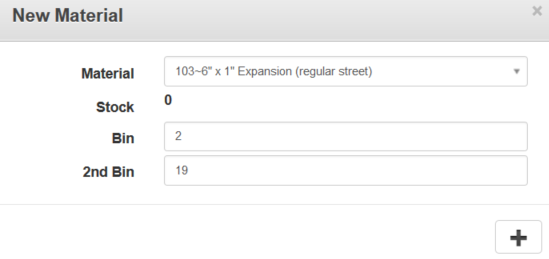
- To add a new material to the storeroom, click New Material.
- Select the Material to add to the storeroom.
When adding a material, the Stock is 0 and cannot be changed here. The stock must be changed in Storeroom through an Audit or Receive transaction. See Perform an Audit or Receive Material for more information.
- Enter the Bin location.
- Enter the 2nd Bin location, if applicable, and click the plus icon.
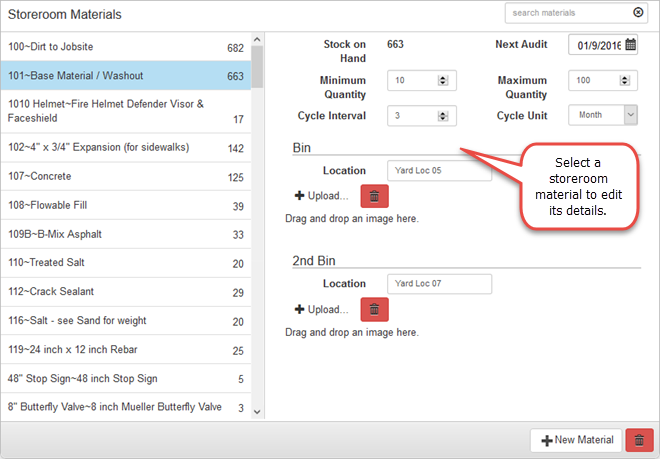
- Select the material in the list on the left to finish editing the storeroom material details on the right.
For an explanation of fields found on this page, see Storeroom Materials Fields.
To add the bin location and images to the material, see Configure Bin Locations and Images for Materials.
- To edit a storeroom material, select it from the Storeroom Materials panel and make the desired changes.

Documentation Feedback Form
Please give us feedback about this Cityworks guide.
If you have a feature enhancement request, please see the Ideas page on MyCityworks.
Last updated 1/3/2020.
Copyright© 2014–2019 by Azteca Systems, LLC. All rights reserved.